Tag: Source edit |
m (Spotlight articles star removed) |
||
| (51 intermediate revisions by 4 users not shown) | |||
| Line 1: | Line 1: | ||
| + | {{FeaturedArticleTop|promoter=Fun Animator}} |
||
| − | |||
{{PageHeader |
{{PageHeader |
||
|image=BYL 2 Teaser.png |
|image=BYL 2 Teaser.png |
||
| Line 5: | Line 5: | ||
|width=670px |
|width=670px |
||
|name=Plants vs. Zombies: Build Your Lawn! 2 |
|name=Plants vs. Zombies: Build Your Lawn! 2 |
||
| − | |release= Released |
+ | |release= Released on April 11<sup>th</sup>, 2021 |
|description=The sequel to [[Plants vs. Zombies: Build Your Lawn!]] |
|description=The sequel to [[Plants vs. Zombies: Build Your Lawn!]] |
||
}} |
}} |
||
| Line 15: | Line 15: | ||
|Row 1 info = [[User:Fun Animator|{{Color|Fun Animation Productions|#FC4C4E}}]] |
|Row 1 info = [[User:Fun Animator|{{Color|Fun Animation Productions|#FC4C4E}}]] |
||
|Row 5 title = Current Version |
|Row 5 title = Current Version |
||
| − | |Row 5 info = 1. |
+ | |Row 5 info = 1.9 |
|Box title = Plants vs. Zombies: Build Your Lawn! 2 |
|Box title = Plants vs. Zombies: Build Your Lawn! 2 |
||
|Row 2 title = Genre: |
|Row 2 title = Genre: |
||
| Line 24: | Line 24: | ||
|Row 4 info = April 11<sup>th</sup>, 2021 |
|Row 4 info = April 11<sup>th</sup>, 2021 |
||
|Row 6 title = Price |
|Row 6 title = Price |
||
| − | |Row 6 info = $29.99 (Basic Version)<br>$59.99 ( |
+ | |Row 6 info = $29.99 (Basic Version)<br>$59.99 (Deluxe Version) |
|Row 7 title = Number of Players: |
|Row 7 title = Number of Players: |
||
|Row 7 info = 1-4 (Local and Online) |
|Row 7 info = 1-4 (Local and Online) |
||
| Line 30: | Line 30: | ||
'''Plants vs. Zombies: Build Your Lawn! 2''' (Abbreviated as BYL 2) is a spin-off partystyle and RPG game of the Plants vs. Zombies franchise, and a sequel to [[Plants vs. Zombies: Build Your Lawn!]]. |
'''Plants vs. Zombies: Build Your Lawn! 2''' (Abbreviated as BYL 2) is a spin-off partystyle and RPG game of the Plants vs. Zombies franchise, and a sequel to [[Plants vs. Zombies: Build Your Lawn!]]. |
||
| − | The game was officially announced |
+ | The game was officially announced on August 27th of 2020, only 3 months after its prequel was released as a response to the commercial success that the original game had been, it has been in development since, hitting the alpha test on December 20th of 2020. |
| − | After months of work, the game was officially released globally |
+ | After months of work, the game was officially released globally on April 11<sup>th</sup>, 2021, nearly a year after the first game was released. |
==Latest News== |
==Latest News== |
||
| + | The final DLC has arrived! Nightly Festival brings 5 plants and 4 zombies to the roster, as well as 1 new board and lawn for players to enjoy! New costumes are also here to add to your collection. Purchase this DLC in the Nintendo eShop for $4.99, or get it for free with the Deluxe Version. |
||
| − | 2022 couldn't start without a bang for Plants vs. Zombies: Build Your Lawn! 2. The very first day of the year brings the brand new Online Houses Update, a new way to play with other people around the world with crazy perks and juicy rewards to fight for! Download it for free at the Nintendo eShop now! |
||
| + | The free update comes with a new premium plant for players to purchase. |
||
== Main Gameplay == |
== Main Gameplay == |
||
Plants vs. Zombies Build Your Lawn! 2 is a party game that has 20 turns or more, each player has its own lawn and they start from that point, each lawn is at each corner of the board. There are multiple boards to pick from and each of them has a different layout. You will roll a dice block that has 6 sides and you will advance the shown spaces. You want to reach the Crazy Dave's Plant Stores that are in certain spots to buy him plants with Sun, you can get Sun by playing minigames at the end of each turn or by landing on the Sun space, or you can get them by planting Sunflowers in your lawn. The objective of the game is to defend your lawn from the zombies, you accomplish this by planting defending or attacking plants to prevent the zombies from reaching your house. The layout of your lawn is this one: |
Plants vs. Zombies Build Your Lawn! 2 is a party game that has 20 turns or more, each player has its own lawn and they start from that point, each lawn is at each corner of the board. There are multiple boards to pick from and each of them has a different layout. You will roll a dice block that has 6 sides and you will advance the shown spaces. You want to reach the Crazy Dave's Plant Stores that are in certain spots to buy him plants with Sun, you can get Sun by playing minigames at the end of each turn or by landing on the Sun space, or you can get them by planting Sunflowers in your lawn. The objective of the game is to defend your lawn from the zombies, you accomplish this by planting defending or attacking plants to prevent the zombies from reaching your house. The layout of your lawn is this one: |
||
| Line 168: | Line 169: | ||
|<div style="text-align: center">{{BurbankText|text = Hypno-Shroom}}</div> |
|<div style="text-align: center">{{BurbankText|text = Hypno-Shroom}}</div> |
||
|[[File:Hypno-Shroom BYL2.png|100px]] |
|[[File:Hypno-Shroom BYL2.png|100px]] |
||
| − | |<div style="text-align: center">{{BurbankText|text = |
+ | |<div style="text-align: center">{{BurbankText|text = 75}}</div> |
|<div style="text-align: center">{{BurbankText|text = -}}</div> |
|<div style="text-align: center">{{BurbankText|text = -}}</div> |
||
|<div style="text-align: center">{{BurbankText|text = Regular**}}</div> |
|<div style="text-align: center">{{BurbankText|text = Regular**}}</div> |
||
| Line 200: | Line 201: | ||
|<div style="text-align: center">{{BurbankText|text = Bowling Bulb}}</div> |
|<div style="text-align: center">{{BurbankText|text = Bowling Bulb}}</div> |
||
|[[File:Bowling Bulb2.png|100px]] |
|[[File:Bowling Bulb2.png|100px]] |
||
| − | |<div style="text-align: center">{{BurbankText|text = |
+ | |<div style="text-align: center">{{BurbankText|text = 125}}</div> |
|<div style="text-align: center">{{BurbankText|text = 10/30/50}}</div> |
|<div style="text-align: center">{{BurbankText|text = 10/30/50}}</div> |
||
|<div style="text-align: center">{{BurbankText|text = Regular**}}</div> |
|<div style="text-align: center">{{BurbankText|text = Regular**}}</div> |
||
| Line 225: | Line 226: | ||
|[[File:Red Stinger BYL2.png|100px]] |
|[[File:Red Stinger BYL2.png|100px]] |
||
|<div style="text-align: center">{{BurbankText|text = 75}}</div> |
|<div style="text-align: center">{{BurbankText|text = 75}}</div> |
||
| − | |<div style="text-align: center">{{BurbankText|text = |
+ | |<div style="text-align: center">{{BurbankText|text = 20/10}}</div> |
|<div style="text-align: center">{{BurbankText|text = Regular/Tough**}}</div> |
|<div style="text-align: center">{{BurbankText|text = Regular/Tough**}}</div> |
||
|<div style="text-align: center">{{BurbankText|text = Straight}}</div> |
|<div style="text-align: center">{{BurbankText|text = Straight}}</div> |
||
| Line 248: | Line 249: | ||
|<div style="text-align: center">{{BurbankText|text = Aloe}}</div> |
|<div style="text-align: center">{{BurbankText|text = Aloe}}</div> |
||
|[[File:Aloe BYL2.png|100px]] |
|[[File:Aloe BYL2.png|100px]] |
||
| − | |<div style="text-align: center">{{BurbankText|text = |
+ | |<div style="text-align: center">{{BurbankText|text = 50}}</div> |
|<div style="text-align: center">{{BurbankText|text = -}}</div> |
|<div style="text-align: center">{{BurbankText|text = -}}</div> |
||
|<div style="text-align: center">{{BurbankText|text = Regular**}}</div> |
|<div style="text-align: center">{{BurbankText|text = Regular**}}</div> |
||
| Line 296: | Line 297: | ||
|<div style="text-align: center">{{BurbankText|text = Squash}}</div> |
|<div style="text-align: center">{{BurbankText|text = Squash}}</div> |
||
|[[File:Squash BYL2.png|100px]] |
|[[File:Squash BYL2.png|100px]] |
||
| − | |<div style="text-align: center">{{BurbankText|text = |
+ | |<div style="text-align: center">{{BurbankText|text = 125}}</div> |
|<div style="text-align: center">{{BurbankText|text = -}}</div> |
|<div style="text-align: center">{{BurbankText|text = -}}</div> |
||
|<div style="text-align: center">{{BurbankText|text = Regular**}}</div> |
|<div style="text-align: center">{{BurbankText|text = Regular**}}</div> |
||
| Line 304: | Line 305: | ||
|<div style="text-align: center">{{BurbankText|text = Doom-Shroom}}</div> |
|<div style="text-align: center">{{BurbankText|text = Doom-Shroom}}</div> |
||
|[[File:Doom-Shroom BYL2.png|100px]] |
|[[File:Doom-Shroom BYL2.png|100px]] |
||
| − | |<div style="text-align: center">{{BurbankText|text = |
+ | |<div style="text-align: center">{{BurbankText|text = 200}}</div> |
|<div style="text-align: center">{{BurbankText|text = 200}}</div> |
|<div style="text-align: center">{{BurbankText|text = 200}}</div> |
||
|<div style="text-align: center">{{BurbankText|text = -***}}</div> |
|<div style="text-align: center">{{BurbankText|text = -***}}</div> |
||
| Line 385: | Line 386: | ||
|<div style="text-align: center">{{BurbankText|text = Witch Hazel}}</div> |
|<div style="text-align: center">{{BurbankText|text = Witch Hazel}}</div> |
||
|[[File:Witch Hazel BYL2.png|100px]] |
|[[File:Witch Hazel BYL2.png|100px]] |
||
| − | |<div style="text-align: center">{{BurbankText|text = |
+ | |<div style="text-align: center">{{BurbankText|text = 150}}</div> |
|<div style="text-align: center">{{BurbankText|text = -}}</div> |
|<div style="text-align: center">{{BurbankText|text = -}}</div> |
||
|<div style="text-align: center">{{BurbankText|text = Regular**}}</div> |
|<div style="text-align: center">{{BurbankText|text = Regular**}}</div> |
||
| Line 490: | Line 491: | ||
|[[File:Peacock BYL2.png|100px]] |
|[[File:Peacock BYL2.png|100px]] |
||
|<div style="text-align: center">{{BurbankText|text = 200}}</div> |
|<div style="text-align: center">{{BurbankText|text = 200}}</div> |
||
| − | |<div style="text-align: center">{{BurbankText|text = |
+ | |<div style="text-align: center">{{BurbankText|text = 80}}</div> |
|<div style="text-align: center">{{BurbankText|text = Regular***}}</div> |
|<div style="text-align: center">{{BurbankText|text = Regular***}}</div> |
||
|<div style="text-align: center">{{BurbankText|text = Straight}}</div> |
|<div style="text-align: center">{{BurbankText|text = Straight}}</div> |
||
| Line 512: | Line 513: | ||
|- |
|- |
||
|<div style="text-align: center">{{BurbankText|text = Sacuanscorche}}</div> |
|<div style="text-align: center">{{BurbankText|text = Sacuanscorche}}</div> |
||
| − | |||
|[[File:Sacuanscorche BYL2.png|100px]] |
|[[File:Sacuanscorche BYL2.png|100px]] |
||
| − | |||
|<div style="text-align: center">{{BurbankText|text = 100}}</div> |
|<div style="text-align: center">{{BurbankText|text = 100}}</div> |
||
|<div style="text-align: center">{{BurbankText|text = 30}}</div> |
|<div style="text-align: center">{{BurbankText|text = 30}}</div> |
||
| Line 520: | Line 519: | ||
|<div style="text-align: center">{{BurbankText|text = Cross}}</div> |
|<div style="text-align: center">{{BurbankText|text = Cross}}</div> |
||
|<div style="text-align: center">{{BurbankText|text = <u>Burn</u><br>When Played: Thaw all plants in the column.}}</div> |
|<div style="text-align: center">{{BurbankText|text = <u>Burn</u><br>When Played: Thaw all plants in the column.}}</div> |
||
| + | |- |
||
| + | |<div style="text-align: center">{{BurbankText|text = Sweet Pea}}</div> |
||
| + | |[[File:Sweet Pea BYL2.png|100px]] |
||
| + | |<div style="text-align: center">{{BurbankText|text = 125}}</div> |
||
| + | |<div style="text-align: center">{{BurbankText|text = 25}}</div> |
||
| + | |<div style="text-align: center">{{BurbankText|text = Regular***}}</div> |
||
| + | |<div style="text-align: center">{{BurbankText|text = Straight}}</div> |
||
| + | |<div style="text-align: center">{{BurbankText|text = When Played: Move all Zombies with 50{{PvZH Icon|health}} or less from next door here.}}</div> |
||
| + | |- |
||
| + | |<div style="text-align: center">{{BurbankText|text = Syrup Berries}}</div> |
||
| + | |[[File:Syrup Berries BYL2.png|100px]] |
||
| + | |<div style="text-align: center">{{BurbankText|text = 200}}</div> |
||
| + | |<div style="text-align: center">{{BurbankText|text = 40}}</div> |
||
| + | |<div style="text-align: center">{{BurbankText|text = Regular***}}</div> |
||
| + | |<div style="text-align: center">{{BurbankText|text = Lobbed}}</div> |
||
| + | |<div style="text-align: center">{{BurbankText|text = When Played: Transform a Plant that costs 100{{PvZH Icon|sun}} or more in an adjacent tile into a <u>Syrup Bottle</u>}}</div> |
||
| + | |- |
||
| + | |<div style="text-align: center">{{BurbankText|text = Carrot Cake}}</div> |
||
| + | |[[File:Carrot Cake BYL2.png|100px]] |
||
| + | |<div style="text-align: center">{{BurbankText|text = 150}}</div> |
||
| + | |<div style="text-align: center">{{BurbankText|text = -}}</div> |
||
| + | |<div style="text-align: center">{{BurbankText|text = -*}}</div> |
||
| + | |<div style="text-align: center">{{BurbankText|text = 3x3}}</div> |
||
| + | |<div style="text-align: center">{{BurbankText|text = Revive all Plants that cost 50{{PvZH Icon|sun}} or less in an area}}</div> |
||
| + | |- |
||
| + | |<div style="text-align: center">{{BurbankText|text = Corny Candy}}</div> |
||
| + | |[[File:Corn Candy BYL2.png|100px]] |
||
| + | |<div style="text-align: center">{{BurbankText|text = 25}}</div> |
||
| + | |<div style="text-align: center">{{BurbankText|text = 10}}</div> |
||
| + | |<div style="text-align: center">{{BurbankText|text = Regular*}}</div> |
||
| + | |<div style="text-align: center">{{BurbankText|text = 3x2}}</div> |
||
| + | |<div style="text-align: center">{{BurbankText|text = This does triple damage to zombies with Rapid or Quick Speed.}}</div> |
||
| + | |- |
||
| + | |<div style="text-align: center">{{BurbankText|text = Cotton Candy}}</div> |
||
| + | |[[File:Cotton Candy BYL2.png|100px]] |
||
| + | |<div style="text-align: center">{{BurbankText|text = 100}}</div> |
||
| + | |<div style="text-align: center">{{BurbankText|text = -}}</div> |
||
| + | |<div style="text-align: center">{{BurbankText|text = Armored*}}</div> |
||
| + | |<div style="text-align: center">{{BurbankText|text = 3x3}}</div> |
||
| + | |<div style="text-align: center">{{BurbankText|text = Start of Turn: Move the zombie with the highest {{PvZH Icon|health}} in an area here.}}</div> |
||
| + | |- |
||
| + | |<div style="text-align: center">{{BurbankText|text = Spore-Shroom}}</div> |
||
| + | |[[File:Spore-Shroom BYL2.png|100px]] |
||
| + | |<div style="text-align: center">{{BurbankText|text = 175}}</div> |
||
| + | |<div style="text-align: center">{{BurbankText|text = 40}}</div> |
||
| + | |<div style="text-align: center">{{BurbankText|text = Regular**}}</div> |
||
| + | |<div style="text-align: center">{{BurbankText|text = Lobbed}}</div> |
||
| + | |<div style="text-align: center">{{BurbankText|text = When this destroys a Zombie, make a Spore-Shroom there}}</div> |
||
| + | |- |
||
| + | |||
| + | |<div style="text-align: center">{{BurbankText|text = Boing-Shroom}}</div> |
||
| + | |||
| + | |[[File:Boing-Shroom BYL2.png|100px]] |
||
| + | |||
| + | |<div style="text-align: center">{{BurbankText|text = 75}}</div> |
||
| + | |||
| + | |<div style="text-align: center">{{BurbankText|text = -}}</div> |
||
| + | |||
| + | |<div style="text-align: center">{{BurbankText|text = -*}}</div> |
||
| + | |||
| + | |<div style="text-align: center">{{BurbankText|text = Tile}}</div> |
||
| + | |||
| + | |<div style="text-align: center">{{BurbankText|text = When played: Send all Zombies in an area to the last Tile of the lane.}}</div> |
||
| + | |||
| + | |- |
||
| + | |<div style="text-align: center">{{BurbankText|text = Water-Melon}}</div> |
||
| + | |[[File:Water-Melon BYL2.png|100px]] |
||
| + | |<div style="text-align: center">{{BurbankText|text = 100}}</div> |
||
| + | |<div style="text-align: center">{{BurbankText|text = -}}</div> |
||
| + | |<div style="text-align: center">{{BurbankText|text = Armored**}}</div> |
||
| + | |<div style="text-align: center">{{BurbankText|text = -}}</div> |
||
| + | |<div style="text-align: center">{{BurbankText|text = When damaged, this will move to another tile, doing 10 damage to all Zombies there.}}</div> |
||
| + | |- |
||
| + | |||
| + | |<div style="text-align: center">{{BurbankText|text = Mystery Fruit}}</div> |
||
| + | |||
| + | |[[File:Mystery Fruit BYL2.png|100px]] |
||
| + | |||
| + | |<div style="text-align: center">{{BurbankText|text = 25}}</div> |
||
| + | |||
| + | |<div style="text-align: center">{{BurbankText|text = -}}</div> |
||
| + | |||
| + | |<div style="text-align: center">{{BurbankText|text = Regular***}}</div> |
||
| + | |||
| + | |<div style="text-align: center">{{BurbankText|text = -}}</div> |
||
| + | |||
| + | |<div style="text-align: center">{{BurbankText|text = Start of Turn: This transforms into a random Plant that costs 25{{PvZH Icon|sun}} more, it keeps the ability.}}</div> |
||
| + | |||
| + | |- |
||
| + | |||
| + | |<div style="text-align: center">{{BurbankText|text = Popcorn Blaster}}</div> |
||
| + | |||
| + | |[[File:Popcorn Blaster BYL2.png|100px]] |
||
| + | |||
| + | |<div style="text-align: center">{{BurbankText|text = 75}}</div> |
||
| + | |||
| + | |<div style="text-align: center">{{BurbankText|text = 20}}</div> |
||
| + | |||
| + | |<div style="text-align: center">{{BurbankText|text = Regular*}}</div> |
||
| + | |||
| + | |<div style="text-align: center">{{BurbankText|text = Lobbed}}</div> |
||
| + | |||
| + | |<div style="text-align: center">{{BurbankText|text = When this destroys a Zombie, <u>Stun</u> all zombies here.}}</div> |
||
|} |
|} |
||
*<nowiki>* = Can be bought starting from turn 1</nowiki> |
*<nowiki>* = Can be bought starting from turn 1</nowiki> |
||
| Line 526: | Line 628: | ||
*Regular Toughness = Resist one turn against a Zombie |
*Regular Toughness = Resist one turn against a Zombie |
||
*Tough Toughness = Resist two turns against a Zombie |
*Tough Toughness = Resist two turns against a Zombie |
||
| + | *Armored Toughness = Resist three turns against a Zombie. |
||
| + | *Puff-Shroom can only be bought up to 4 times per turn. |
||
| + | *Mystery Fruit can only be bought 1 time per turn. |
||
=== Zombies === |
=== Zombies === |
||
| Line 582: | Line 687: | ||
|<div style="text-align: center">{{BurbankText|text = 50}}</div> |
|<div style="text-align: center">{{BurbankText|text = 50}}</div> |
||
|<div style="text-align: center">{{BurbankText|text = 20}}</div> |
|<div style="text-align: center">{{BurbankText|text = 20}}</div> |
||
| − | |<div style="text-align: center">{{BurbankText|text = |
+ | |<div style="text-align: center">{{BurbankText|text = Quick*}}</div> |
|<div style="text-align: center">{{BurbankText|text = Move 1 Tile Backwards every other turn, gaining +20 Health.}}</div> |
|<div style="text-align: center">{{BurbankText|text = Move 1 Tile Backwards every other turn, gaining +20 Health.}}</div> |
||
|- |
|- |
||
| Line 658: | Line 763: | ||
|[[File:Blockhead Zombie2.png|100px]] |
|[[File:Blockhead Zombie2.png|100px]] |
||
|<div style="text-align: center">{{BurbankText|text = 100}}</div> |
|<div style="text-align: center">{{BurbankText|text = 100}}</div> |
||
| − | |<div style="text-align: center">{{BurbankText|text = |
+ | |<div style="text-align: center">{{BurbankText|text = 60}}</div> |
|<div style="text-align: center">{{BurbankText|text = Stiff**}}</div> |
|<div style="text-align: center">{{BurbankText|text = Stiff**}}</div> |
||
|<div style="text-align: center">{{BurbankText|text = Start of Turn: A random plant gets trapped in an ice block.}}</div> |
|<div style="text-align: center">{{BurbankText|text = Start of Turn: A random plant gets trapped in an ice block.}}</div> |
||
| Line 685: | Line 790: | ||
|<div style="text-align: center">{{BurbankText|text = Amberhead Zombie}}</div> |
|<div style="text-align: center">{{BurbankText|text = Amberhead Zombie}}</div> |
||
|[[File:Amberhead Zombie BYL2.png|100px]] |
|[[File:Amberhead Zombie BYL2.png|100px]] |
||
| − | |<div style="text-align: center">{{BurbankText|text = |
+ | |<div style="text-align: center">{{BurbankText|text = 150}}</div> |
|<div style="text-align: center">{{BurbankText|text = 100}}</div> |
|<div style="text-align: center">{{BurbankText|text = 100}}</div> |
||
| − | |<div style="text-align: center">{{BurbankText|text = Basic**}}</div> |
+ | |<div style="text-align: center">{{BurbankText|text = Basic***}}</div> |
|<div style="text-align: center">{{BurbankText|text = Takes -10 Damage from all attacks.}}</div> |
|<div style="text-align: center">{{BurbankText|text = Takes -10 Damage from all attacks.}}</div> |
||
|- |
|- |
||
| Line 707: | Line 812: | ||
|[[File:Zomb-Totem BYL2.png|100px]] |
|[[File:Zomb-Totem BYL2.png|100px]] |
||
|<div style="text-align: center">{{BurbankText|text = 150}}</div> |
|<div style="text-align: center">{{BurbankText|text = 150}}</div> |
||
| − | |<div style="text-align: center">{{BurbankText|text = |
+ | |<div style="text-align: center">{{BurbankText|text = 100}}</div> |
|<div style="text-align: center">{{BurbankText|text = Still*}}</div> |
|<div style="text-align: center">{{BurbankText|text = Still*}}</div> |
||
|<div style="text-align: center">{{BurbankText|text = Start of Turn: This moves to a random lane, leaving behind a Basic Zombie.}}</div> |
|<div style="text-align: center">{{BurbankText|text = Start of Turn: This moves to a random lane, leaving behind a Basic Zombie.}}</div> |
||
| Line 829: | Line 934: | ||
|<div style="text-align: center">{{BurbankText|text = Quick*}}</div> |
|<div style="text-align: center">{{BurbankText|text = Quick*}}</div> |
||
|<div style="text-align: center">{{BurbankText|text = When this reaches the 5th column, this destroys itself and makes 2 Jester Zombies there.}}</div> |
|<div style="text-align: center">{{BurbankText|text = When this reaches the 5th column, this destroys itself and makes 2 Jester Zombies there.}}</div> |
||
| − | | |
+ | |- |
| + | |<div style="text-align: center">{{BurbankText|text = Choco Zombie}}</div> |
||
| + | |[[File:Choco Zombie BYL2.png|100px]] |
||
| + | |<div style="text-align: center">{{BurbankText|text = 150}}</div> |
||
| + | |<div style="text-align: center">{{BurbankText|text = 120}}</div> |
||
| + | |<div style="text-align: center">{{BurbankText|text = Rapid**}}</div> |
||
| + | |<div style="text-align: center">{{BurbankText|text = Start of Turn: Zombies behind this get +10{{PvZH Icon|health}}}}</div> |
||
| + | |- |
||
| + | |<div style="text-align: center">{{BurbankText|text = Surprise Fruitcake Zombie}}</div> |
||
| + | |[[File:Surprise Fruitcake Zombie BYL2.png|100px]] |
||
| + | |<div style="text-align: center">{{BurbankText|text = 25}}</div> |
||
| + | |<div style="text-align: center">{{BurbankText|text = 20}}</div> |
||
| + | |<div style="text-align: center">{{BurbankText|text = Still**}}</div> |
||
| + | |<div style="text-align: center">{{BurbankText|text = When a Plant destroys a Zombie, this destroys that Plant and every other Plant with 20{{PvZH Icon|strength}} or less in a 3x3 area.}}</div> |
||
| + | |- |
||
| + | |<div style="text-align: center">{{BurbankText|text = Cupcake Monster Zombie}}</div> |
||
| + | |[[File:Cupcake Monster Zombie BYL2.png|100px]] |
||
| + | |<div style="text-align: center">{{BurbankText|text = 150}}</div> |
||
| + | |<div style="text-align: center">{{BurbankText|text = 100}}</div> |
||
| + | |<div style="text-align: center">{{BurbankText|text = Still***}}</div> |
||
| + | |<div style="text-align: center">{{BurbankText|text = When Hurt: This moves 2 Tiles forwards}}</div> |
||
| + | |- |
||
| + | |<div style="text-align: center">{{BurbankText|text = Ice Cream Gargantuar}}</div> |
||
| + | |[[File:Ice Cream Gargantuar BYL2.png|100px]] |
||
| + | |<div style="text-align: center">{{BurbankText|text = 200}}</div> |
||
| + | |<div style="text-align: center">{{BurbankText|text = 180}}</div> |
||
| + | |<div style="text-align: center">{{BurbankText|text = Stiff***}}</div> |
||
| + | |<div style="text-align: center">{{BurbankText|text = Start of Turn: All Plants here do -5{{PvZH Icon|strength}}}}</div> |
||
| + | |- |
||
| + | |<div style="text-align: center">{{BurbankText|text = Firework Imp}}</div> |
||
| + | |||
| + | |[[File:Firework Imp BYL2.png|100px]] |
||
| + | |||
| + | |<div style="text-align: center">{{BurbankText|text = 25}}</div> |
||
| + | |||
| + | |<div style="text-align: center">{{BurbankText|text = 40}}</div> |
||
| + | |||
| + | |<div style="text-align: center">{{BurbankText|text = Quick**}}</div> |
||
| + | |||
| + | |<div style="text-align: center">{{BurbankText|text = When Destroyed: This destroys 2 Plants and Zombies in this lane.}}</div> |
||
| + | |||
| + | |- |
||
| + | |||
| + | |<div style="text-align: center">{{BurbankText|text = Electric Lights Zombie}}</div> |
||
| + | |||
| + | |[[File:Electric Lights Zombie BYL2.png|100px]] |
||
| + | |||
| + | |<div style="text-align: center">{{BurbankText|text = 75}}</div> |
||
| + | |||
| + | |<div style="text-align: center">{{BurbankText|text = 80}}</div> |
||
| + | |||
| + | |<div style="text-align: center">{{BurbankText|text = Stiff**}}</div> |
||
| + | |||
| + | |<div style="text-align: center">{{BurbankText|text = Immune to <u>Burn</u> effects. When hurt: This moves ½ Tile.}}</div> |
||
| + | |||
| + | |- |
||
| + | |||
| + | |<div style="text-align: center">{{BurbankText|text = Magician Imp}}</div> |
||
| + | |||
| + | |[[File:Magician Imp BYL2.png|100px]] |
||
| + | |||
| + | |<div style="text-align: center">{{BurbankText|text = 100}}</div> |
||
| + | |||
| + | |<div style="text-align: center">{{BurbankText|text = 40}}</div> |
||
| + | |||
| + | |<div style="text-align: center">{{BurbankText|text = Still***}}</div> |
||
| + | |||
| + | |<div style="text-align: center">{{BurbankText|text = Start of Turn: Transform a random Plant into a Puff-Shroom.}}</div> |
||
| + | |||
| + | |- |
||
| + | |||
| + | |<div style="text-align: center">{{BurbankText|text = Werewolf Zombie}}</div> |
||
| + | |||
| + | |[[File:Werewolf Zombie BYL2.png|100px]] |
||
| + | |||
| + | |<div style="text-align: center">{{BurbankText|text = 125}}</div> |
||
| + | |||
| + | |<div style="text-align: center">{{BurbankText|text = 100}}</div> |
||
| + | |||
| + | |<div style="text-align: center">{{BurbankText|text = Rapid***}}</div> |
||
| + | |||
| + | |<div style="text-align: center">{{BurbankText|text = This gains +20{{PvZH Icon|health}} every other turn.}}</div> |
||
| + | |} |
||
*Stiff Speed = Moves 1/2 Tile every turn. |
*Stiff Speed = Moves 1/2 Tile every turn. |
||
*Basic Speed = Moves 1 Tile every turn. |
*Basic Speed = Moves 1 Tile every turn. |
||
| Line 841: | Line 1,028: | ||
!<div style="text-align: center">{{BurbankText|text = Health}}</div> |
!<div style="text-align: center">{{BurbankText|text = Health}}</div> |
||
!<div style="text-align: center">{{BurbankText|text = Ability}}</div> |
!<div style="text-align: center">{{BurbankText|text = Ability}}</div> |
||
| + | |- |
||
| + | |<div style="text-align: center">{{BurbankText|text = Crater}}</div> |
||
| + | |[[File:Crater BYL2.png|100px]] |
||
| + | |<div style="text-align: center">{{BurbankText|text = -}}</div> |
||
| + | |<div style="text-align: center">{{BurbankText|text = Plants can't be planted here for 2 turns.}}</div> |
||
| + | |- |
||
| + | |<div style="text-align: center">{{BurbankText|text = Heal Tile}}</div> |
||
| + | |[[File:Heal Tile BYL2.png|100px]] |
||
| + | |<div style="text-align: center">{{BurbankText|text = -}}</div> |
||
| + | |<div style="text-align: center">{{BurbankText|text = Start of Turn: Zombies here heal 10{{PvZH Icon|health}}}}</div> |
||
|- |
|- |
||
|<div style="text-align: center">{{BurbankText|text = Sheep}}</div> |
|<div style="text-align: center">{{BurbankText|text = Sheep}}</div> |
||
| Line 852: | Line 1,049: | ||
|<div style="text-align: center">{{BurbankText|text = Plants here do +5 Damage.}}</div> |
|<div style="text-align: center">{{BurbankText|text = Plants here do +5 Damage.}}</div> |
||
|} |
|} |
||
| + | {| border="1" cellspacing="1" cellpadding="1" style="width:500px;" class="article-table" style="color: black;background:white; box-shadow: 0px 0px 8px 4px #BOFC38; border: 2px solid black; " |
||
| + | !<div style="text-align: center">{{BurbankText|text = }}</div> |
||
| + | !<div style="text-align: center">{{BurbankText|text = Image}}</div> |
||
| + | !<div style="text-align: center">{{BurbankText|text = Damage}}</div> |
||
| + | !<div style="text-align: center">{{BurbankText|text = Defense}}</div> |
||
| + | !<div style="text-align: center">{{BurbankText|text = Range}}</div> |
||
| + | !<div style="text-align: center">{{BurbankText|text = Ability}}</div> |
||
| + | |- |
||
| + | |<div style="text-align: center">{{BurbankText|text = Syrup Bottle}}</div> |
||
| + | |[[File:Syrup Bottle BYL2.png|100px]] |
||
| + | |<div style="text-align: center">{{BurbankText|text = 20}}</div> |
||
| + | |<div style="text-align: center">{{BurbankText|text = Regular}}</div> |
||
| + | |<div style="text-align: center">{{BurbankText|text = Lobbed}}</div> |
||
| + | |<div style="text-align: center">{{BurbankText|text = All Syrup Bottles and <u>Syrup Berries</u> do +5{{PvZH Icon|strength}}}}</div> |
||
| + | |} |
||
| + | |||
=== Special Effects === |
=== Special Effects === |
||
{{M|Power |Snow}} '''Chill''': Reduces zombie Speed by 1/2 Spaces. |
{{M|Power |Snow}} '''Chill''': Reduces zombie Speed by 1/2 Spaces. |
||
| Line 862: | Line 1,075: | ||
{{M|Power |Toss}} '''Knockback''': Zombies are thrown backwards one tile. |
{{M|Power |Toss}} '''Knockback''': Zombies are thrown backwards one tile. |
||
| + | |||
| + | {{M|Power |Stun}} '''Stun''': Zombies do not move for a turn. |
||
=== Characters === |
=== Characters === |
||
| Line 924: | Line 1,139: | ||
|<div style="text-align: center">{{BurbankText|text = The Player with the least amount of Sun moves 1 Space every turn.<br>}}</div> |
|<div style="text-align: center">{{BurbankText|text = The Player with the least amount of Sun moves 1 Space every turn.<br>}}</div> |
||
|<div style="text-align: center">{{BurbankText|text = [[File:Pea Palace Lawn.png|thumb|center]]<br>Pea Palace}}</div> |
|<div style="text-align: center">{{BurbankText|text = [[File:Pea Palace Lawn.png|thumb|center]]<br>Pea Palace}}</div> |
||
| − | |<div style="text-align: center">{{BurbankText|text = 3 Heal Tiles change of position every turn, healing zombies that step on them for |
+ | |<div style="text-align: center">{{BurbankText|text = 3 Heal Tiles change of position every turn, healing zombies that step on them for 10 Health.<br>}}</div> |
|- |
|- |
||
|<div style="text-align: center">{{BurbankText|text = [[File:Mischievous Honeyhive Board.png|thumb|center]]<br>Mischievous Honeyhive}}</div> |
|<div style="text-align: center">{{BurbankText|text = [[File:Mischievous Honeyhive Board.png|thumb|center]]<br>Mischievous Honeyhive}}</div> |
||
|<div style="text-align: center">{{BurbankText|text = Every player rolls their regular Dice Block, along with a <u>Beez Dice Block</u>.<br>}}</div> |
|<div style="text-align: center">{{BurbankText|text = Every player rolls their regular Dice Block, along with a <u>Beez Dice Block</u>.<br>}}</div> |
||
| − | |<div style="text-align: center">{{BurbankText|text = [[File:Mischievous Honeyhive Lawn |
+ | |<div style="text-align: center">{{BurbankText|text = [[File:Mischievous Honeyhive Lawn.png|thumb|center]]<br>Mischievous Honeyhive}}</div> |
|<div style="text-align: center">{{BurbankText|text = Beez appear every other turn, destroying 2 plants in their way.<br>}}</div> |
|<div style="text-align: center">{{BurbankText|text = Beez appear every other turn, destroying 2 plants in their way.<br>}}</div> |
||
|- |
|- |
||
| Line 940: | Line 1,155: | ||
|<div style="text-align: center">{{BurbankText|text = [[File:PvZCC Mashup Lawn.png|thumb|center]]<br>PvZCC Mashup}}</div> |
|<div style="text-align: center">{{BurbankText|text = [[File:PvZCC Mashup Lawn.png|thumb|center]]<br>PvZCC Mashup}}</div> |
||
|<div style="text-align: center">{{BurbankText|text = '''Start of Turn:''' A Peashooter and a Basic Zombie are randomly added to each players' lawns.<br>}}</div> |
|<div style="text-align: center">{{BurbankText|text = '''Start of Turn:''' A Peashooter and a Basic Zombie are randomly added to each players' lawns.<br>}}</div> |
||
| + | |- |
||
| + | |<div style="text-align: center">{{BurbankText|text = [[File:Candy Wonderland Board.png|thumb|center]]<br>Candy Wonderland}}</div> |
||
| + | |<div style="text-align: center">{{BurbankText|text = Minigame winners move 2 extra Spaces every turn.<br>}}</div> |
||
| + | |<div style="text-align: center">{{BurbankText|text = [[File:Candy Wonderland Lawn.png|thumb|center]]<br>Candy Wonderland}}</div> |
||
| + | |<div style="text-align: center">{{BurbankText|text = '''Start of Turn:''' Move the rightmost zombie 1 tile.<br>}}</div> |
||
| + | |- |
||
| + | |<div style="text-align: center">{{BurbankText|text = [[File:Nightly Festival Board.png|thumb|center]]<br>Nightly Festival}}</div> |
||
| + | |<div style="text-align: center">{{BurbankText|text = Start of Turn: The player with less zombies on the lawn gains 25 Sun.<br>}}</div> |
||
| + | |<div style="text-align: center">{{BurbankText|text = [[File:Nightly Festival Lawn.png|thumb|center]]<br>Nightly Festival}}</div> |
||
| + | |<div style="text-align: center">{{BurbankText|text = When a Zombie is destroyed, a Coffee Puddle appears for a turn there.<br>}}</div> |
||
|} |
|} |
||
| Line 1,343: | Line 1,568: | ||
*Items with a {{Color|marigold|#FCAE1E}} background are exclusive to Pizzeria Nightmare. No other items appear on that world. |
*Items with a {{Color|marigold|#FCAE1E}} background are exclusive to Pizzeria Nightmare. No other items appear on that world. |
||
== Shop == |
== Shop == |
||
| − | A brand new feature of the game is the Shop, in which the player can buy many things with the in-game currency of Zombucks. |
+ | A brand new feature of the game is the Shop, in which the player can buy many things with the in-game currency of [[File:Zombucks.png|24px]] {{Color|'''Zombucks'''|#B559F7}} [[File:Zombucks.png|24px]]. |
=== Zombucks === |
=== Zombucks === |
||
| − | [[File:Zombucks.png| |
+ | The player can get [[File:Zombucks.png|24px]] {{Color|'''Zombucks'''|#B559F7}} [[File:Zombucks.png|24px]] by playing matches, the better its placement and overall performance, the more [[File:Zombucks.png|24px]] {{Color|'''Zombucks'''|#B559F7}} [[File:Zombucks.png|24px]] they get. [[File:Zombucks.png|24px]] {{Color|'''Zombucks'''|#B559F7}} [[File:Zombucks.png|24px]] will only be given if the match finalizes. [[File:Zombucks.png|24px]] {{Color|'''Zombucks'''|#B559F7}} [[File:Zombucks.png|24px]] are also obtained by playing minigames, the extra modes, and Online matches. |
| − | '''Here are the different methods to get Zombucks:''' |
+ | '''Here are the different methods to get [[File:Zombucks.png|24px]] {{Color|Zombucks|#B559F7}} [[File:Zombucks.png|24px]]:''' |
| − | *Quick Match - 1500 |
+ | *Quick Match - 1500[[File:Zombucks.png|30px]] (1st place, 1100/700/300 if 2nd, 3rd or 4th) |
| − | *Extra Modes - Depends on the Game Mode |
+ | *Extra Modes - Depends on the Game Mode (''Specified below'') |
| − | *Online Match - 3000 |
+ | *Online Match - 3000[[File:Zombucks.png|30px]] (1st place, 2200/1400/600 if 2nd, 3rd or 4th) |
=== Purchasable Objects === |
=== Purchasable Objects === |
||
| Line 1,444: | Line 1,669: | ||
|<div style="text-align: center">{{BurbankText|text = Lobbed}}</div> |
|<div style="text-align: center">{{BurbankText|text = Lobbed}}</div> |
||
|<div style="text-align: center">{{BurbankText|text = Does Splash Damage upon impact. When this hurts a Zombie, chill it.}}</div> |
|<div style="text-align: center">{{BurbankText|text = Does Splash Damage upon impact. When this hurts a Zombie, chill it.}}</div> |
||
| + | |<div style="text-align: center">{{BurbankText|text = 20000[[File:Zombucks.png|30px]]}}</div> |
||
| + | |- |
||
| + | |<div style="text-align: center">{{BurbankText|text = Blooming Heart}}</div> |
||
| + | |[[File:Blooming_Heart_BYL2.png|100px]] |
||
| + | |<div style="text-align: center">{{BurbankText|text = 75}}</div> |
||
| + | |<div style="text-align: center">{{BurbankText|text = 20}}</div> |
||
| + | |<div style="text-align: center">{{BurbankText|text = Regular**}}</div> |
||
| + | |<div style="text-align: center">{{BurbankText|text = Lobbed}}</div> |
||
| + | |<div style="text-align: center">{{BurbankText|text = When this hurts a Zombie, this gets +10{{PvZH Icon|strength}}}}</div> |
||
| + | |<div style="text-align: center">{{BurbankText|text = 20000[[File:Zombucks.png|30px]]}}</div> |
||
| + | |- |
||
| + | |<div style="text-align: center">{{BurbankText|text = Strawburst}}</div> |
||
| + | |[[File:Strawburst BYL2.png|100px]] |
||
| + | |<div style="text-align: center">{{BurbankText|text = 175}}</div> |
||
| + | |<div style="text-align: center">{{BurbankText|text = 30/60/90}}</div> |
||
| + | |<div style="text-align: center">{{BurbankText|text = Regular***}}</div> |
||
| + | |<div style="text-align: center">{{BurbankText|text = Lobbed}}</div> |
||
| + | |<div style="text-align: center">{{BurbankText|text = Touch to attack, every turn it skips an attack it gains +30{{PvZH Icon|strength}}}}</div> |
||
|<div style="text-align: center">{{BurbankText|text = 20000[[File:Zombucks.png|30px]]}}</div> |
|<div style="text-align: center">{{BurbankText|text = 20000[[File:Zombucks.png|30px]]}}</div> |
||
|} |
|} |
||
| Line 1,688: | Line 1,931: | ||
|style="background: coral|<center>{{L|Scorching Thorns|2}}<br>Scorching Thorns |
|style="background: coral|<center>{{L|Scorching Thorns|2}}<br>Scorching Thorns |
||
|style="background: #0492C2|<center>{{L|Blooming Hat|2}}<br>Blooming Hat |
|style="background: #0492C2|<center>{{L|Blooming Hat|2}}<br>Blooming Hat |
||
| + | |- |
||
| + | |<center>{{L|Sweet Pea| BYL2}}<br>Sweet Pea |
||
| + | |style="background: #5DBB63|<center>{{L|Gentle Pea|2}}<br>Gentle Pea |
||
| + | |style="background: coral|<center>{{L|Sweet Hat|2}}<br>Sweet Hat |
||
| + | |- |
||
| + | |<center>{{L|Syrup Berries| BYL2}}<br>Syrup Berries |
||
| + | |style="background: coral|<center>{{L|Berry Matching Hats|2}}<br>Berry Matching Hats |
||
| + | |style="background: #0492C2|<center>{{L|Bluesberries|2}}<br>Bluesberries |
||
| + | |- |
||
| + | |<center>{{L|Carrot Cake| BYL2}}<br>Carrot Cake |
||
| + | |style="background: #0492C2|<center>{{L|Flower Carrot|2}}<br>Flower Carrot |
||
| + | |style="background: #B65FCF|<center>{{L|Rainbow Cake|2}}<br>Rainbow Cake |
||
| + | |- |
||
| + | |<center>{{L|Corn Candy| BYL2}}<br>Corny Candy |
||
| + | |style="background: #B65FCF|<center>{{L|Witch Candy|2}}<br>Witch Candy |
||
| + | |style="background: #0492C2|<center>{{L|Mustache Corn|2}}<br>Mustache Corn |
||
| + | |- |
||
| + | |<center>{{L|Cotton Candy| BYL2}}<br>Cotton Candy |
||
| + | |style="background: #0492C2|<center>{{L|Wizard Candy|2}}<br>Wizard Candy |
||
| + | |style="background: coral|<center>{{L|Cotton Mime|2}}<br>Cotton Mime |
||
| + | |- |
||
| + | |<center>{{L|Spore-Shroom| BYL2}}<br>Spore-Shroom |
||
| + | |style="background: #B65FCF|<center>{{L|Paper-Shroom|2}}<br>Paper-Shroom |
||
| + | |style="background: coral|<center>{{L|Spore Boat|2}}<br>Spore Boat |
||
| + | |- |
||
| + | |<center>{{L|Boing-Shroom| BYL2}}<br>Boing-Shroom |
||
| + | |style="background: #B65FCF|<center>{{L|Bouncy Mage|2}}<br>Bouncy Mage |
||
| + | |style="background: #0492C2|<center>{{L|Candle-Shroom|2}}<br>Candle-Shroom |
||
| + | |- |
||
| + | |<center>{{L|Water-Melon| BYL2}}<br>Water-Melon |
||
| + | |style="background: coral|<center>{{L|Juicy Melon|2}}<br>Juicy Melon |
||
| + | |style="background: #5DBB63|<center>{{L|Cowboy Melon|2}}<br>Cowboy Melon |
||
| + | |- |
||
| + | |<center>{{L|Popcorn Blaster| BYL2}}<br>Popcorn Blaster |
||
| + | |style="background: #0492C2|<center>{{L|Rainbow Popcorn|2}}<br>Rainbow Popcorn |
||
| + | |style="background: #0492C2|<center>{{L|Cap Blaster|2}}<br>Cap Blaster |
||
|} |
|} |
||
</center> |
</center> |
||
| Line 1,719: | Line 1,998: | ||
|<center>'''Common''' |
|<center>'''Common''' |
||
|<center>33% |
|<center>33% |
||
| − | |<center>{{M|Peashooter|2}}{{M|Sunflower|2}}{{M|Wall-nut|2}}{{M|Puff-Shroom |BYL2}}{{M|Sun-Shroom| BYL2}}{{M|Lily Pad|2}}{{M|Tangle Kelp|2}}{{M|Squash |BYL2}}{{M|Twin Sunflower| BYL2}}{{M|Repeater| BYL2}}{{M|Pea Pod| BYL2}}{{M|Caramel Apple| Image}}{{M|Pollen Bouque|t2}}{{M|Tomato Juice| BYL2}}{{M|Little Olives BYL|2}}{{M|Impactus BYL|2}}{{M|Nenuflare BYL|2}} |
+ | |<center>{{M|Peashooter|2}}{{M|Sunflower|2}}{{M|Wall-nut|2}}{{M|Puff-Shroom |BYL2}}{{M|Sun-Shroom| BYL2}}{{M|Lily Pad|2}}{{M|Tangle Kelp|2}}{{M|Squash |BYL2}}{{M|Twin Sunflower| BYL2}}{{M|Repeater| BYL2}}{{M|Pea Pod| BYL2}}{{M|Caramel Apple| Image}}{{M|Pollen Bouque|t2}}{{M|Tomato Juice| BYL2}}{{M|Little Olives BYL|2}}{{M|Impactus BYL|2}}{{M|Nenuflare BYL|2}}{{M|Carrot Cak|e BYL2}}{{M|Corn Candy| BYL2}}{{M|Spore-Shroom| BYL2}}{{M|Strawburst| BYL2}} |
|<center>+2 Points |
|<center>+2 Points |
||
|- |
|- |
||
|<center>'''Special''' |
|<center>'''Special''' |
||
|<center>25% |
|<center>25% |
||
| − | |<center>{{M|Potato Mine|2}}{{M|Pult-shroom |BYL2}}{{M|Threepeater |BYL2}}{{M|Guacodile|2}}{{M|Red Stinger| BYL2}}{{M|A.K.E.E. |BYL2}}{{M|Snow Pea| BYL2}}{{M|Starfruit |BYL2}}{{M|Split Pea| BYL2}}{{M|Perfume-Shroom| BYL2}}{{M|Berry Bush| Image}}{{M|Coffee Bean| BYL2}}{{M|Escape Root| BYL2}}{{M|Flaming Peppers BYL|2}}{{M|Sacuanscorche BYL|2}} |
+ | |<center>{{M|Potato Mine|2}}{{M|Pult-shroom |BYL2}}{{M|Threepeater |BYL2}}{{M|Guacodile|2}}{{M|Red Stinger| BYL2}}{{M|A.K.E.E. |BYL2}}{{M|Snow Pea| BYL2}}{{M|Starfruit |BYL2}}{{M|Split Pea| BYL2}}{{M|Perfume-Shroom| BYL2}}{{M|Berry Bush| Image}}{{M|Coffee Bean| BYL2}}{{M|Escape Root| BYL2}}{{M|Flaming Peppers BYL|2}}{{M|Sacuanscorche BYL|2}}{{M|Sweet Pea| BYL2}}{{M|Popcorn Blaster |BYL2}} |
|<center>+4 Points |
|<center>+4 Points |
||
|- |
|- |
||
|<center>'''Unique''' |
|<center>'''Unique''' |
||
|<center>16% |
|<center>16% |
||
| − | |<center>{{M|Bowling Bulb|2}}{{M|Lava Guava |BYL2}}{{M|Pepper-pult| BYL2}}{{M|Cold-Shroom| BYL2}}{{M|Plantern| BYL2}}{{M|Melon-Pult| BYL2}}{{M|Intensive Carrot |BYL2}}{{M|Beeshooter |BYL2}}{{M|Sap-Fling| BYL2}}{{M|Olive Pit| BYL2}}{{M|Life Lily| BYL2}}{{M|Pineapple Sauce BYL|2}}{{M|Winterberries BYL|2}}{{M|Winter Melon BYL|2}} |
+ | |<center>{{M|Bowling Bulb|2}}{{M|Lava Guava |BYL2}}{{M|Pepper-pult| BYL2}}{{M|Cold-Shroom| BYL2}}{{M|Plantern| BYL2}}{{M|Melon-Pult| BYL2}}{{M|Intensive Carrot |BYL2}}{{M|Beeshooter |BYL2}}{{M|Sap-Fling| BYL2}}{{M|Olive Pit| BYL2}}{{M|Life Lily| BYL2}}{{M|Pineapple Sauce BYL|2}}{{M|Winterberries BYL|2}}{{M|Winter Melon BYL|2}}{{M|Cotton Candy| BYL2}}{{M|Boing-Shroom| BYL2}} |
|<center>+7 Points |
|<center>+7 Points |
||
|- |
|- |
||
|<center>'''Mythical''' |
|<center>'''Mythical''' |
||
|<center>5% |
|<center>5% |
||
| − | |<center>{{M|Hypno-Shroom| BYL2}}{{M|Aloe BYL|2}}{{M|Equinox Berrie|s}}{{M|Doom-Shroom |BYL2}}{{M|Imitater |BYL2}}{{M|Pumpkin |BYL2}}{{M|Grapeshot| BYL2}}{{M|Witch Hazel| BYL2}}{{M|Garlic BYL|2}}{{M|Peacock BYL|2}} |
+ | |<center>{{M|Hypno-Shroom| BYL2}}{{M|Aloe BYL|2}}{{M|Equinox Berrie|s}}{{M|Doom-Shroom |BYL2}}{{M|Imitater |BYL2}}{{M|Pumpkin |BYL2}}{{M|Grapeshot| BYL2}}{{M|Witch Hazel| BYL2}}{{M|Garlic BYL|2}}{{M|Peacock BYL|2}}{{M|Syrup Berries| BYL2}}{{M|Water-Melon| BYL2}} |
|<center>+10 Points |
|<center>+10 Points |
||
|- |
|- |
||
|<center>'''Negatives''' |
|<center>'''Negatives''' |
||
|<center>20% |
|<center>20% |
||
| − | |<center>{{M|Chomper|Lawn}}{{M|Fume-Shroom |BYL2}}{{M|Stallia |BYL2}}{{M|Torchwood| BYL2}}{{M|Jalapeno BYL|2}} |
+ | |<center>{{M|Chomper|Lawn}}{{M|Fume-Shroom |BYL2}}{{M|Stallia |BYL2}}{{M|Torchwood| BYL2}}{{M|Jalapeno BYL|2}}{{M|Blooming Heart| BYL2}}{{M|Mystery Fruit |BYL2}} |
|<center>-1/2 Points |
|<center>-1/2 Points |
||
|} |
|} |
||
| Line 1,780: | Line 2,059: | ||
*2:30 minutes |
*2:30 minutes |
||
*1:45 minutes |
*1:45 minutes |
||
| + | ===Botany Casino=== |
||
| + | This returning mode from the original game was added in the 1.8 Update. Players will go through a set of free-for-all minigames (They can pick from 5, 8, or 10), and they will gain Sun based on their placement. Before playing each minigame, players will bet some of the Sun (The quantity they desire). After the minigame, the winner will earn most of the Sun, second and third earn a lesser amount, with fourth earning no Sun. After 10 minigames, the player with most Sun wins. All players start with 100 Sun. |
||
| + | |||
| + | The Sun quantities you can bet: |
||
| + | *25 Sun |
||
| + | *50 Sun |
||
| + | *75 Sun |
||
| + | *100 Sun |
||
| + | *Half your Sun |
||
| + | *All your Sun |
||
| + | |||
| + | Note that you will earn less Sun if you bet less than the rest of the players, and vice-versa if you bet more. |
||
| + | |||
| + | How much Sun you get from the bid: |
||
| + | *First Place - 60% (10% more or less based on the amount you bet). |
||
| + | *Second Place - 25% (10% more or less based on the amount you bet). |
||
| + | *Third Place - 15% (10% more or less based on the amount you bet). |
||
| + | *Fourth Place - 0% |
||
| + | |||
| + | If the Sun gained ends up being a decimal, it will be rounded down to the nearest whole number. If a player runs out of Sun, it loses, and the game continues with the other players. |
||
| + | |||
==Online Houses Mode== |
==Online Houses Mode== |
||
Introduced in the 1.7 update, the Online Houses Mode is a new way to play online matches and to team up with other players around the world to become the best, strongest house for exclusive prices only available in this mode. |
Introduced in the 1.7 update, the Online Houses Mode is a new way to play online matches and to team up with other players around the world to become the best, strongest house for exclusive prices only available in this mode. |
||
| Line 1,847: | Line 2,147: | ||
!<center>{{BurbankText|text=Pot O’ Gold Badge}} |
!<center>{{BurbankText|text=Pot O’ Gold Badge}} |
||
!<center>{{BurbankText|text=Geyser Badge}} |
!<center>{{BurbankText|text=Geyser Badge}} |
||
| + | !<center>{{BurbankText|text=Duckie Badge}} |
||
| + | !<center>{{BurbankText|text=Ice-Shroom Badge}} |
||
| + | !<center>{{BurbankText|text=Firework Badge}} |
||
| + | !<center>{{BurbankText|text=Beanstalk Badge}} |
||
| + | !<center>{{BurbankText|text=Cake Badge}} |
||
| + | !<center>{{BurbankText|text=Spray Badge}} |
||
| + | !<center>{{BurbankText|text=Pearadise Badge}} |
||
| + | !<center>{{BurbankText|text=Bog Badge}} |
||
|- |
|- |
||
|<center>[[File:Egg Badge.png|100px]] |
|<center>[[File:Egg Badge.png|100px]] |
||
| Line 1,854: | Line 2,162: | ||
|<center>[[File:Pot O’ Gold Badge.png|100px]] |
|<center>[[File:Pot O’ Gold Badge.png|100px]] |
||
|<center>[[File:Geyser Badge.png|100px]] |
|<center>[[File:Geyser Badge.png|100px]] |
||
| + | |<center>[[File:Duckie Badge BYL2.png|100px]] |
||
| + | |<center>[[File:Ice-Shroom Badge.png|100px]] |
||
| + | |<center>[[File:Firework Badge.png|100px]] |
||
| + | |<center>[[File:Beanstalk Badge.png|100px]] |
||
| + | |<center>[[File:Cake Badge.png|100px]] |
||
| + | |<center>[[File:Spray Badge.png|100px]] |
||
| + | |<center>[[File:Pearadise Badge.png|100px]] |
||
| + | |<center>[[File:Bog Badge.png|100px]] |
||
|- |
|- |
||
|<center>{{BurbankText|text=Make a random Plant that costs 25 Sun or less every other turn.}} |
|<center>{{BurbankText|text=Make a random Plant that costs 25 Sun or less every other turn.}} |
||
| Line 1,861: | Line 2,177: | ||
|<center>{{BurbankText|text=Gain 25 extra Sun when getting first place in a minigame.}} |
|<center>{{BurbankText|text=Gain 25 extra Sun when getting first place in a minigame.}} |
||
|<center>{{BurbankText|text=Plants that cost 25 Sun or less are invincible the turn they are played on.}} |
|<center>{{BurbankText|text=Plants that cost 25 Sun or less are invincible the turn they are played on.}} |
||
| + | |<center>{{BurbankText|text=When you roll an odd number, move +1 Spaces.}} |
||
| + | |<center>{{BurbankText|text=Get to Chill all Zombies twice whenever you want.}} |
||
| + | |<center>{{BurbankText|text=Zombies with more than 100{{PvZH Icon|health}} take +5 damage from all attacks.}} |
||
| + | |<center>{{BurbankText|text=Knock back Zombies 1/2 Tile every turn for the last 4 turns.}} |
||
| + | |<center>{{BurbankText|text=All Plants gain Tough Defense in the last 3 turns.}} |
||
| + | |<center>{{BurbankText|text=Destroy all Zombies with 20 Health or less every other turn.}} |
||
| + | |<center>{{BurbankText|text=Plants that cost 150 Sun or more do double damage the turn they are played on.}} |
||
| + | |<center>{{BurbankText|text=When you land on a Green Space, move -1 Spaces.}} |
||
|- |
|- |
||
|<center>''”Did you toss the eggs? Did you keep ‘em? If you were patient, then here’s your reward!”'' |
|<center>''”Did you toss the eggs? Did you keep ‘em? If you were patient, then here’s your reward!”'' |
||
| Line 1,868: | Line 2,192: | ||
|<center>''”Online Houses Season 1 Reward!”'' |
|<center>''”Online Houses Season 1 Reward!”'' |
||
|<center>''”Online Houses Season 2 Reward!”'' |
|<center>''”Online Houses Season 2 Reward!”'' |
||
| + | |<center>''”Online Houses Season 3 Reward!”'' |
||
| + | |<center>''”Online Houses Season 4 Reward!”'' |
||
| + | |<center>''”Online Houses Season 5 Reward!”'' |
||
| + | |<center>''”Online Houses Season 6 Reward!”'' |
||
| + | |<center>''”Online Houses Season 7 Reward!”'' |
||
| + | |<center>''”Online Houses Season 8 Reward!”'' |
||
| + | |<center>''”Online Houses Season 9 Reward!”'' |
||
| + | |<center>''”Online Houses Season 10 Reward!”'' |
||
|} |
|} |
||
| Line 1,883: | Line 2,215: | ||
|<center>{{L|Torchwood| BYL2}}<br>Torchwood |
|<center>{{L|Torchwood| BYL2}}<br>Torchwood |
||
|<center>{{L|Torchwood Swimmer|2}}<br>Torchwood Swimmer |
|<center>{{L|Torchwood Swimmer|2}}<br>Torchwood Swimmer |
||
| − | |<center>Season |
+ | |<center>Season 2 |
| + | |- |
||
| + | |<center>{{L|Starfruit| BYL2}}<br>Starfruit |
||
| + | |<center>{{L|Fairy Star|2}}<br>Fairy Star |
||
| + | |<center>Season 3 |
||
| + | |- |
||
| + | |<center>{{L|Twin Sunflower| BYL2}}<br>Twin Sunflower |
||
| + | |<center>{{L|Gardening Twins|2}}<br>Gardening Twins |
||
| + | |<center>Season 4 |
||
| + | |- |
||
| + | |<center>{{L|Winter Melon| BYL2}}<br>Winter Melon |
||
| + | |<center>{{L|Winter Fan|2}}<br>Winter Fan |
||
| + | |<center>Season 5 |
||
| + | |- |
||
| + | |<center>{{L|Blooming Heart| BYL2}}<br>Blooming Heart |
||
| + | |<center>{{L|Blooming Band|2}}<br>Blooming Band |
||
| + | |<center>Season 6 |
||
| + | |- |
||
| + | |<center>{{L|Sap-Fling| BYL2}}<br>Sap-Fling |
||
| + | |<center>{{L|Christmas Sap|2}}<br>Christmas Sap |
||
| + | |<center>Season 7 |
||
| + | |- |
||
| + | |<center>{{L|Jalapeno| BYL2}}<br>Jalapeno |
||
| + | |<center>{{L|Jalaranger|2}}<br>Jalaranger |
||
| + | |<center>Season 8 |
||
| + | |- |
||
| + | |<center>{{L|Escape Root| BYL2}}<br>Escape Root |
||
| + | |<center>{{L|Escape Builder|2}}<br>Escape Builder |
||
| + | |<center>Season 9 |
||
| + | |- |
||
| + | |<center>{{L|Strawburst| BYL2}}<br>Strawburst |
||
| + | |<center>{{L|Strawpunk|2}}<br>Strawpunk |
||
| + | |<center>Season 10 |
||
|} |
|} |
||
</center> |
</center> |
||
| Line 1,890: | Line 2,254: | ||
If a player purchased the game prior to April 18<sup>th</sup>, they would get a mysterious screen with three Mystery Eggs when they first entered into the game. Then, they would have the option to "Keep" or "Toss" the Mystery Eggs. As of now, nothing has been done with these items, but it is confirmed that with a future update they will get a utility. |
If a player purchased the game prior to April 18<sup>th</sup>, they would get a mysterious screen with three Mystery Eggs when they first entered into the game. Then, they would have the option to "Keep" or "Toss" the Mystery Eggs. As of now, nothing has been done with these items, but it is confirmed that with a future update they will get a utility. |
||
| − | After months of work, the Mystery Eggs teased the Online Houses update that was released |
+ | After months of work, the Mystery Eggs teased the Online Houses update that was released on January of 2022. The players that had kept them would get an exclusive badge for it. |
==Game Versions== |
==Game Versions== |
||
| − | ''Plants vs. Zombies: Build Your Lawn! 2'' can be bought in two separate versions. The Basic Version costs $29.99 and it includes the game only. The Deluxe Version costs $59.99, but it |
+ | ''Plants vs. Zombies: Build Your Lawn! 2'' can be bought in two separate versions. The Basic Version costs $29.99 and it includes the game only. The Deluxe Version costs $59.99, but it includes all the game's DLCs in it as free updates so they don't have to be bought separately. |
==Sales and reception== |
==Sales and reception== |
||
| + | {| |
||
| − | ''Plants vs. Zombies: Build Your Lawn! 2'' received positive reviews and was acclaimed for fixing issues from its predecessor. As of January 2022, it has sold over 12.5 million copies, making it the 10th best-selling game on the Nintendo Switch, and surpassing the sales of ''Plants vs. Zombies: Build Your Lawn!'', at 7 million copies. |
||
| + | |''Plants vs. Zombies: Build Your Lawn! 2'' received positive reviews and was critically acclaimed for fixing issues from its predecessor, such as the new improved art style and polished gameplay. As of April 2023, it has sold over 17.1 million copies, making it the 9th best-selling game on the Nintendo Switch, and surpassing the sales of ''Plants vs. Zombies: Build Your Lawn!'', at 7.7 million copies. The game is currently Fun Animation Production's best-selling game across all platforms. |
||
| + | | |
||
| + | {|class="wikitable" style="border: 5px solid black" |
||
| + | |colspan="2" style="background: #332C2C; color: white; width: 5cm" |<center>'''Review scores'''</center> |
||
| + | |- |
||
| + | |style="background: #474242; color: white" |<center>Publication</center> |
||
| + | |style="background: #474242; color: white" |<center>Score</center> |
||
| + | |- |
||
| + | |style="background: #5C5A5A; color: white" |<center>''CGM''</center> |
||
| + | |style="background: #5C5A5A; color: white" |<center>8/10</center> |
||
| + | |- |
||
| + | |style="background: #5C5A5A; color: white" |<center>''GameRevolution''</center> |
||
| + | |style="background: #5C5A5A; color: white" |<center>7/10</center> |
||
| + | |- |
||
| + | |style="background: #5C5A5A; color: white" |<center>''Game Informer''</center> |
||
| + | |style="background: #5C5A5A; color: white" |<center>8.25/10</center> |
||
| + | |- |
||
| + | |style="background: #5C5A5A; color: white" |<center>''IGN''</center> |
||
| + | |style="background: #5C5A5A; color: white" |<center>7.3/10</center> |
||
| + | |- |
||
| + | |style="background: #5C5A5A; color: white" |<center>''Nintendo Life''</center> |
||
| + | |style="background: #5C5A5A; color: white" |<center>{{Color|★★★★★★★★|#FFCC4A}}{{Color|★★|white}}</center> |
||
| + | |} |
||
| + | |} |
||
| + | |||
| + | |||
| + | Each DLC has also sold very well and most have received abundantly positive reviews by the public. Below you can see each DLC's sales in detail regarding their release date. |
||
| + | |||
| + | {|class="wikitable" style="border: 5px solid #704E03" |
||
| + | |style="background: #B37D0B; color: #F7C559; width: 25cm" |<center>'''Content'''</center> |
||
| + | |style="background: #B37D0B; color: #F7C559; width: 25cm" |<center>'''Platform'''</center> |
||
| + | |style="background: #B37D0B; color: #F7C559; width: 10cm" |<center>'''Sales'''</center> |
||
| + | |style="background: #B37D0B; color: #F7C559; width: 40cm" |<center>'''Release Date'''</center> |
||
| + | |- |
||
| + | |style="background: #F7C559; color: black" |<center>Pea Palace</center> |
||
| + | |rowspan="6" style="background: #F7C559; color: black;" |<center>Nintendo Switch</center> |
||
| + | |style="background: #F7C559; color: black" |<center>''2,200,000''</center> |
||
| + | |style="background: #F7C559; color: black" |<center>May 10, 2021</center> |
||
| + | |- |
||
| + | |style="background: #F7C559; color: black" |<center>Mischievous Honeyhive</center> |
||
| + | |style="background: #F7C559; color: black" |<center>''900,000''</center> |
||
| + | |style="background: #F7C559; color: black" |<center>August 7, 2021</center> |
||
| + | |- |
||
| + | |style="background: #F7C559; color: black" |<center>Pizzeria Nightmare</center> |
||
| + | |style="background: #F7C559; color: black" |<center>''2,900,000''</center> |
||
| + | |style="background: #F7C559; color: black" |<center>August 26, 2021</center> |
||
| + | |- |
||
| + | |style="background: #F7C559; color: black" |<center>PvZCC Mashup</center> |
||
| + | |style="background: #F7C559; color: black" |<center>''2,400,000''</center> |
||
| + | |style="background: #F7C559; color: black" |<center>November 6, 2021</center> |
||
| + | |- |
||
| + | |style="background: #F7C559; color: black" |<center>Candy Wonderland</center> |
||
| + | |style="background: #F7C559; color: black" |<center>''4,100,000''</center> |
||
| + | |style="background: #F7C559; color: black" |<center>January 19, 2022</center> |
||
| + | |- |
||
| + | |style="background: #F7C559; color: black" |<center>Nightly Festival</center> |
||
| + | |style="background: #F7C559; color: black" |<center>''1,900,000''</center> |
||
| + | |style="background: #F7C559; color: black" |<center>April 16, 2022</center> |
||
| + | |} |
||
==Update history== |
==Update history== |
||
''Main article:'' [[Plants vs. Zombies: Build Your Lawn! 2/Update history]] |
''Main article:'' [[Plants vs. Zombies: Build Your Lawn! 2/Update history]] |
||
| − | == |
+ | ==Scrapped concepts== |
| − | ''Main article:'' [[Plants vs. Zombies: Build Your Lawn! 2/ |
+ | ''Main article:'' [[Plants vs. Zombies: Build Your Lawn! 2/Scrapped concepts]] |
==Gallery== |
==Gallery== |
||
===Teasers and Logos=== |
===Teasers and Logos=== |
||
<gallery> |
<gallery> |
||
| − | BYL 2.png|The game's logo |
+ | BYL 2.png|<center>The game's logo |
| − | BYL2 NS Icon.png|The game's icon for the Nintendo Switch main menu |
+ | BYL2 NS Icon.png|<center>The game's icon for the Nintendo Switch main menu |
| − | BYL 2 Teaser.png|The game's trailer screen |
+ | BYL 2 Teaser.png|<center>The game's trailer screen |
| − | Pea Palace Teaser.png|The teaser for the Pea Palace Update |
+ | Pea Palace Teaser.png|<center>The teaser for the Pea Palace Update |
| − | Mischievous Honeyhive Teaser BYL2.png|The teaser for the Mischievous Honeyhive Update |
+ | Mischievous Honeyhive Teaser BYL2.png|<center>The teaser for the Mischievous Honeyhive Update |
| − | Pizzeria Prison Teaser BYL2.png|The teaser for the Pizzeria Prison Update |
+ | Pizzeria Prison Teaser BYL2.png|<center>The teaser for the Pizzeria Prison Update |
| − | PvZCC Mashup Teaser BYL2.png|The teaser for the PvZCC Mashup Update |
+ | PvZCC Mashup Teaser BYL2.png|<center>The teaser for the PvZCC Mashup Update |
| + | Candy Wonderland Teaser BYL2.png|<center>The teaser for the Candy Wonderland Update |
||
| + | Nightly Festival Teaser BYL2.png|<center>The teaser for the Nightly Festival Update |
||
</gallery> |
</gallery> |
||
===Screenshots=== |
===Screenshots=== |
||
<gallery> |
<gallery> |
||
| − | Puzzle Brewers.png|Puzzle Brewers Gameplay |
+ | Puzzle Brewers.png|<center>Puzzle Brewers Gameplay |
| − | BYL2 NS Icon MM.png|''Plants vs. Zombies: Build Your Lawn! 2'' in the Nintendo Switch main menu |
+ | BYL2 NS Icon MM.png|<center>''Plants vs. Zombies: Build Your Lawn! 2'' in the Nintendo Switch main menu |
| − | BYL2 Character Select Screen.png|''Plants vs. Zombies: Build Your Lawn! 2'''s character select screen |
+ | BYL2 Character Select Screen.png|<center>''Plants vs. Zombies: Build Your Lawn! 2'''s character select screen |
| − | BYL2 Online Houses Screen.png|Getting ready to play Online Houses |
+ | BYL2 Online Houses Screen.png|<center>Getting ready to play Online Houses |
</gallery> |
</gallery> |
||
| Line 1,934: | Line 2,359: | ||
== Trivia == |
== Trivia == |
||
*The minigame "Fire-Ice Battle" was originally named "Bipolar Pirojectiles" in ''Plants vs. Zombies: Build Your Lawn!''. |
*The minigame "Fire-Ice Battle" was originally named "Bipolar Pirojectiles" in ''Plants vs. Zombies: Build Your Lawn!''. |
||
| − | *Tangle Kelp, Imitater, |
+ | *Tangle Kelp, Imitater, Coffee Bean, and Mystery Fruit are the only 4 normal plants without costumes. |
**Tangle Kelp lacks them due to how obscure it is in-game and how little the costumes would be seen. |
**Tangle Kelp lacks them due to how obscure it is in-game and how little the costumes would be seen. |
||
**Imitater has no costumes because it only appears briefly as it quickly transforms into other plants. |
**Imitater has no costumes because it only appears briefly as it quickly transforms into other plants. |
||
**Coffee Bean has no costumes because he is an instant use plant that does not stay long enough on screen. |
**Coffee Bean has no costumes because he is an instant use plant that does not stay long enough on screen. |
||
| + | **Mystery Fruit has no costumes as even though it is not an instant-use plant, it just stays stale with no meaningful ability for a turn. |
||
*Premium Plants had no costumes until the 1.7 Update. |
*Premium Plants had no costumes until the 1.7 Update. |
||
**They were added as a reward to the Online Houses Mode, rather than as an item you could buy at the Shop. |
**They were added as a reward to the Online Houses Mode, rather than as an item you could buy at the Shop. |
||
*The Shop was originally going to be in ''Plants vs. Zombies: Build Your Lawn!'', but it was scrapped because there were not enough ideas for it. |
*The Shop was originally going to be in ''Plants vs. Zombies: Build Your Lawn!'', but it was scrapped because there were not enough ideas for it. |
||
| − | **In this game, it has been confirmed that the Shop will be updated constantly with new Premium Plants and costumes for Plants coming in future DLCs. |
||
*Despite not being present in-game, {{W|Electric Boogaloo}} is referenced in one of Life Lily's costumes. |
*Despite not being present in-game, {{W|Electric Boogaloo}} is referenced in one of Life Lily's costumes. |
||
| − | * |
+ | *Candy Wonderland is the DLC with most original Plants and Zombies. |
*Flaming Pepper and Winter Melon are currently the most expensive plants of the game, with a Sun cost of 250. |
*Flaming Pepper and Winter Melon are currently the most expensive plants of the game, with a Sun cost of 250. |
||
| + | {{Fun Animator}} |
||
| + | {{AniProjects|Previous=[[Plants vs. Zombies 2: Fall Food Fight|Plants vs. Zombies 2:<br>Fall Food Fight]]|Date1=(2020)|Current=Plants vs. Zombies:<br>Build Your Lawn! 2|Date2=(2021)|Next=[[Plants vs. Zombies: City Saviors]]|Date3=(2022)}} |
||
| + | {{Featured Articles}} |
||
| − | [[Category:Games |
+ | [[Category:Games]] |
| + | [[Category:Fun Animator's creations]] |
||
| + | [[Category:Uncleared page]] |
||
Latest revision as of 00:39, 5 December 2023

| Plants vs. Zombies: Build Your Lawn! 2 | |
|---|---|
 Logo | |
|
Created by: |
|
|
Genre: |
Party and RPG |
|
Platforms: |
Nintendo Switch |
|
Release Dates |
April 11th, 2021 |
|
Current Version |
1.9 |
|
Price |
$29.99 (Basic Version) |
|
Number of Players: |
1-4 (Local and Online) |
Plants vs. Zombies: Build Your Lawn! 2 (Abbreviated as BYL 2) is a spin-off partystyle and RPG game of the Plants vs. Zombies franchise, and a sequel to Plants vs. Zombies: Build Your Lawn!.
The game was officially announced on August 27th of 2020, only 3 months after its prequel was released as a response to the commercial success that the original game had been, it has been in development since, hitting the alpha test on December 20th of 2020.
After months of work, the game was officially released globally on April 11th, 2021, nearly a year after the first game was released.
Latest News
The final DLC has arrived! Nightly Festival brings 5 plants and 4 zombies to the roster, as well as 1 new board and lawn for players to enjoy! New costumes are also here to add to your collection. Purchase this DLC in the Nintendo eShop for $4.99, or get it for free with the Deluxe Version.
The free update comes with a new premium plant for players to purchase.
Main Gameplay
Plants vs. Zombies Build Your Lawn! 2 is a party game that has 20 turns or more, each player has its own lawn and they start from that point, each lawn is at each corner of the board. There are multiple boards to pick from and each of them has a different layout. You will roll a dice block that has 6 sides and you will advance the shown spaces. You want to reach the Crazy Dave's Plant Stores that are in certain spots to buy him plants with Sun, you can get Sun by playing minigames at the end of each turn or by landing on the Sun space, or you can get them by planting Sunflowers in your lawn. The objective of the game is to defend your lawn from the zombies, you accomplish this by planting defending or attacking plants to prevent the zombies from reaching your house. The layout of your lawn is this one:
- 9 columns
- 5 rows
The gameplay of Plants vs. Zombies: Build Your Lawn! 2 remains almost equally from its prequel, except with a few minor changes. First of all, the game no longer features any pixel art, now the artstyle is a combination of that of Plants vs. Zombies 2 and Plants vs. Zombies Heroes. Second of all, items are a new implementation to complement the battle gameplay, they can be obtained through the boards in special spaces.
Just like in its prequel, players must roll the dice in order to move through the board, and collect goodies that will help them fight zombies or affect other players. Each player also has their own lawn which must be protected from approaching zombie by purchasing plants on the boards. Plants are bought in Crazy Dave's Plant Stores, special spaces that when a player passes through, will open a store where plants can be bought, and then placed in the lawn. After each player has rolled the dice, a minigame will be played, in which players can gain Sun, the currency to buy plants, once the minigame is over, the lawn action begins! Zombies first move a set number of tiles, if they have reached a plant, they will start eating it the next turn instead of moving (Some plants have different toughnesses), plants then attack zombies to defend your house, while other plants like Sunflower produce Sun or trigger other abilities to help out. If zombies reach your house, you lose, leaving the other players left to play, once all players but one have lost, the game ends with the remaining player winning. If the match lasts the 20 turns, then a Sun count is done, with every plant in the lawn being worth its cost, along with the Sun the player has left, zombies affect this counter as well, reducing it equal to how much they cost. At the end, the player with most Sun wins.
The party side remains equal, players roll dice blocks, play minigames and gain Sun used to battle, although 5 Sunflowers aren't spawned at the beginning of the match, instead players begin with 100 Sun each. However, the truly biggest change of the game is the Story Mode, which is used to unlock new things like Boards, Heroes, Dice Blocks and plant lines, learn more about it below.
The game will also feature DLC content, which will be paid, but it will bring new plants, zombies and boards in the same way Plants vs. Zombies 2 did, by worlds with different gimmicks.
Story Mode
- « »
- Welcome to Battle Island! In this place you will move using your dice block and gaining Sun through minigames, you will face many challenges in the way that will unlock many new features for you. Your goal is to reach the Toxic Volcano in the island, but for that you will have to go through all other 5 areas of the Battle Island. Once you get to Toxic Volcano, you will have to battle Dr. Zomboss and his minions, and if you beat him, you get some juicy rewards, but if you fail, you will have to retreat to a random place of the island.
- —Crazy Dave
The Story Mode is the main game mode of the game. In it, you will go through a massive board, moving with the help of dice blocks, and facing a minigame against CPUs after 3 rolls, gaining Sun used to buy plants. Plants are used to complete challenges along the way, which if completed with certain standards will grant the player many new items, like plants, zombies or boards for the "Regular Match" mode. In the case the player completes the challenge but not with the conditions met, it can continue the adventure, but will not get any rewards. And if the players loses the challenge, then it will have to try the challenge again, but not before it reaches the challenge space again, as it will be taken some spaces backwards as a punishment.
The challenges are turn-based battles against set zombies, in which the player will use the plants it has bought to defeat the zombies of the challenge and win. Plants can only be used a set amount of times before disappearing, in which case the player must buy new plants with Sun. There are 4 different types of challenges, each one granting a different reward.
In the Story Mode, the same spaces of "Regular Match" are used. However, plants do not have turn clauses as in "Regular Match" mode because of special missions and gimmicks.
There are 6 worlds in this mode, each one harder than the previous one, and with special gimmicks. In every world, only the zombies unlocked there will appear in challenges, but unlocked plants from other areas can still be purchased. Each world is about 5 times bigger than a regular board, and they have a boss at the end, which if successfully defeated, grants the player the world's board in a smaller scale.
| Description | Gimmick | |
|---|---|---|
Plants
Plant
|
Image
|
Damage
|
Defense
|
Range
|
Ability
| |
|---|---|---|---|---|---|---|
Peashooter
|

|
25
|
10
|
Regular*
|
Straight
|
None
|
Sunflower
|

|
25
|
-
|
Regular*
|
-
|
Produce 10
|
Wall-Nut
|

|
50
|
-
|
Tough*
|
-
|
None
|
Potato Mine
|

|
50
|
0 (Unarmed)
75 (Armed) |
Regular (Unarmed)*
|
Touch
|
Take one turn to arm, they destroy themselves after damaging a Zombie.
|
Chomper
|
|
100
|
100
|
Regular*
|
1x2
|
Take one turn after damging a Zombie to chew it.
|
Puff-Shroom
|
|
0
|
20
|
Regular**
|
1x2
|
None
|
Sun-Shroom
|

|
25
|
-
|
Regular**
|
-
|
Start of Turn: Gain 5
|
Fume-Shroom
|
|
100
|
30
|
Regular**
|
1x2
|
Hits all Zombies in its range.
|
Hypno-Shroom
|

|
75
|
-
|
Regular**
|
Tile
|
When Destroyed: The Zombie that destroyed this gets hypnotized.
|
Pult-Shroom
|
|
100
|
60
|
Regular**
|
Lobbed/Close (3x2)
|
None
|
Lily Pad
|

|
25
|
-
|
Regular*
|
-
|
Plant non-aquatic Plants on top of it.
|
Tangle Kelp
|

|
25
|
150
|
Regular**
|
Touch
|
Damages zombies upon touch, self-destroying afterwards.
|
Bowling Bulb
|

|
125
|
10/30/50
|
Regular**
|
Straight
|
Projectiles bounces into multiple Zombies, damage changes with turns.
|
Threepeater
|
|
100
|
10
|
Regular**
|
Multi-Lane
|
-
|
Guacodile
|

|
100
|
20
|
Regular*
|
Straight
|
When destroyed: Do 10 damage to all Zombies here.
|
Red Stinger
|
|
75
|
20/10
|
Regular/Tough**
|
Straight
|
Does less damage depending on where is it planted.
|
A.K.E.E.
|
|
100
|
20
|
Regular**
|
Lobbed
|
Projectiles target 3 zombies in its lane.
|
Stallia
|
|
50
|
-
|
Regular*
|
Touch/3x3
|
Knocks back zombies upon touch.
|
Aloe
|
|
50
|
-
|
Regular**
|
Close
|
Boosts plants' defense directly to its right.
|
Lava Guava
|
|
100
|
80
|
Regular*
|
Touch/3x3
|
-
|
Pepper-Pult
|
|
125
|
30
|
Regular**
|
Lobbed
|
When played: Thaws plants in a 3x3 Area.
|
Snow Pea
|
|
50
|
20
|
Regular*
|
Straight
|
When this hurts a zombie, chill it.
|
Cold-Shroom
|
|
50
|
10
|
Regular**
|
Lane
|
When this hurts a zombie, chill it.
|
Equinox Berries
|
|
150
|
20 (Snow)
40 (Fire) |
Reuglar**
|
Multi-Lane
|
Attacks in the lanes next door to it, either chills or burns zombies.
|
Squash
|
|
125
|
-
|
Regular**
|
Close
|
Squashes the zombie near it, destroying it entirely.
|
Doom-Shroom
|

|
200
|
200
|
-***
|
Full Lawn
|
Damages all zombies and creates a crater upon use.
|
Plantern
|
|
25
|
-
|
Regular*
|
3x3
|
Lights up a small area.
|
Melon-Pult
|
|
150
|
50 (Impact)
25 (Splash) |
Regular**
|
Lobbed
|
Does splash damage upon impact.
|
Intensive Carrot
|
|
75
|
-
|
-**
|
Tile
|
Revives a previously destroyed plant.
|
Imitater
|
|
75
|
-
|
Regular*
|
-
|
When a plant is played, this tranforms into a copy of that plant.
|
Repeater
|
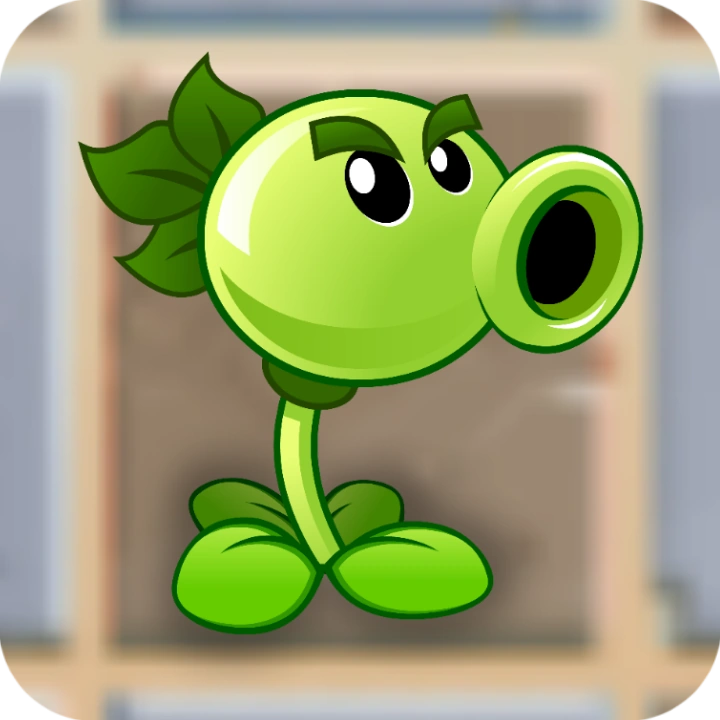
|
50
|
20
|
Regular*
|
Straight
|
None
|
Pea Pod
|
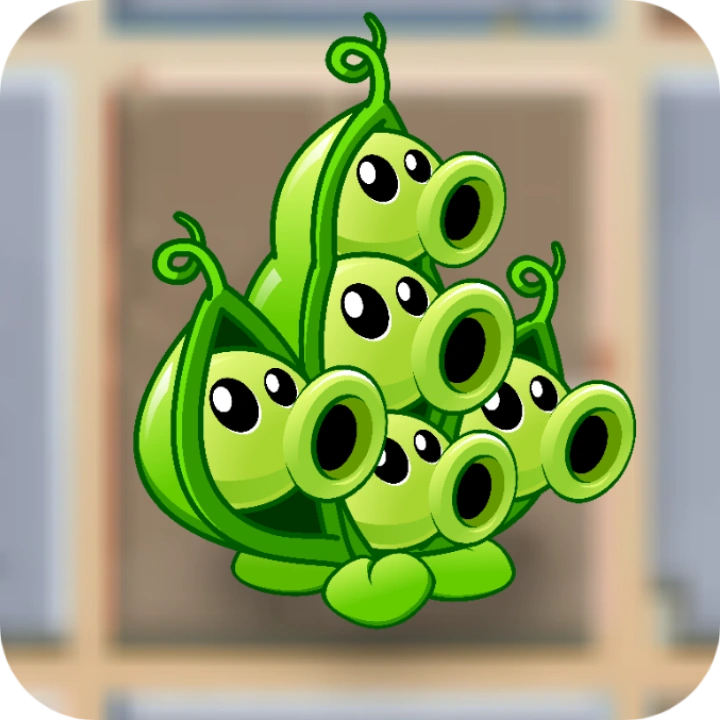
|
25
|
15
|
Regular**
|
Straight
|
Can be stacked up to 5 times for extra damage.
|
Olive Pit
|
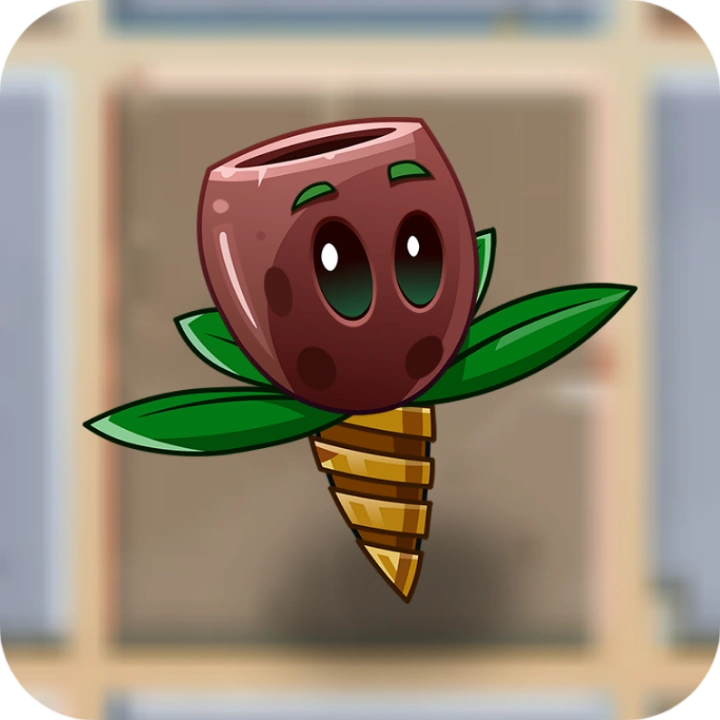
|
100
|
80
|
Regular**
|
Tile
|
Swallows zombies that step on it twice before disappearing.
|
Split Pea
|
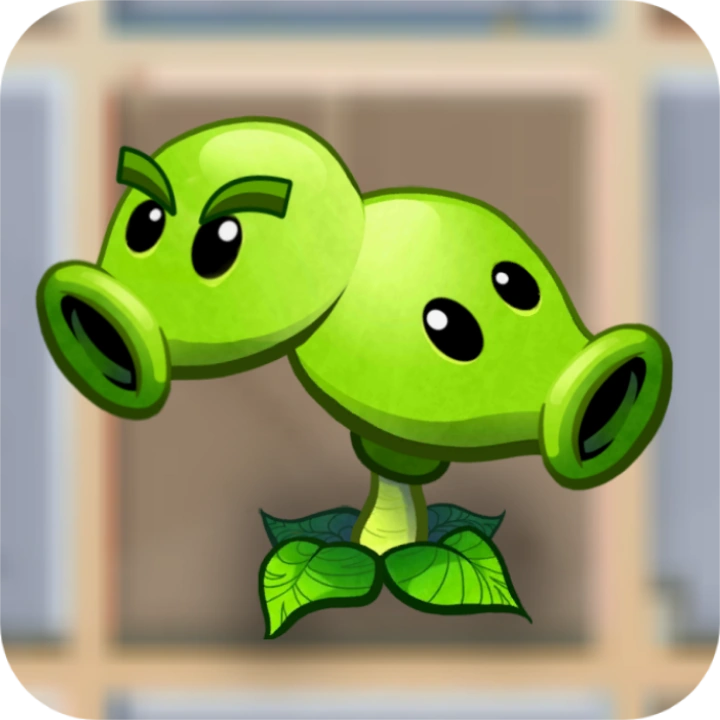
|
75
|
10 (Front)
20 (Behind) |
Regular*
|
Straight and Behind
|
None
|
Grapeshot
|
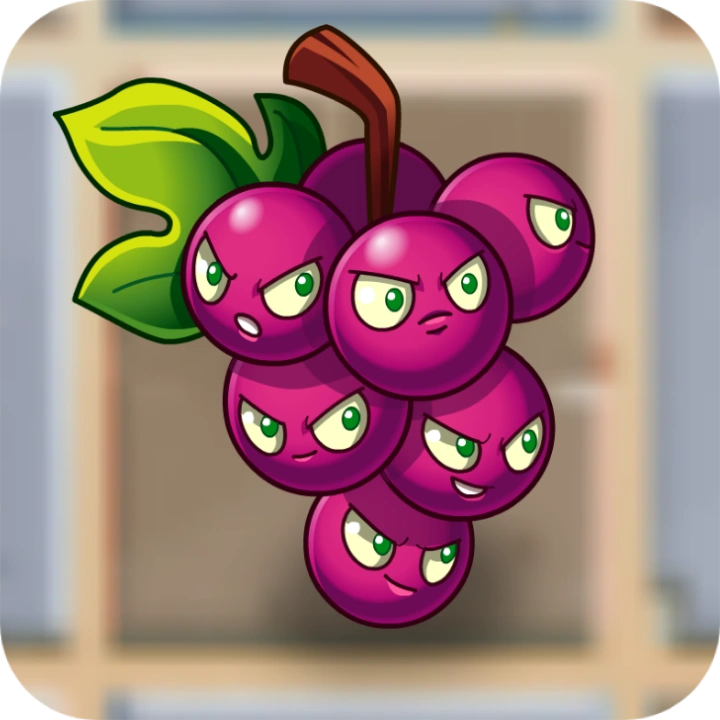
|
125
|
80 (Explosion)
10 (Grapes) |
-***
|
3x3
|
Explodes in an area, and splits into 1 grape per lane.
|
Witch Hazel
|
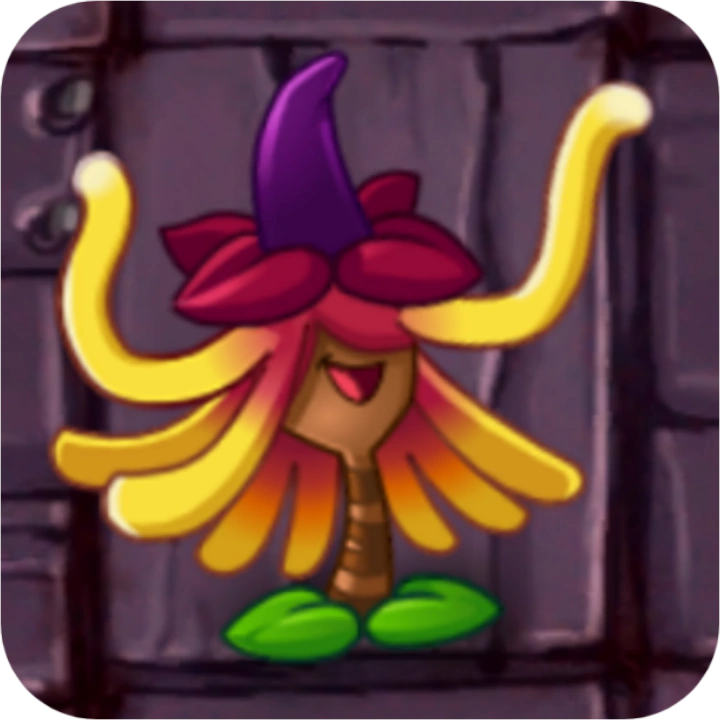
|
150
|
-
|
Regular**
|
Full Lawn
|
Start of Turn: Destroy a Zombie with 100
|
Perfume-Shroom
|

|
200
|
-
|
-***
|
Lane
|
Revive the three most expensive Plants here.
|
Caramel Apple
|
|
75
|
-
|
Tough*
|
-
|
Attracts Beez in a 3x3 area, and can resist 2 Beez attacks.
|
Berry Bush
|
|
100
|
10 (+5 for every tile)
|
Regular*
|
Straight
|
Does more damage the farther the zombie is.
|
Coffee Bean
|
|
25
|
-
|
-**
|
Tile
|
Creates a Coffee Puddle in a selected tile.
|
Life Lily
|
|
250
|
-
|
Regular***
|
Full Board
|
When a Zombie is destroyed, hypnotize it with half health instead.
|
Pollen Bouquet
|

|
75
|
10
|
Regular***
|
Lobbed
|
Produce 10
|
Flaming Pepper
|
|
250
|
40
|
Regular***
|
Lobbed
Full Lawn |
Burn
Start of Turn: Do 10 damage to all zombies with 80 |
Garlic
|
|
75
|
-
|
Tough**
|
Touch
|
When a Zombie eats this, move it to a lane next door.
|
Little Olives
|

|
25
|
10
|
Regular*
|
Straight
|
When this hurts a zombie, knock it back.
|
Tomato Juice
|
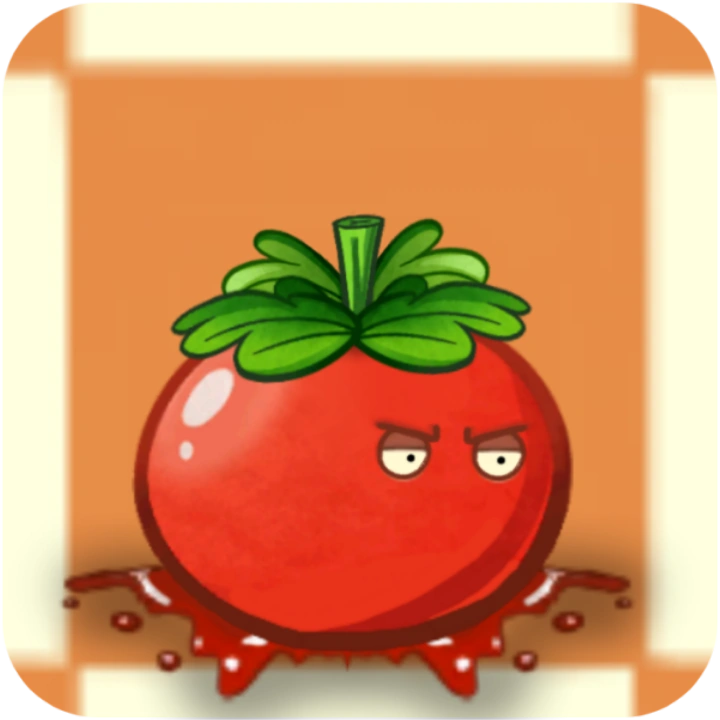
|
150
|
-
|
Regular**
|
-
|
Start of Turn: Revive a plant in an adjacent tile.
|
Pineapple Sauce
|

|
100
|
20
|
Regular*
|
Lobbed
Full Lawn |
When a non-Pineapple Sauce plant hurts a zombie, do 5 extra damage to it.
|
Impactus
|
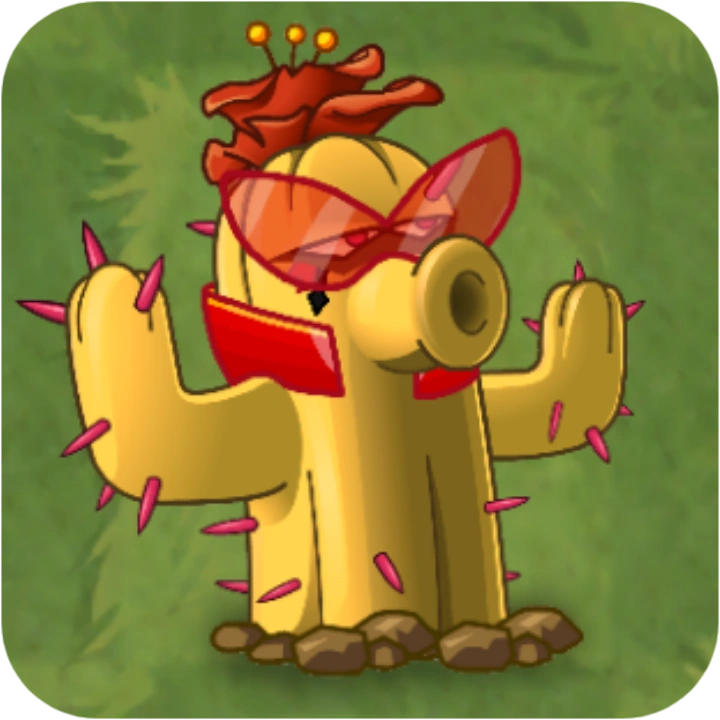
|
100
|
40
|
Regular**
|
Straight/Vertical
|
When this hits a zombie, do 20 damage to 2 zombies in that column.
|
Peacock
|
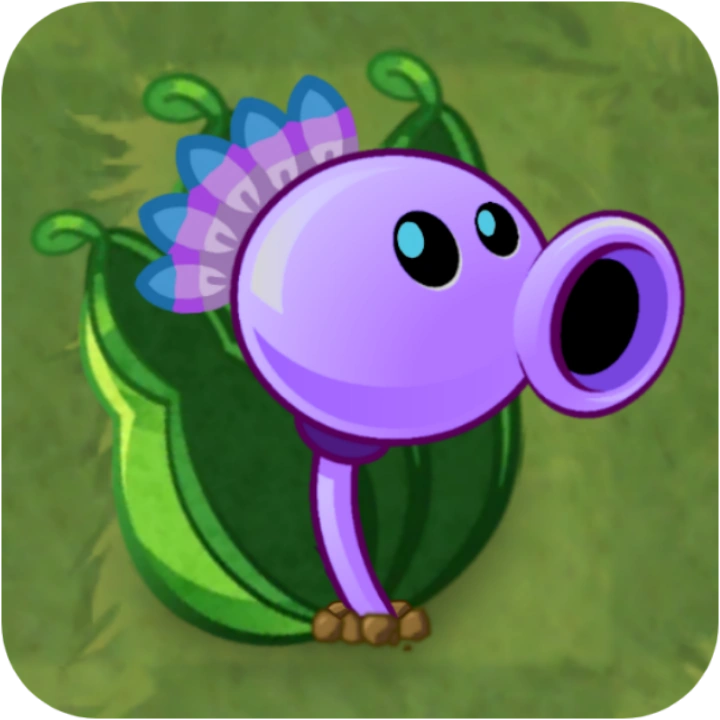
|
200
|
80
|
Regular***
|
Straight
|
When this destroys a zombie for the first time each turn, this attacks again.
|
Nenuflare
|

|
125
|
-
|
Regular*
|
Full Lawn
|
Start of Turn: Do 100 damage to 3 random zombies. This gets destroyed afterwards.
|
Winterberries
|
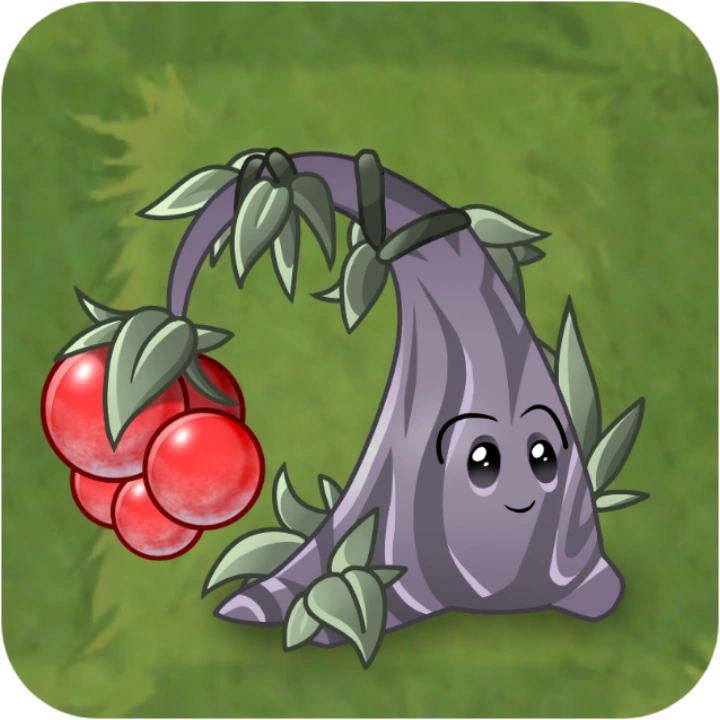
|
75
|
10
|
Regular*
|
Lobbed
|
This attacks the 3 zombies closest to the house in the lane. When this hurts a zombie, chill it.
|
Sacuanscorche
|

|
100
|
30
|
Regular*
|
Cross
|
Burn
When Played: Thaw all plants in the column. |
Sweet Pea
|

|
125
|
25
|
Regular***
|
Straight
|
When Played: Move all Zombies with 50
|
Syrup Berries
|
|
200
|
40
|
Regular***
|
Lobbed
|
When Played: Transform a Plant that costs 100
|
Carrot Cake
|
|
150
|
-
|
-*
|
3x3
|
Revive all Plants that cost 50
|
Corny Candy
|
|
25
|
10
|
Regular*
|
3x2
|
This does triple damage to zombies with Rapid or Quick Speed.
|
Cotton Candy
|

|
100
|
-
|
Armored*
|
3x3
|
Start of Turn: Move the zombie with the highest
|
Spore-Shroom
|
|
175
|
40
|
Regular**
|
Lobbed
|
When this destroys a Zombie, make a Spore-Shroom there
|
Boing-Shroom
|

|
75
|
-
|
-*
|
Tile
|
When played: Send all Zombies in an area to the last Tile of the lane.
|
Water-Melon
|
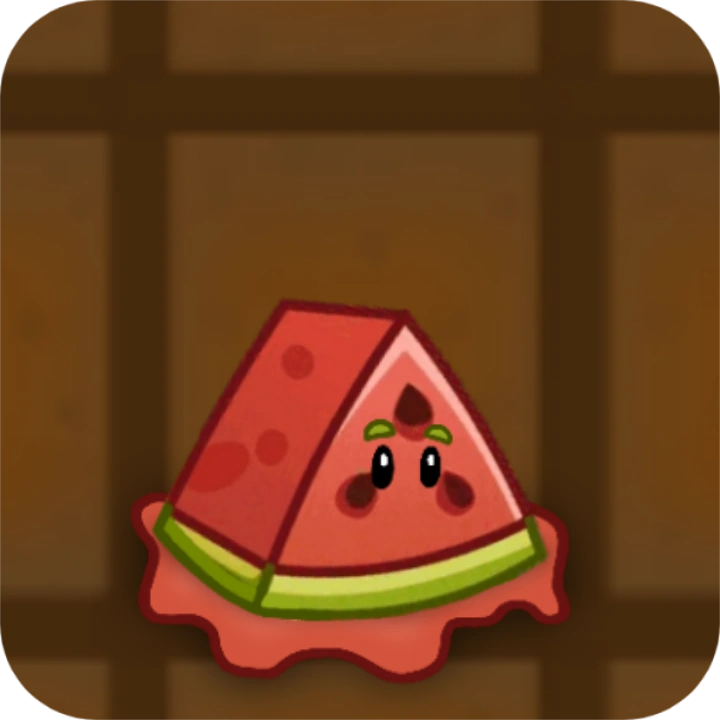
|
100
|
-
|
Armored**
|
-
|
When damaged, this will move to another tile, doing 10 damage to all Zombies there.
|
Mystery Fruit
|
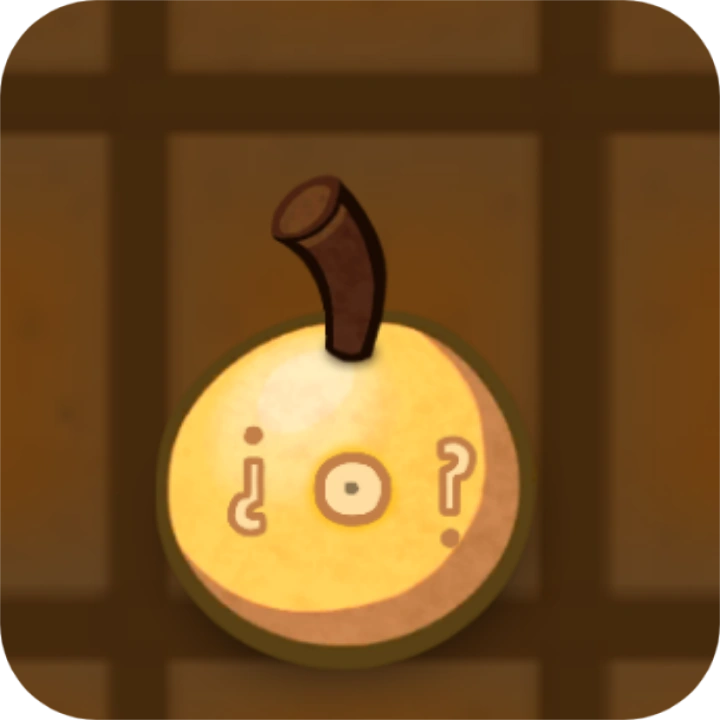
|
25
|
-
|
Regular***
|
-
|
Start of Turn: This transforms into a random Plant that costs 25
|
Popcorn Blaster
|

|
75
|
20
|
Regular*
|
Lobbed
|
When this destroys a Zombie, Stun all zombies here.
|
- * = Can be bought starting from turn 1
- ** = Can be bought starting from turn 5
- *** = Can be bought starting from turn 10
- Regular Toughness = Resist one turn against a Zombie
- Tough Toughness = Resist two turns against a Zombie
- Armored Toughness = Resist three turns against a Zombie.
- Puff-Shroom can only be bought up to 4 times per turn.
- Mystery Fruit can only be bought 1 time per turn.
Zombies
Zombie
|
Image
|
Health
|
Speed
|
Ability
| |
|---|---|---|---|---|---|
Basic Zombie
|

|
25
|
40
|
Basic*
|
-
|
Conehead Zombie
|

|
50
|
60
|
Basic*
|
-
|
Buckethead Zombie
|

|
75
|
100
|
Stiff*
|
-
|
All-Star Zombie
|

|
125
|
100
|
Quick**
|
Start of Turn: This moves to an adjacent lane.
|
Newspaper Zombie
|
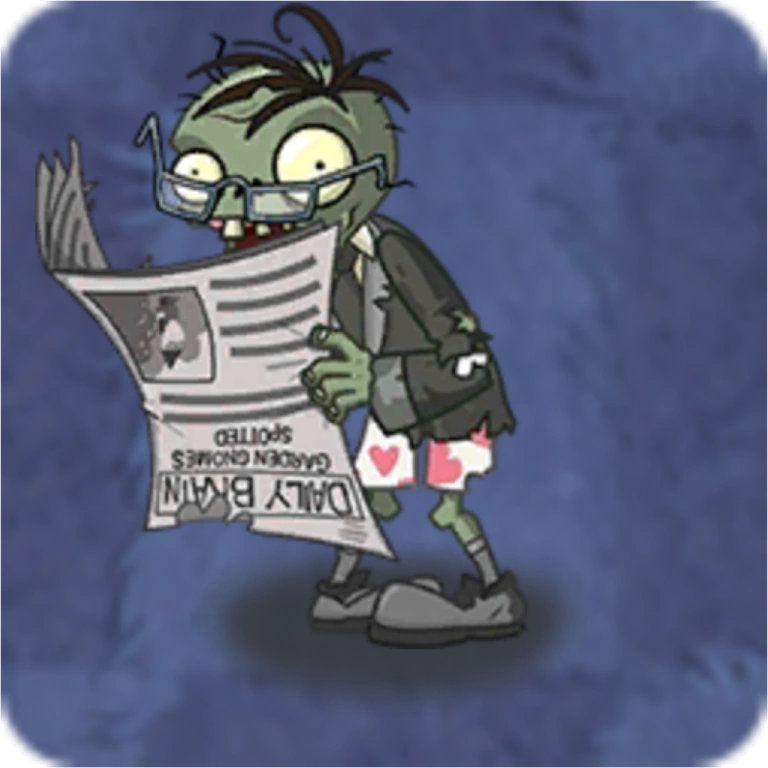
|
75
|
60
|
Basic/Rapid*
|
His speed changes after losing half health.
|
Dancing Zombie
|
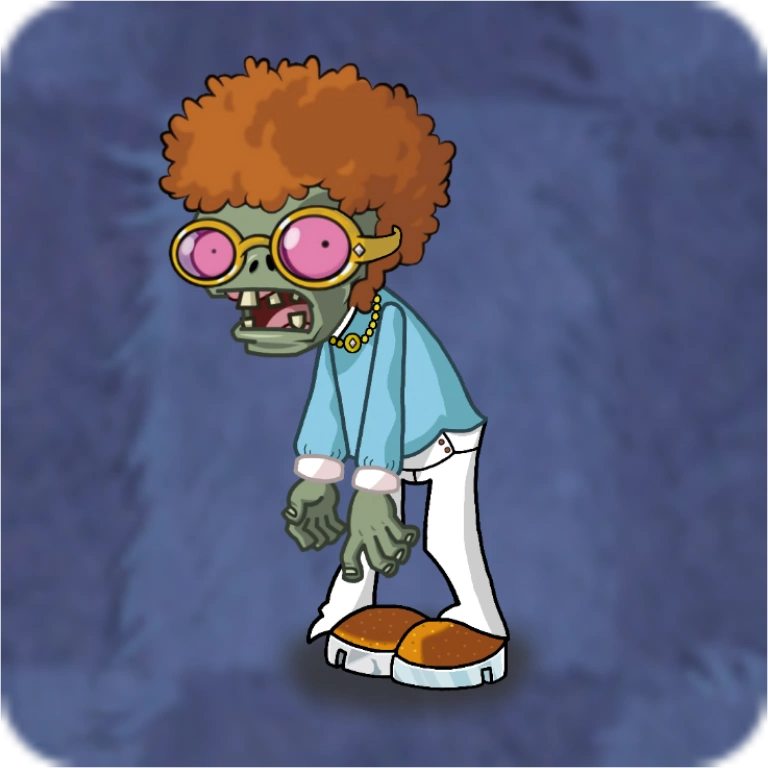
|
75
|
40
|
Basic**
|
Spawns Backup Dancers every other turn.
|
Backup Dancer
|
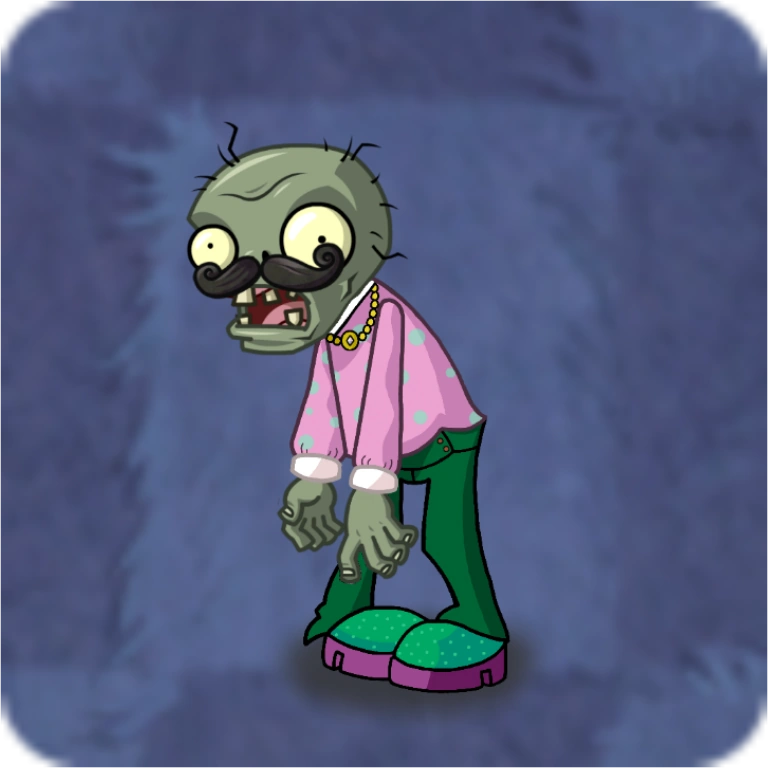
|
50
|
20
|
Quick*
|
Move 1 Tile Backwards every other turn, gaining +20 Health.
|
Jester Zombie
|
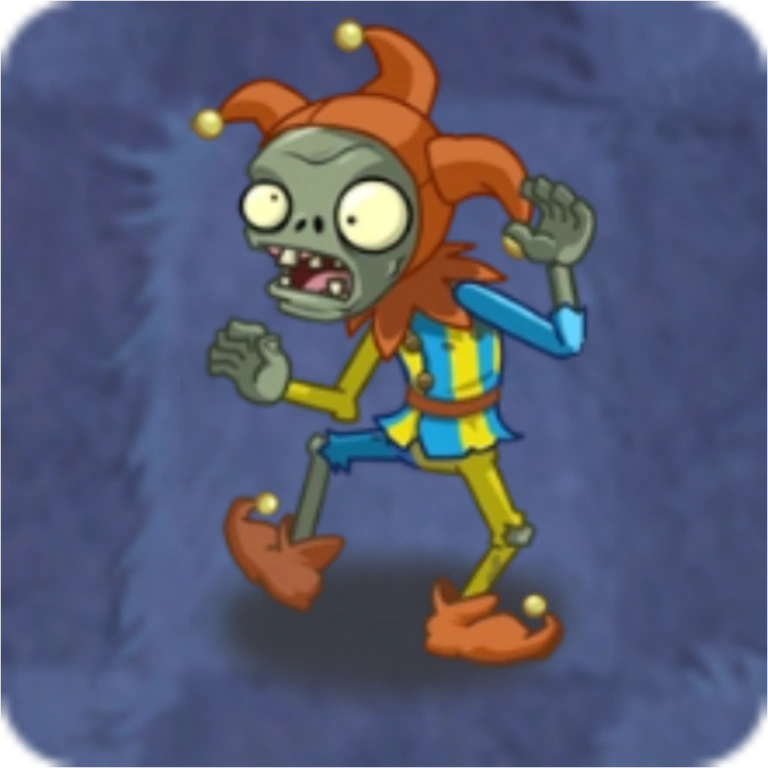
|
100
|
60
|
Rapid**
|
Returns projectiles to plants.
|
Snorkel Zombie
|

|
25
|
20
|
Rapid*
|
Hides in the tide, being immune to most attacks.
|
Surfer Zombie
|

|
50
|
60
|
Basic*
|
While in the Water: This has a Quick speed. Destroys plants with its surfboard.
|
Octo Zombie
|

|
150
|
140
|
Stiff**
|
Hurls octopi at plants, trapping them for a turn.
|
Fisher Zombie
|

|
100
|
60
|
Still**
|
Pulls plants with its rod.
|
Parasol Zombie
|
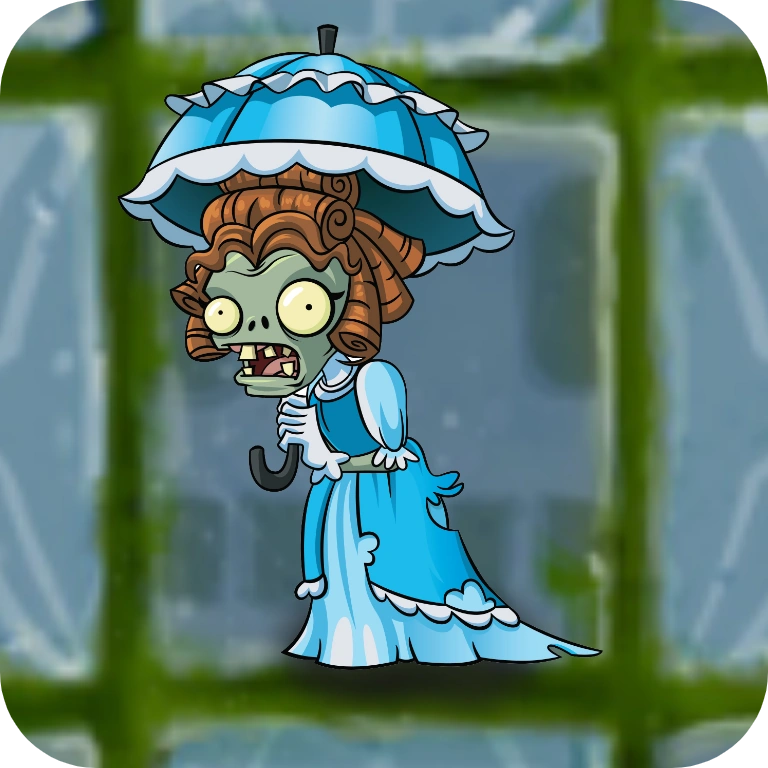
|
125
|
60
|
Stiff**
|
Immune to lobbed projectiles.
|
Excavator Zombie
|
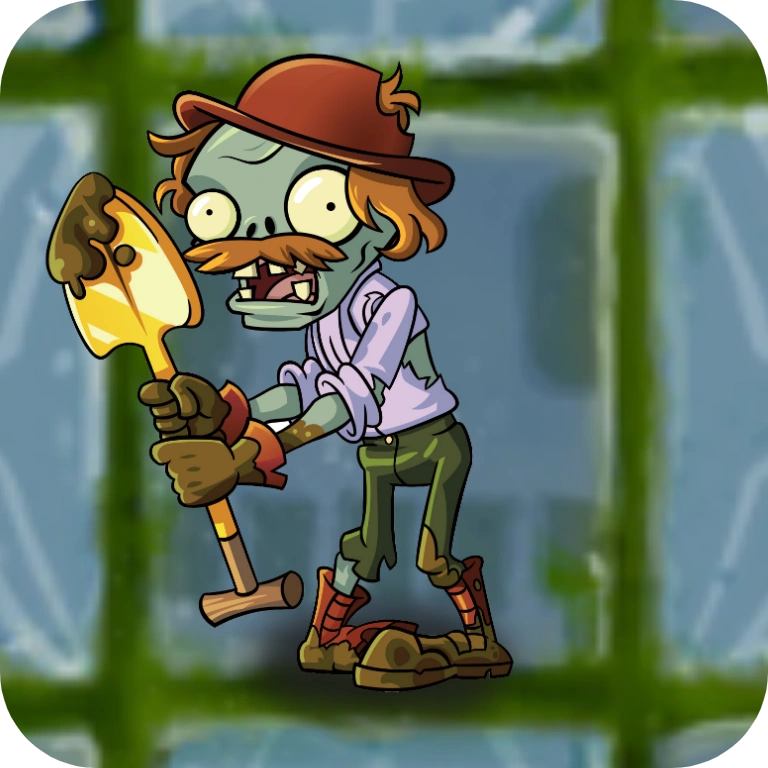
|
100
|
40
|
Stiff*
|
Immune to straight projectiles. Moves plants with its shovel.
|
Turquoise Skull Zombie
|
|
150
|
100
|
Basic***
|
Start of Turn: The player loses 10
|
Parachute Zombie
|
|
50
|
20
|
Still*
|
Drops in any tile, stealing the plant in it.
|
Snowman Imp
|
|
75
|
60
|
Basic*
|
Immune to Chill effects, Burn plants deal double damage.
|
Blockhead Zombie
|

|
100
|
60
|
Stiff**
|
Start of Turn: A random plant gets trapped in an ice block.
|
Zombie Yeti
|
|
150
|
80
|
Basic***
|
When Destroyed: All Zombies get +20 Health.
|
Weasel
|

|
0
|
10
|
Quick***
|
Come in groups of 3.
|
Rockpuncher Zombie
|
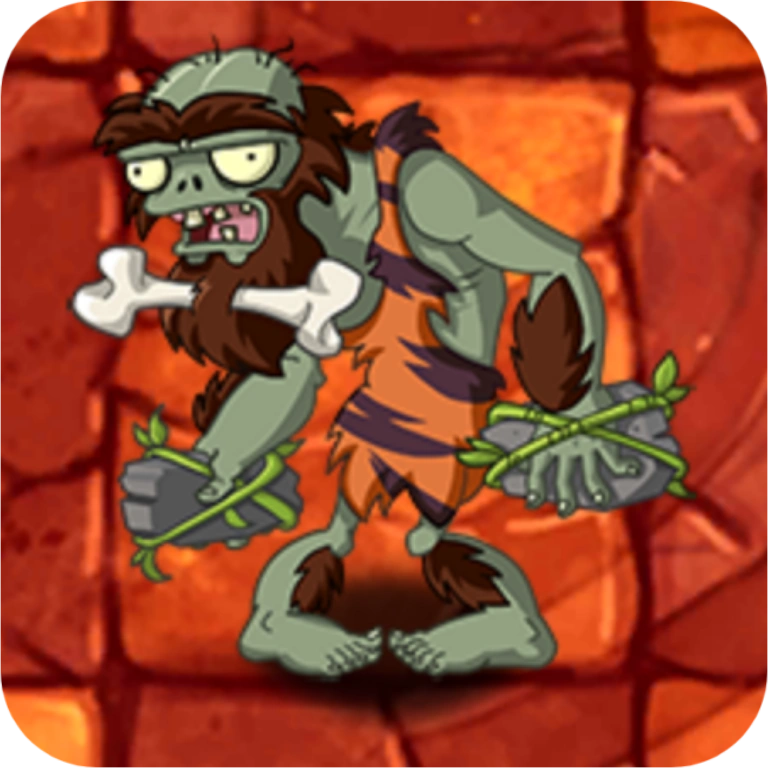
|
150
|
100
|
Stiff**
|
Start of Turn: Destroy a plant here, make a crater there.
|
Amberhead Zombie
|
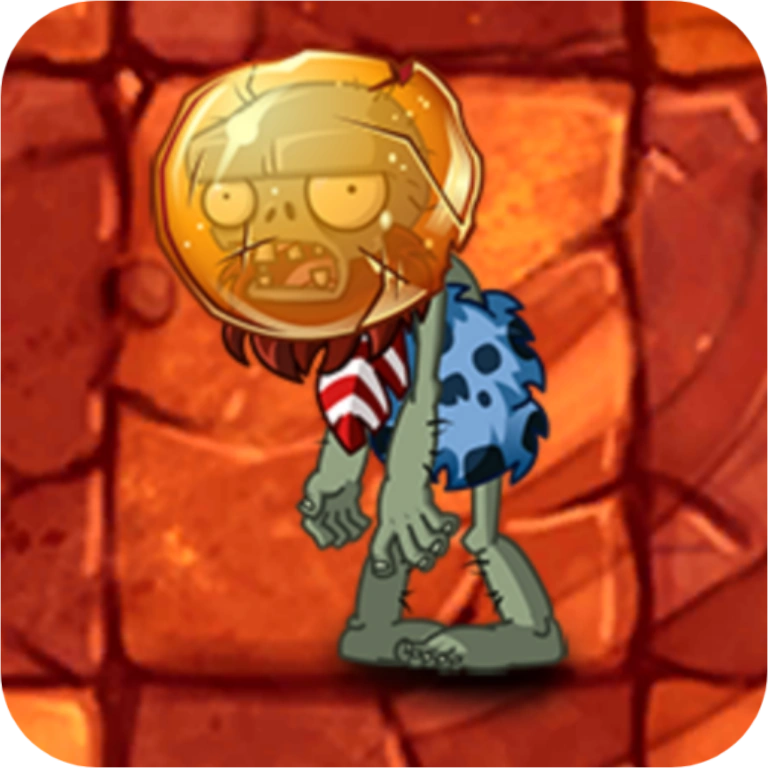
|
150
|
100
|
Basic***
|
Takes -10 Damage from all attacks.
|
Gargantuar
|
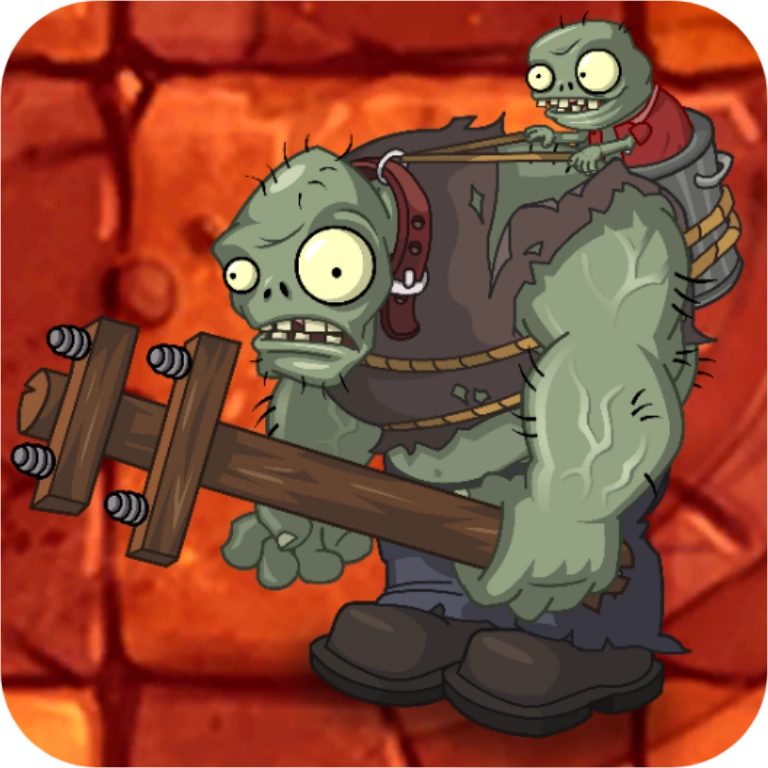
|
200
|
200
|
Basic***
|
-
|
Zombot 1000
|
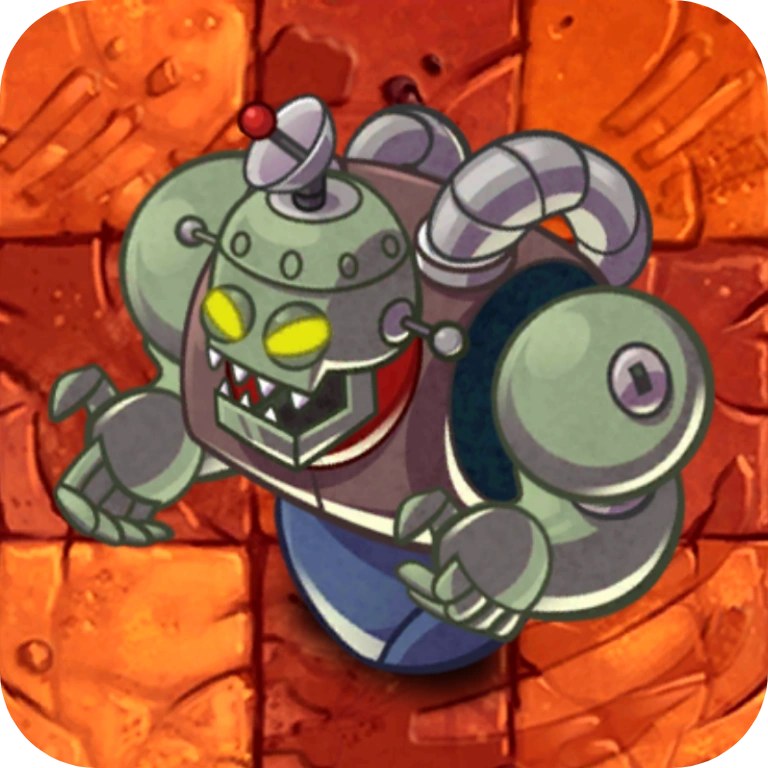
|
250
|
250 (1000 in Story Mode)
|
Stiff***
|
Start of Turn: Destroy a random plant, the player loses 25 Sun.
|
Zomb-Totem
|
|
150
|
100
|
Still*
|
Start of Turn: This moves to a random lane, leaving behind a Basic Zombie.
|
Healer Zombie
|
|
75
|
80
|
Stiff***
|
When a Zombie is destroyed, make a Heal Tile there for one turn.
|
Zombie Medusa
|
|
150
|
120
|
Stiff***
|
When a Zombie enters this lane, it gets +10 Health.
|
Angel Imp
|
|
50
|
40
|
Stiff*
|
Appears from the left side of the lawn.
|
Wizard Zombie
|

|
75
|
60
|
Basic**
|
Start of Turn: Transform a plant here into a Sheep. When Destroyed: Destroy all Sheeps here.
|
Potion Bugs
|
|
75
|
20
|
Quick**
|
When Destroyed: Turn plants in a 3x1 area into Frozen Blocks..
|
Hivehead Zombie
|
|
175
|
120
|
Basic*
|
When Destroyed: Make Beez here and next door.
|
Anti-Pollination Zombie
|
|
125
|
80
|
Stiff***
|
Start of Turn: Halve a Plant’s damage.
|
Syrup Imp
|
|
75
|
80
|
Rapid**
|
Attracts all projectiles here and next door.
|
Elite Bee
|
|
25
|
20
|
Quick*
|
End of Turn: This moves 1 Tile Forwards.
|
Pizza-Tron 3000
|
|
150
|
120
|
Stiff***
|
Zombies behind this have a Rapid speed.
When Destroyed: Make Cheesy Ghost Zombies next door. |
Cheesy Ghost Zombie
|
|
75
|
120
|
Quick*
|
When a Zombie is hurt, this gets hurt instead.
|
Sauce Imps
|
|
50
|
40
|
Stiff*
|
Start of Turn: Move a Plant here to another lane.
|
Soda Zombie
|
|
125
|
60
|
Basic**
|
Plants here cannot use their abilities
|
Marmalade Witch
|

|
175
|
100
|
Stiff***
|
Start of Turn: If this has 50
|
Zombot Swing Smasher
|
|
200
|
160
|
Normal***
|
Start of Turn: Move a random zombie behind this to the 5th column.
|
Tricky Lantern Zombie
|
|
100
|
60
|
Rapid*
|
When Destroyed: Make a Peashooter here for a turn, it then transforms into a Basic Zombie.
|
Caketank
|

|
50
|
20
|
Quick*
|
When this reaches the 5th column, this destroys itself and makes 2 Jester Zombies there.
|
Choco Zombie
|

|
150
|
120
|
Rapid**
|
Start of Turn: Zombies behind this get +10
|
Surprise Fruitcake Zombie
|
|
25
|
20
|
Still**
|
When a Plant destroys a Zombie, this destroys that Plant and every other Plant with 20
|
Cupcake Monster Zombie
|

|
150
|
100
|
Still***
|
When Hurt: This moves 2 Tiles forwards
|
Ice Cream Gargantuar
|
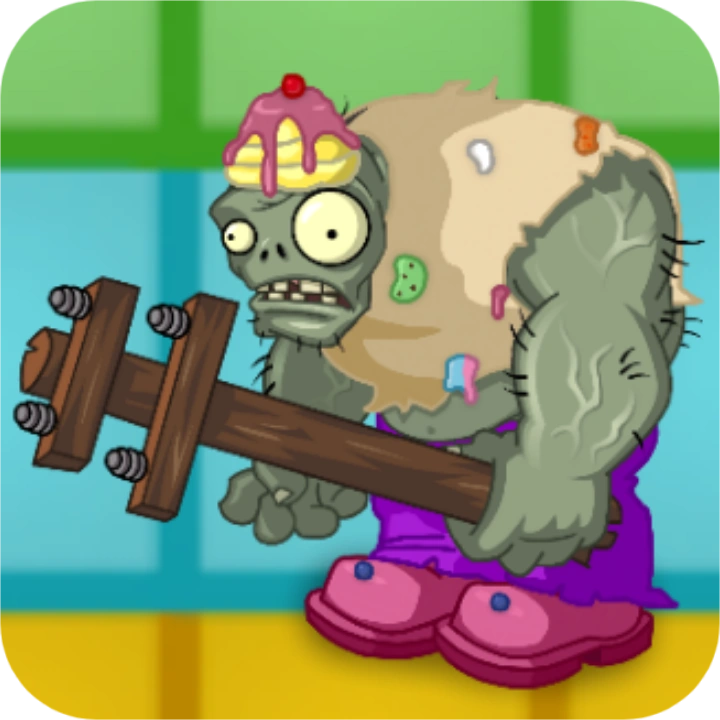
|
200
|
180
|
Stiff***
|
Start of Turn: All Plants here do -5
|
Firework Imp
|
|
25
|
40
|
Quick**
|
When Destroyed: This destroys 2 Plants and Zombies in this lane.
|
Electric Lights Zombie
|
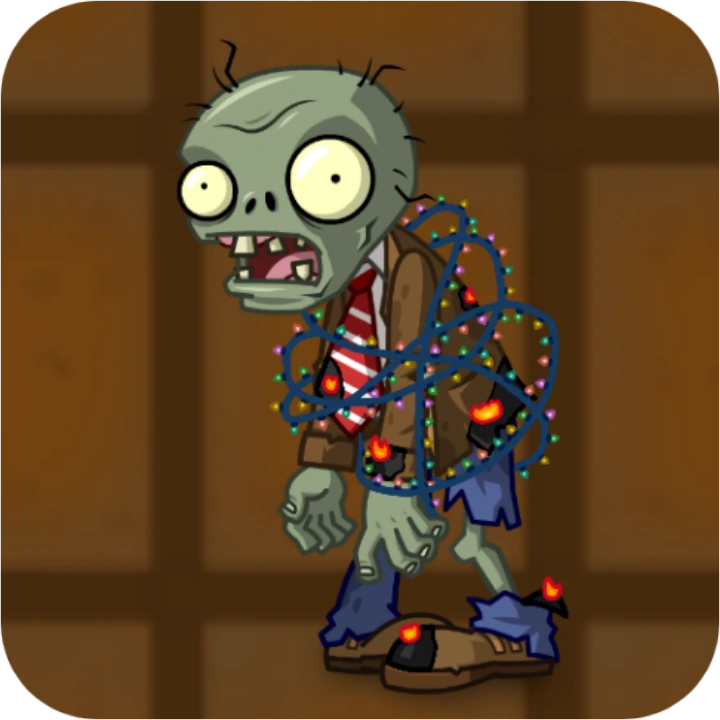
|
75
|
80
|
Stiff**
|
Immune to Burn effects. When hurt: This moves ½ Tile.
|
Magician Imp
|
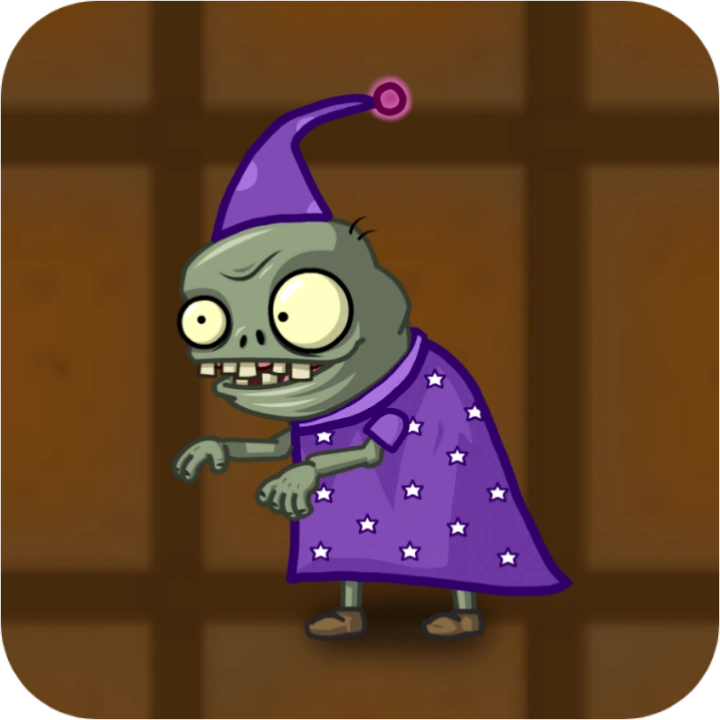
|
100
|
40
|
Still***
|
Start of Turn: Transform a random Plant into a Puff-Shroom.
|
Werewolf Zombie
|
|
125
|
100
|
Rapid***
|
This gains +20
|
- Stiff Speed = Moves 1/2 Tile every turn.
- Basic Speed = Moves 1 Tile every turn.
- Rapid Speed = Moves 1 1/2 Tiles every turn.
- Quick Speed = Moves 2 Tiles every turn.
Other Entities
Image
|
Health
|
Ability
| |
|---|---|---|---|
Crater
|
|
-
|
Plants can't be planted here for 2 turns.
|
Heal Tile
|

|
-
|
Start of Turn: Zombies here heal 10
|
Sheep
|
|
-
|
-
|
Coffee Puddle
|
|
-
|
Plants here do +5 Damage.
|
Image
|
Damage
|
Defense
|
Range
|
Ability
| |
|---|---|---|---|---|---|
Syrup Bottle
|
|
20
|
Regular
|
Lobbed
|
All Syrup Bottles and Syrup Berries do +5
|
Special Effects
![]() Chill: Reduces zombie Speed by 1/2 Spaces.
Chill: Reduces zombie Speed by 1/2 Spaces.
![]() Burn: Does increased Damage (+5) to a zombie if damaged continuously.
Burn: Does increased Damage (+5) to a zombie if damaged continuously.
![]() Thaw: Unfreezes plants trapped in Ice Blocks (Blizzard Peak).
Thaw: Unfreezes plants trapped in Ice Blocks (Blizzard Peak).
![]() Revive: A previously destroyed plant reappears.
Revive: A previously destroyed plant reappears.
![]() Knockback: Zombies are thrown backwards one tile.
Knockback: Zombies are thrown backwards one tile.
![]() Stun: Zombies do not move for a turn.
Stun: Zombies do not move for a turn.
Characters
 |
|
| Description: She is an important peas of the L.E.A.F. team! | |
| Starting Character | |
| Superpower: Pea Blaster - All Peas do +10 |
|
| Green Shadow | Dice Block:   |
 |
|
| Description: Her biggest fear is the waterpark. | |
| Starting Character | |
| Superpower: Scorching Petals - Plants cost 10 |
|
| Solar Flare | Dice Block:   |


 |
|
| Description: What a hothead, yeez. | |
| Starting Character | |
| Superpower: Tater Toss - Do 10 damage to all zombies every other turn. | |
| Spudow | Dice Block:   |
Boards & Lawns
The lawns are the main setting where the player fights against the zombies, and are located in front of the player's house. The boards are where the characters move, going through the different spaces, and where they buy the plants used on the lawns. Each board comes with a special lawn, and a gimmick.
Lawns are used in both the Story Mode and Quick Match modes. However, boards are exclusive to Quick Match, as a special unique board is used for the Story.
Each board and lawn have its own gimmick, see their effects below:
Board
|
Gimmick
|
Lawn
|
Gimmick
|
|---|---|---|---|
Pay 25 Sun in certain spots to be taken to another place.
|
3 random Zombies change lanes at the start of every turn.
| ||
Plants cost 10 more Sun.
|
Gravestones spawn every 5 turns. And they reveal random zombies every other turn.
| ||
Spaces change every other turn.
|
The tide changes every turn, drowning non-aquatic plants in its way.
| ||
Minigames give -15 Sun.
|
5 Gold Tiles appear in random tiles every game, giving 10 Sun every other turn when a plant is on them.
| ||
Players move back 2 Spaces every turn.
|
Plants turn into frozen blocks after 3 turns. World Plants are immune to this, and make plants in a 3x3 area immune as well.
| ||
Every other turn, a random Space turns into a Doom Space.
|
Fog appears, blinding an area on the right.
| ||
The Player with the least amount of Sun moves 1 Space every turn.
|
3 Heal Tiles change of position every turn, healing zombies that step on them for 10 Health.
| ||
Every player rolls their regular Dice Block, along with a Beez Dice Block.
|
Beez appear every other turn, destroying 2 plants in their way.
| ||
Item Spaces are replaced with Pizza Spaces.
|
A random zombie gets +20 Health every turn.
| ||
Minigame losers give 10
|
Start of Turn: A Peashooter and a Basic Zombie are randomly added to each players' lawns.
| ||
Minigame winners move 2 extra Spaces every turn.
|
Start of Turn: Move the rightmost zombie 1 tile.
| ||
Start of Turn: The player with less zombies on the lawn gains 25 Sun.
|
When a Zombie is destroyed, a Coffee Puddle appears for a turn there.
|


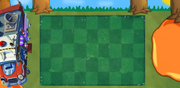
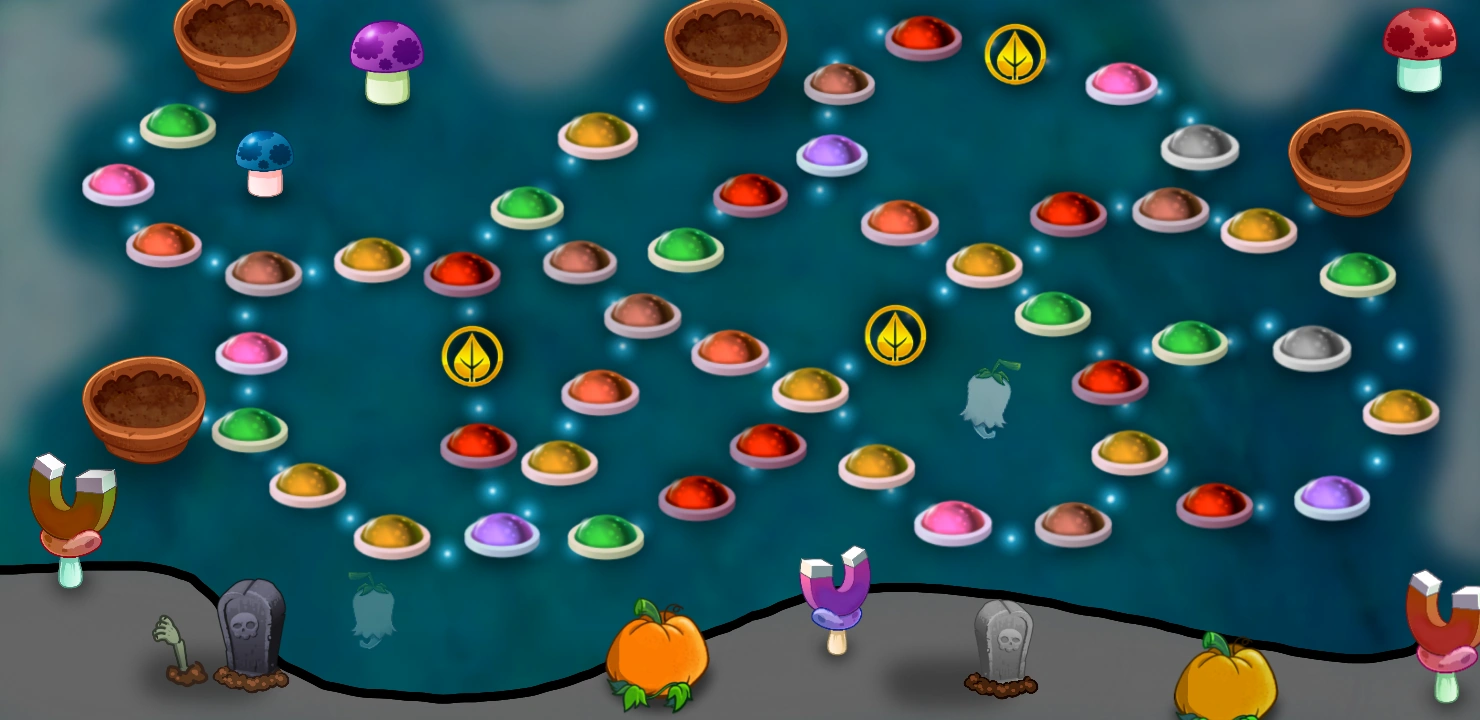
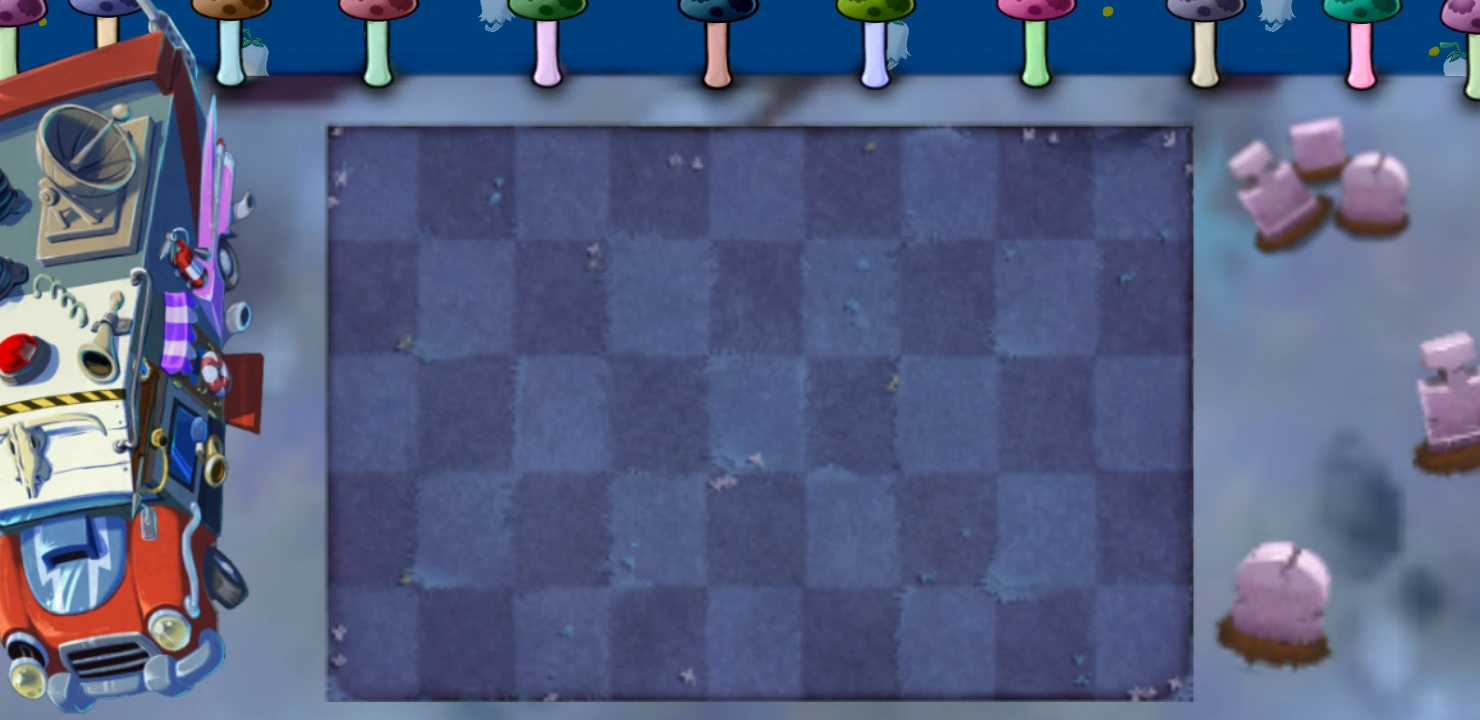

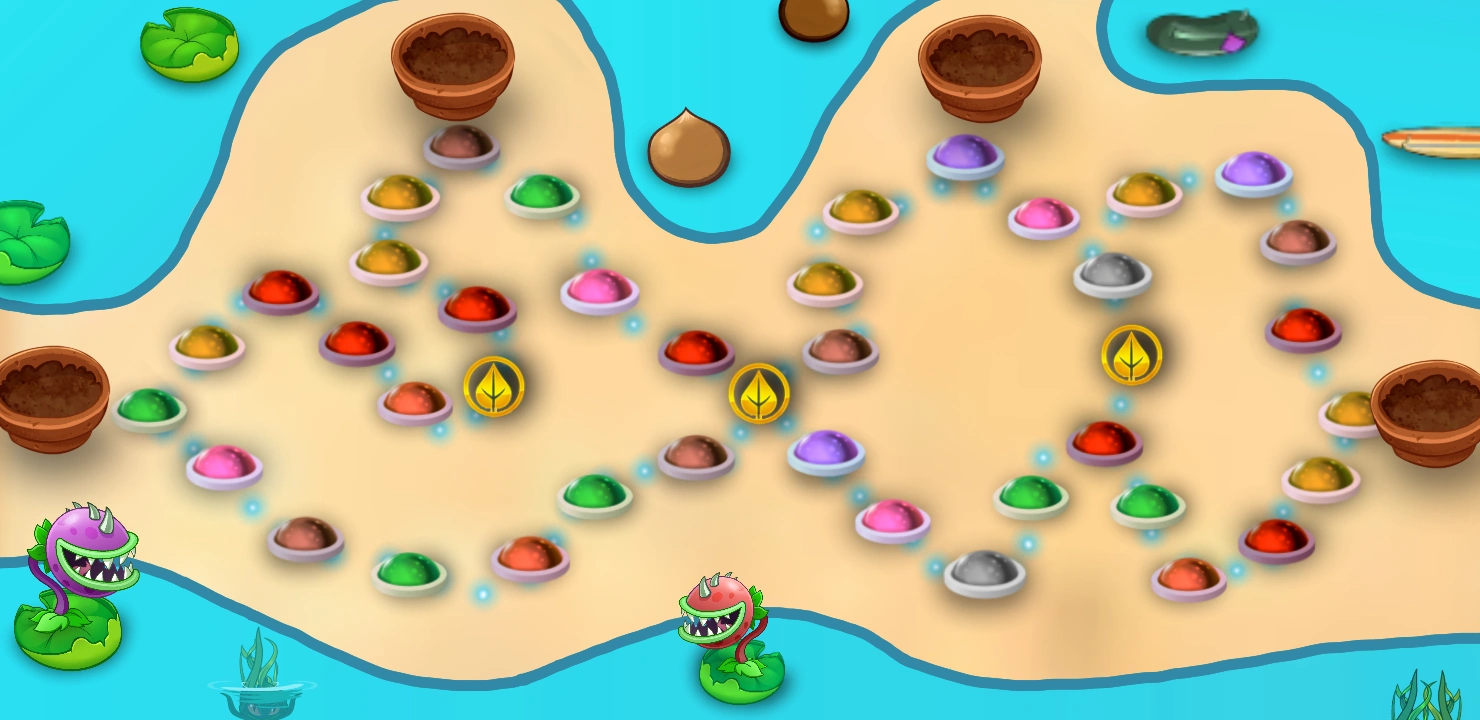

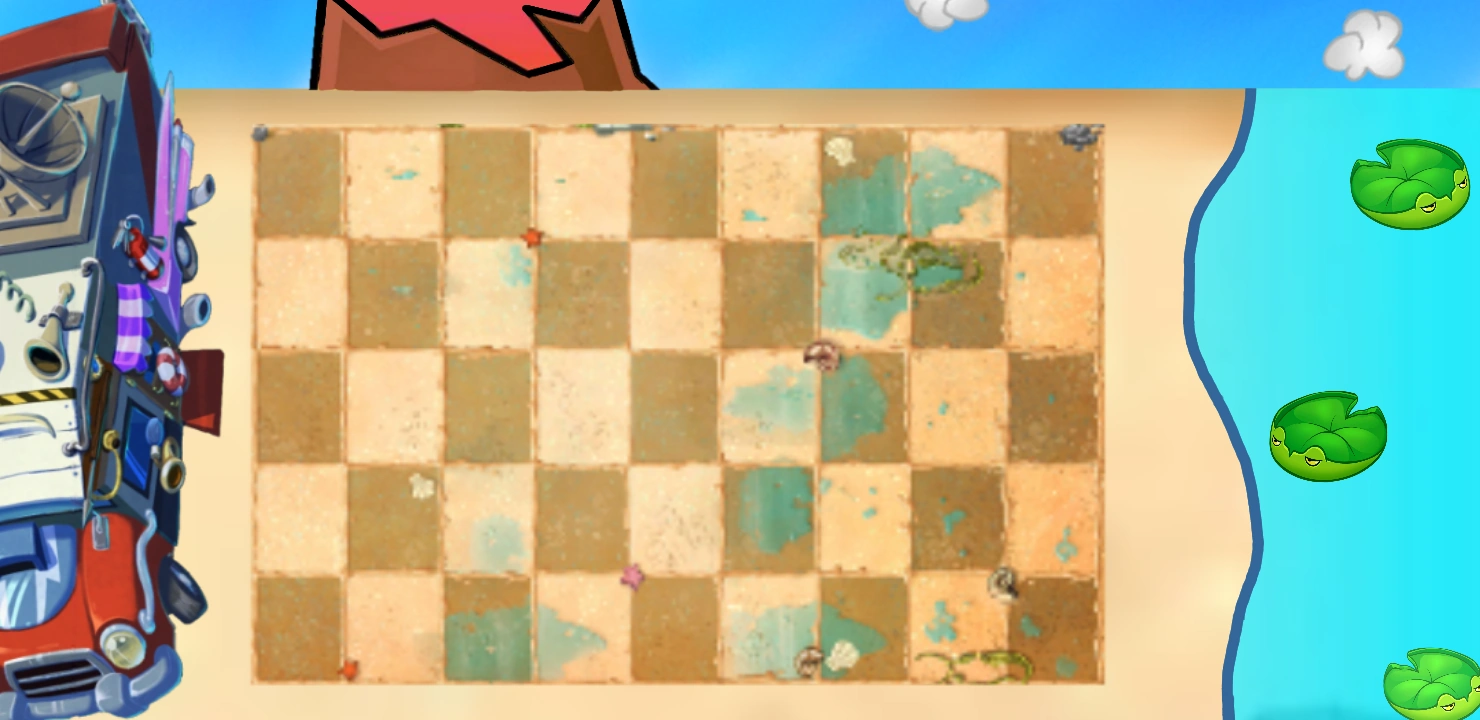

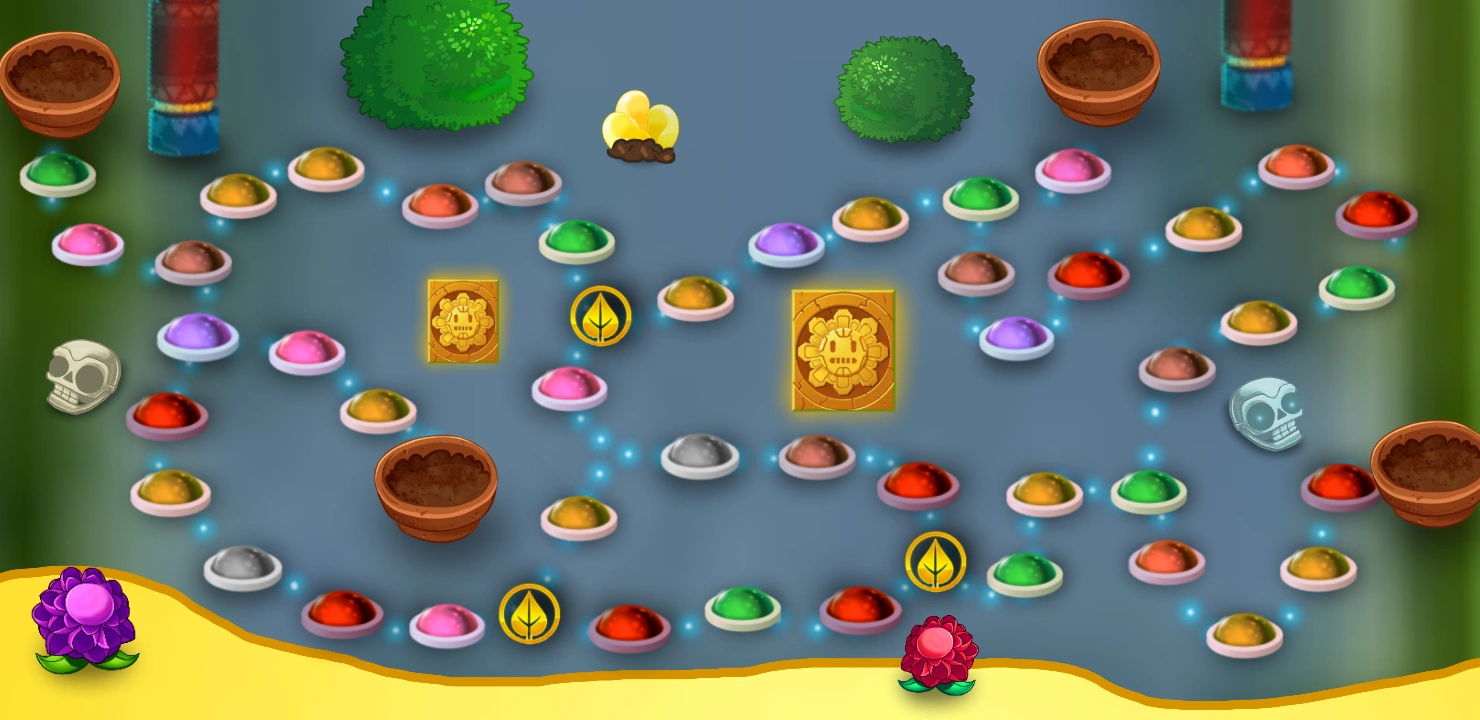
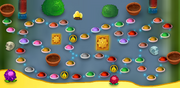
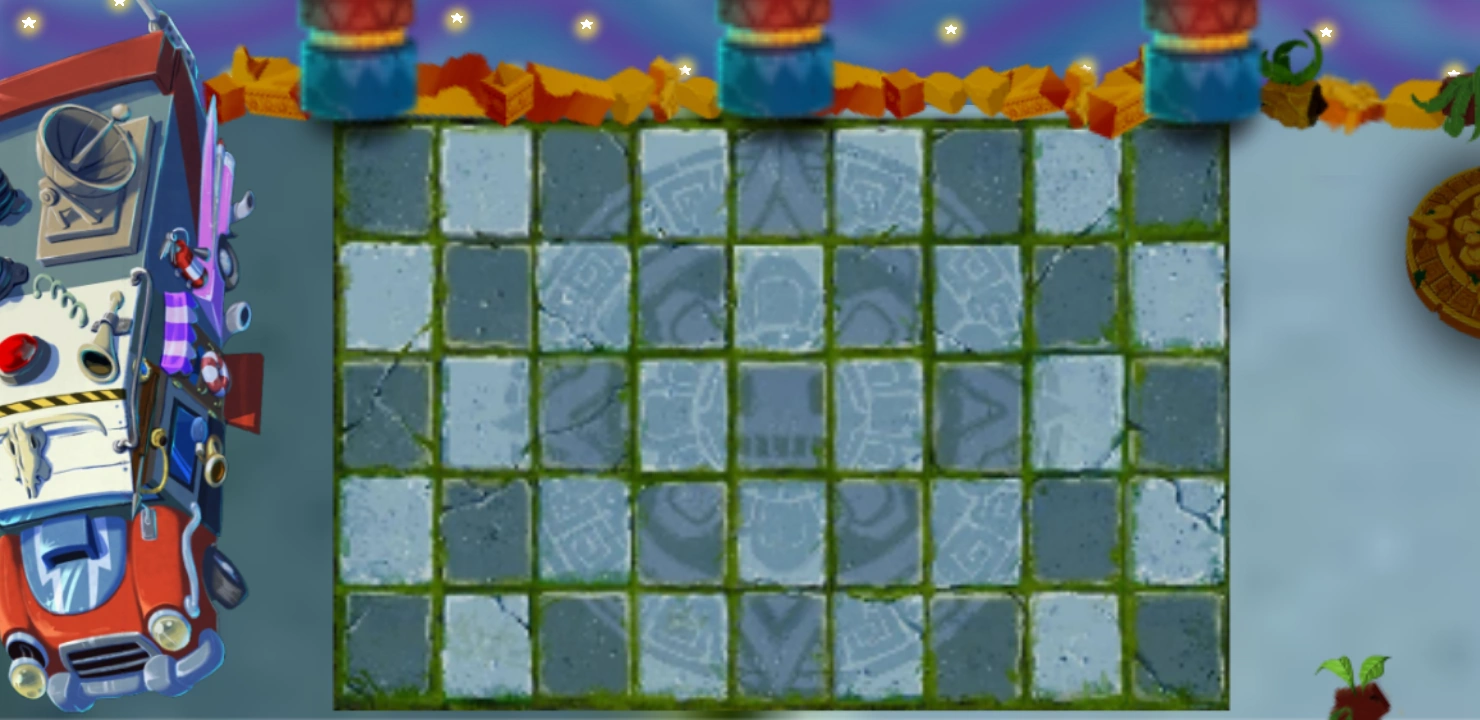
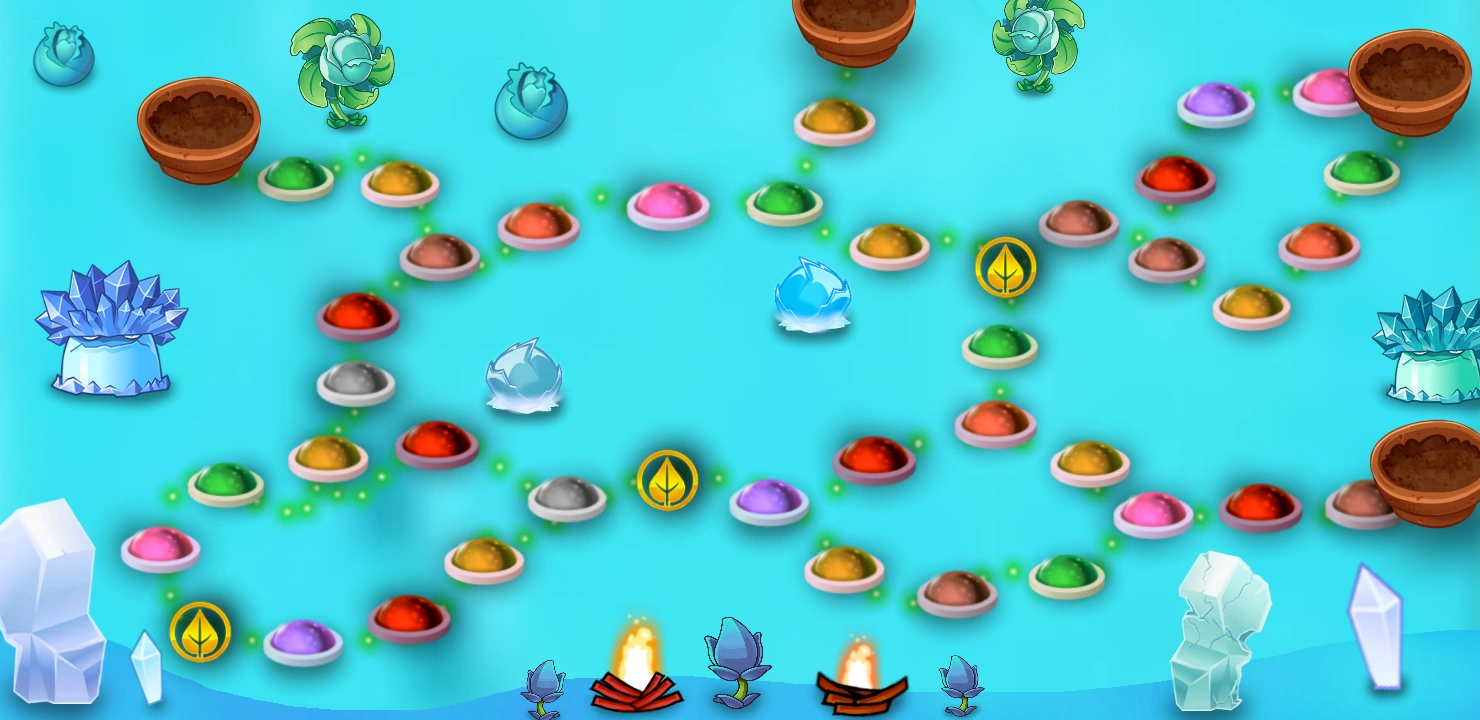


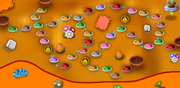
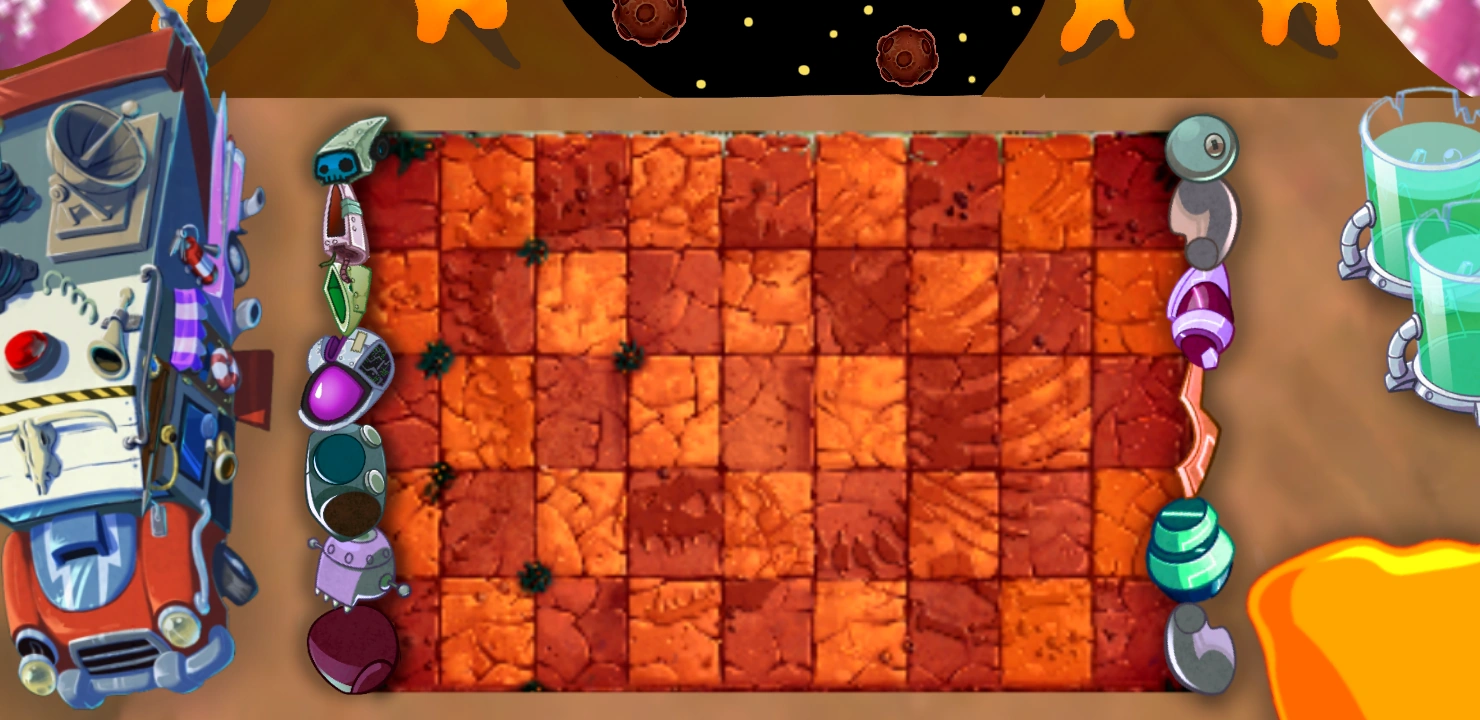

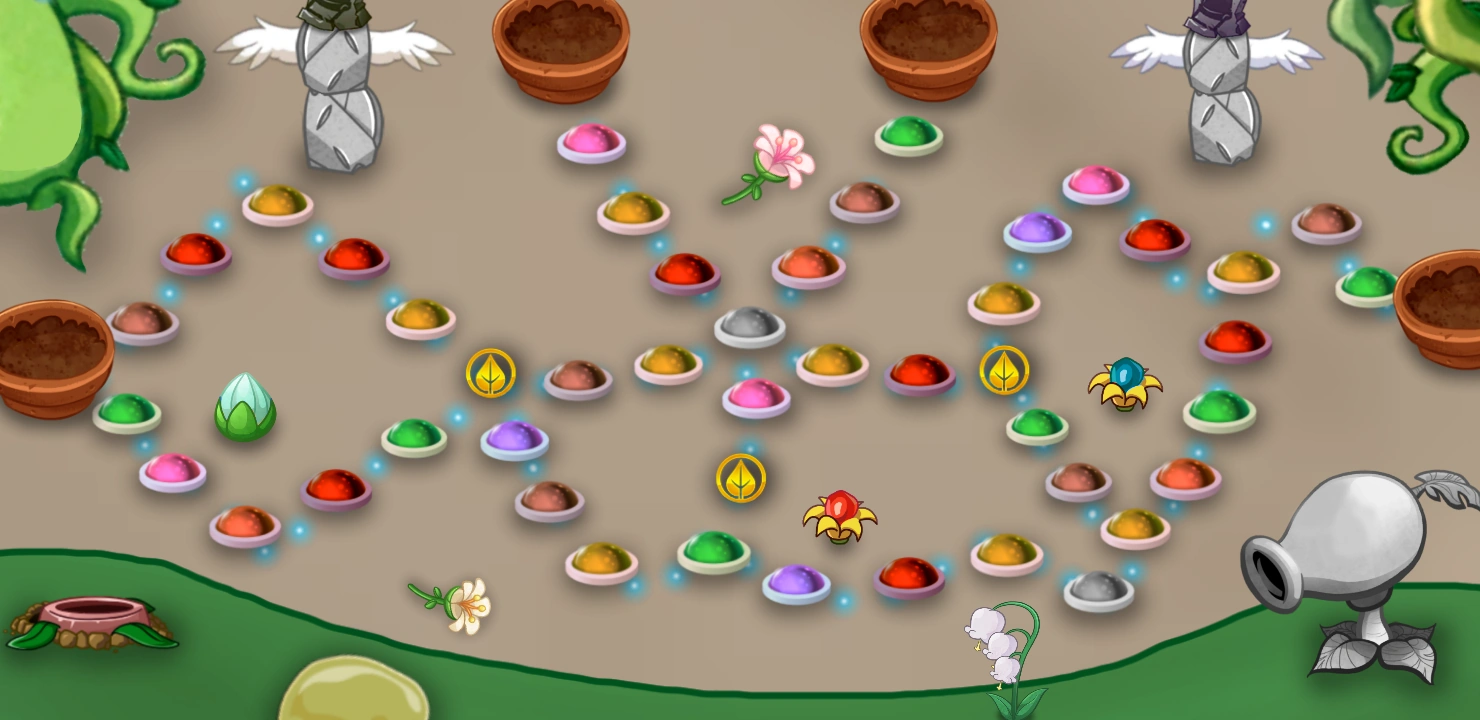

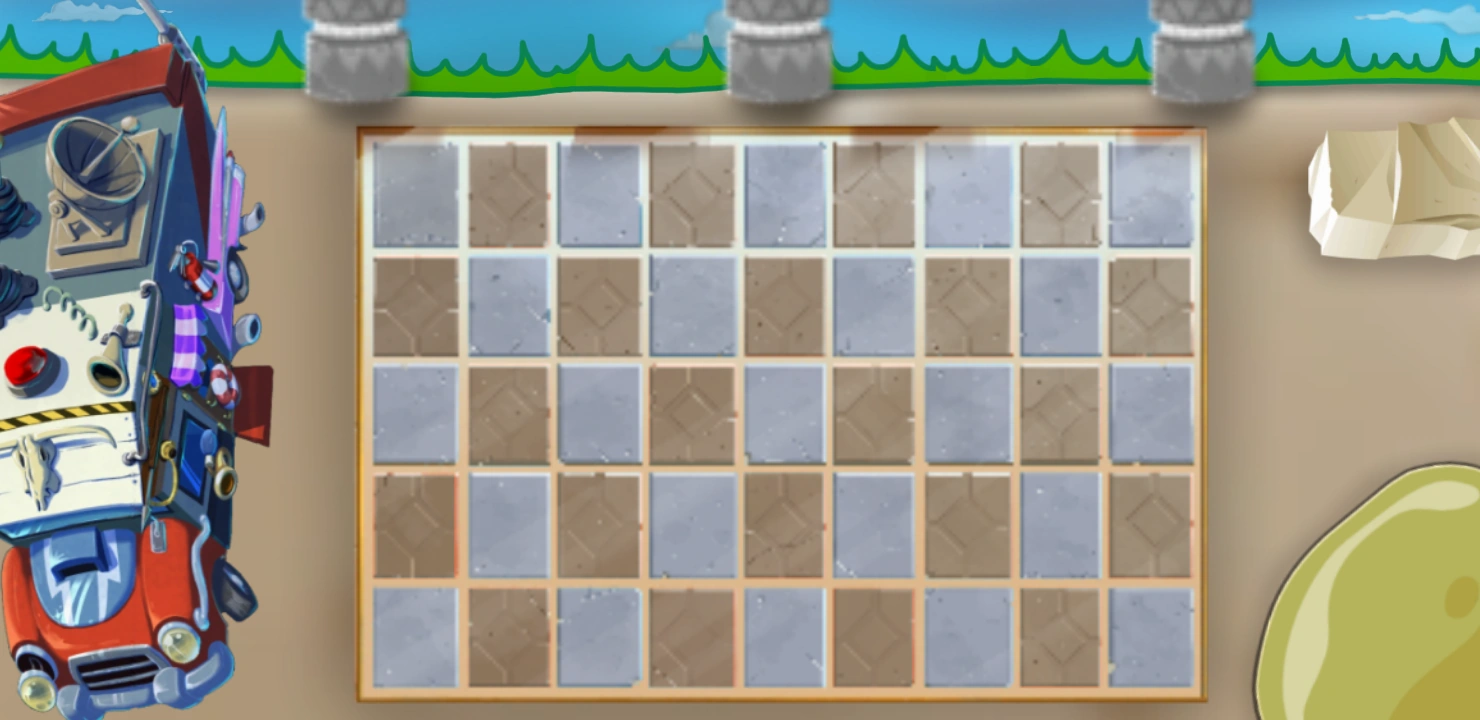


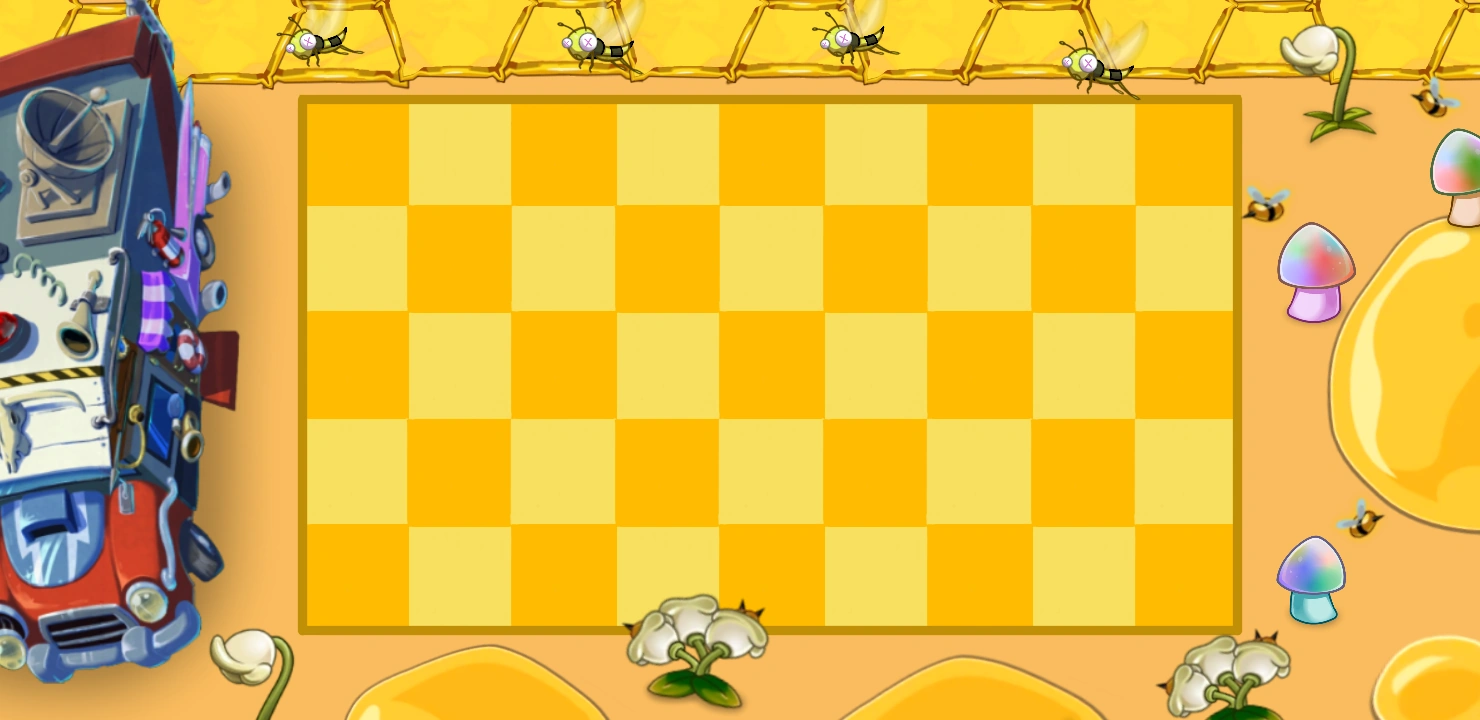

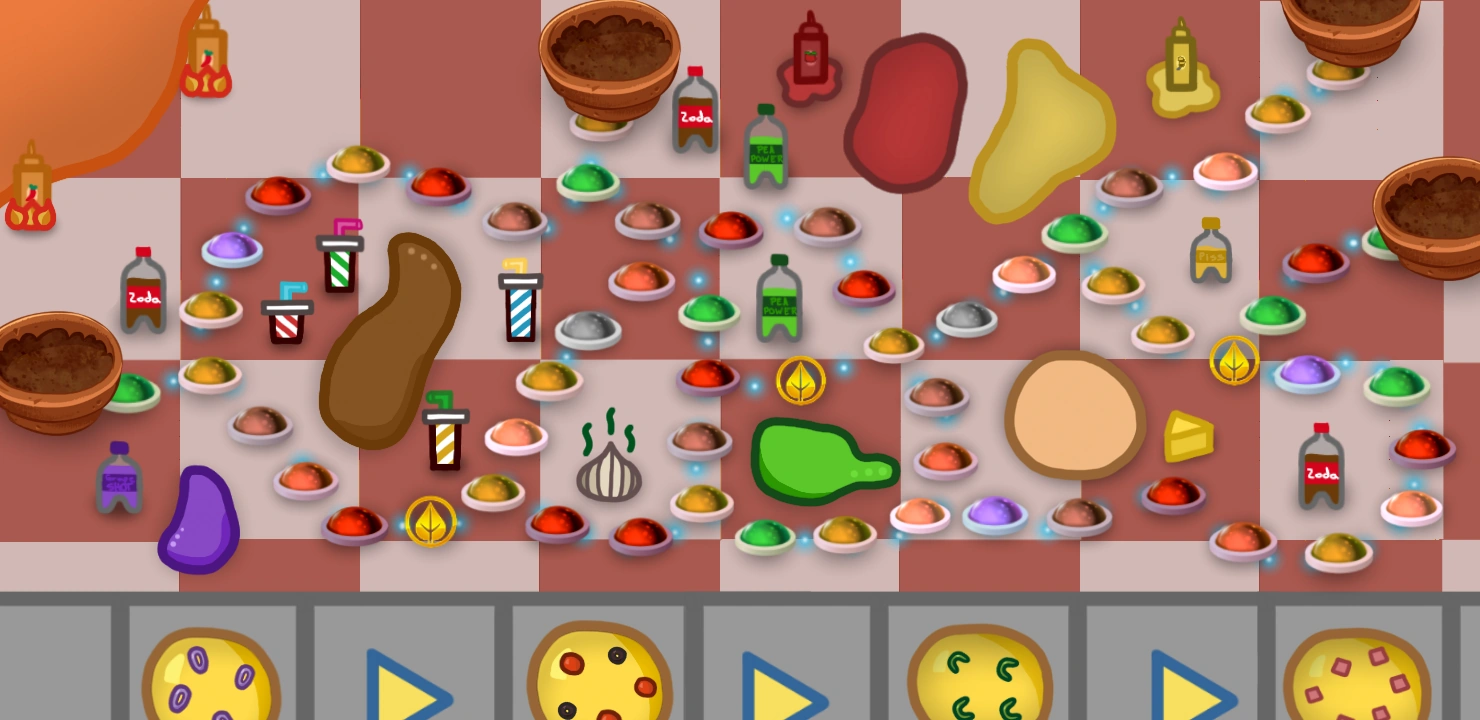
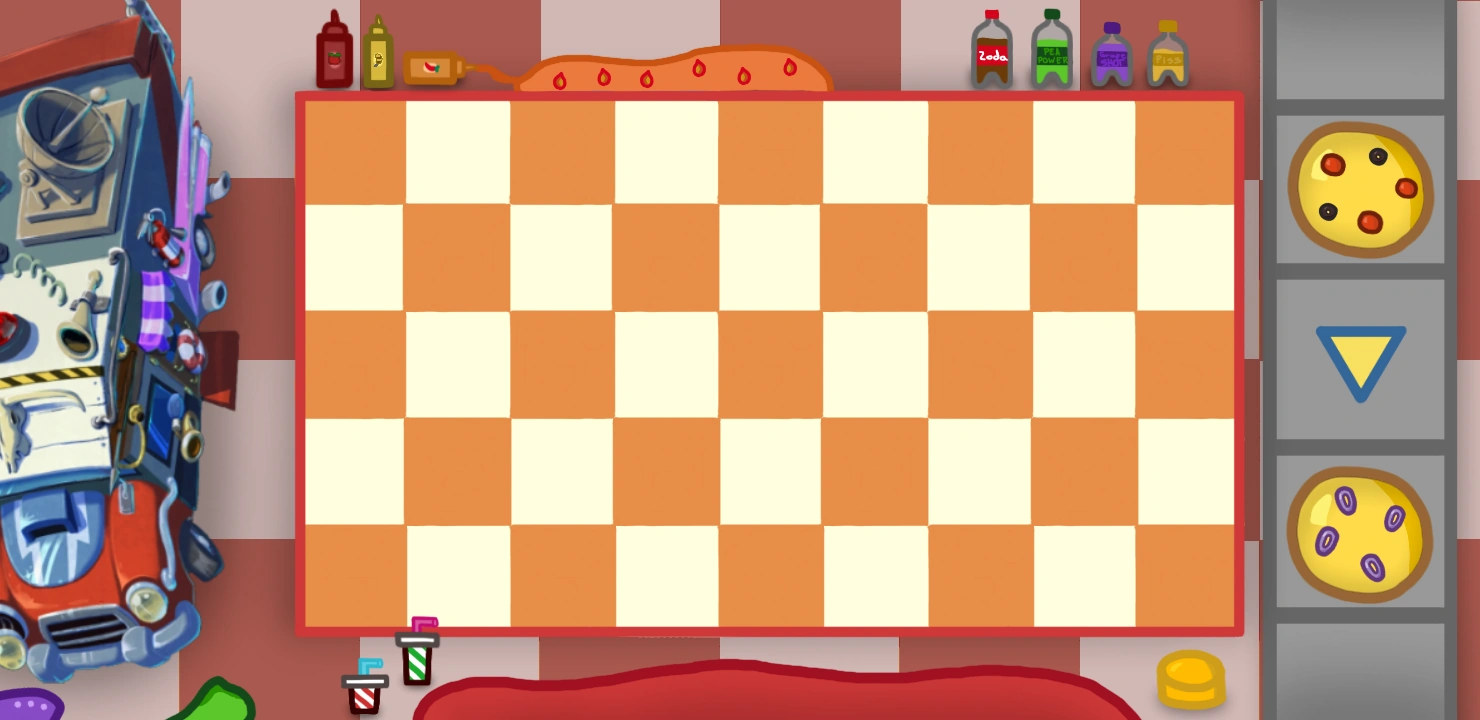


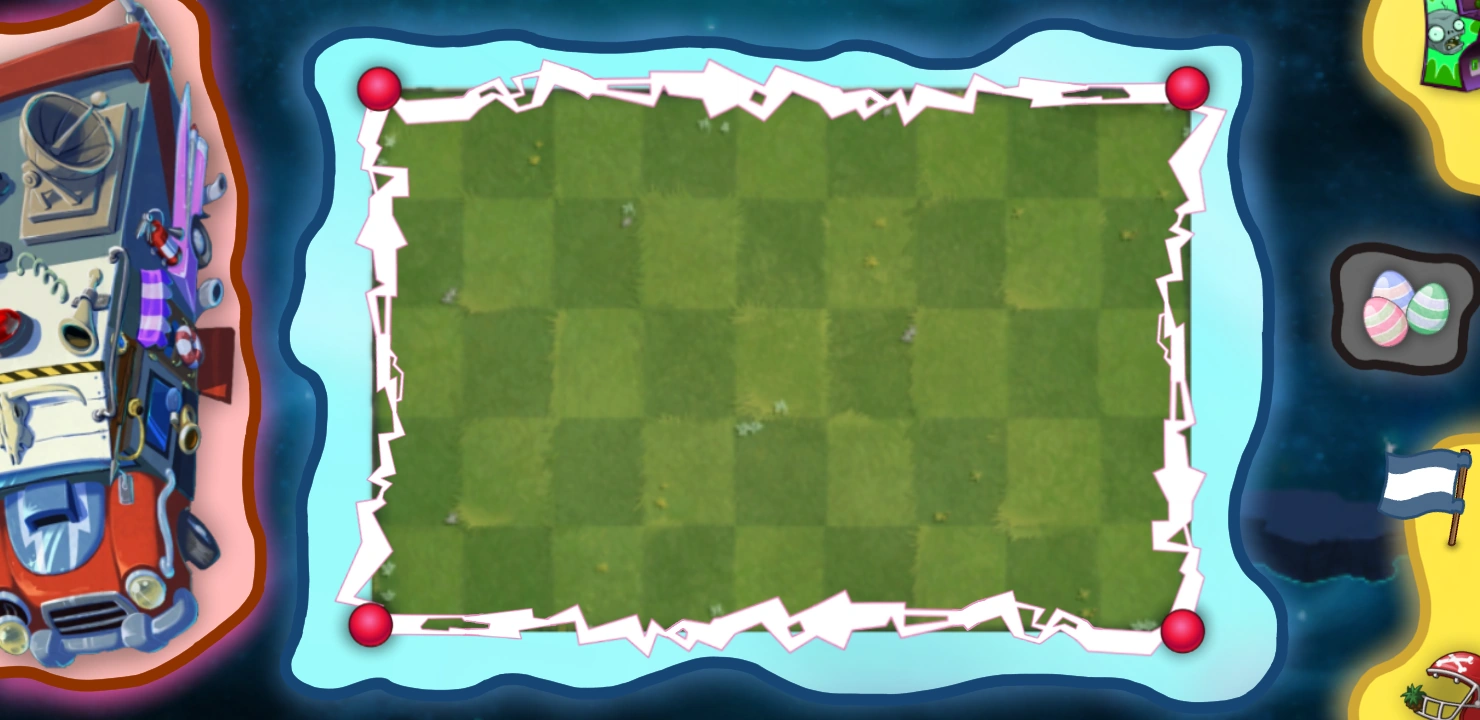
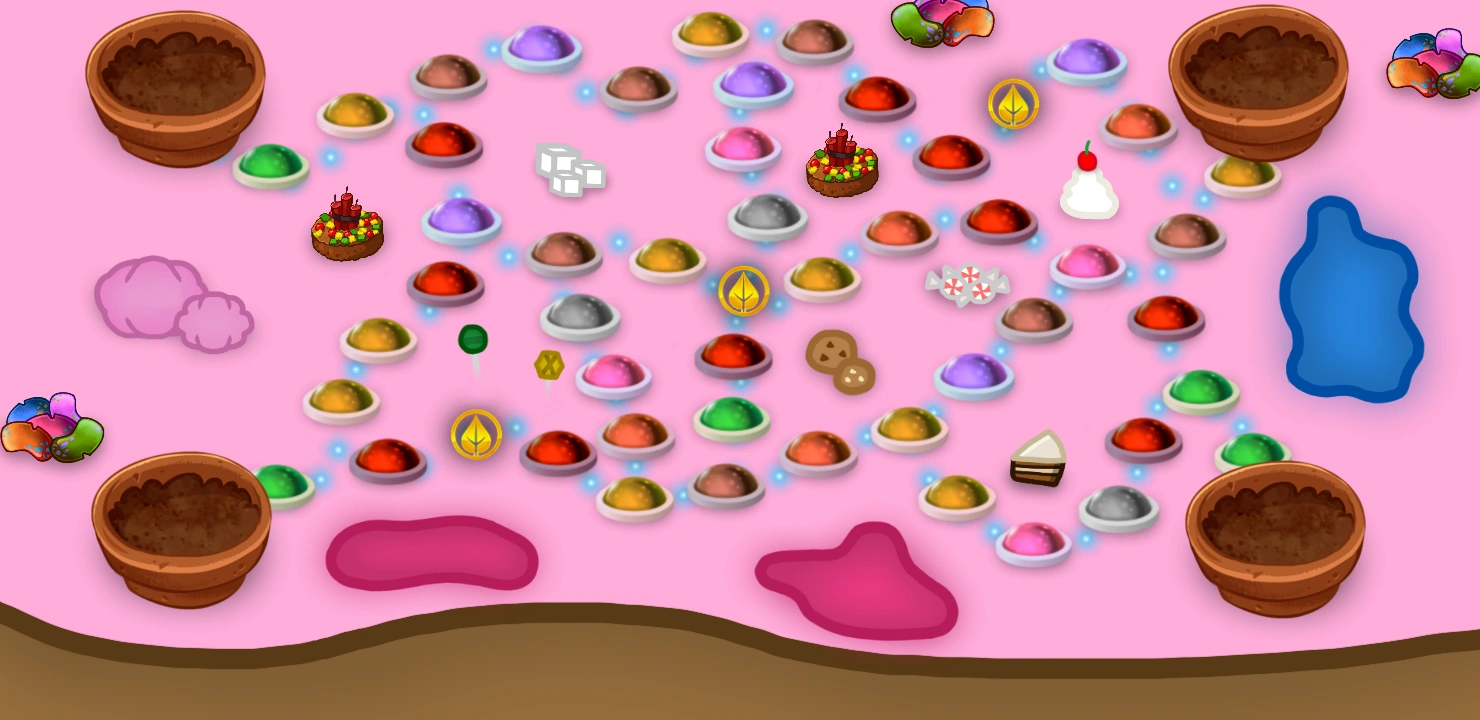

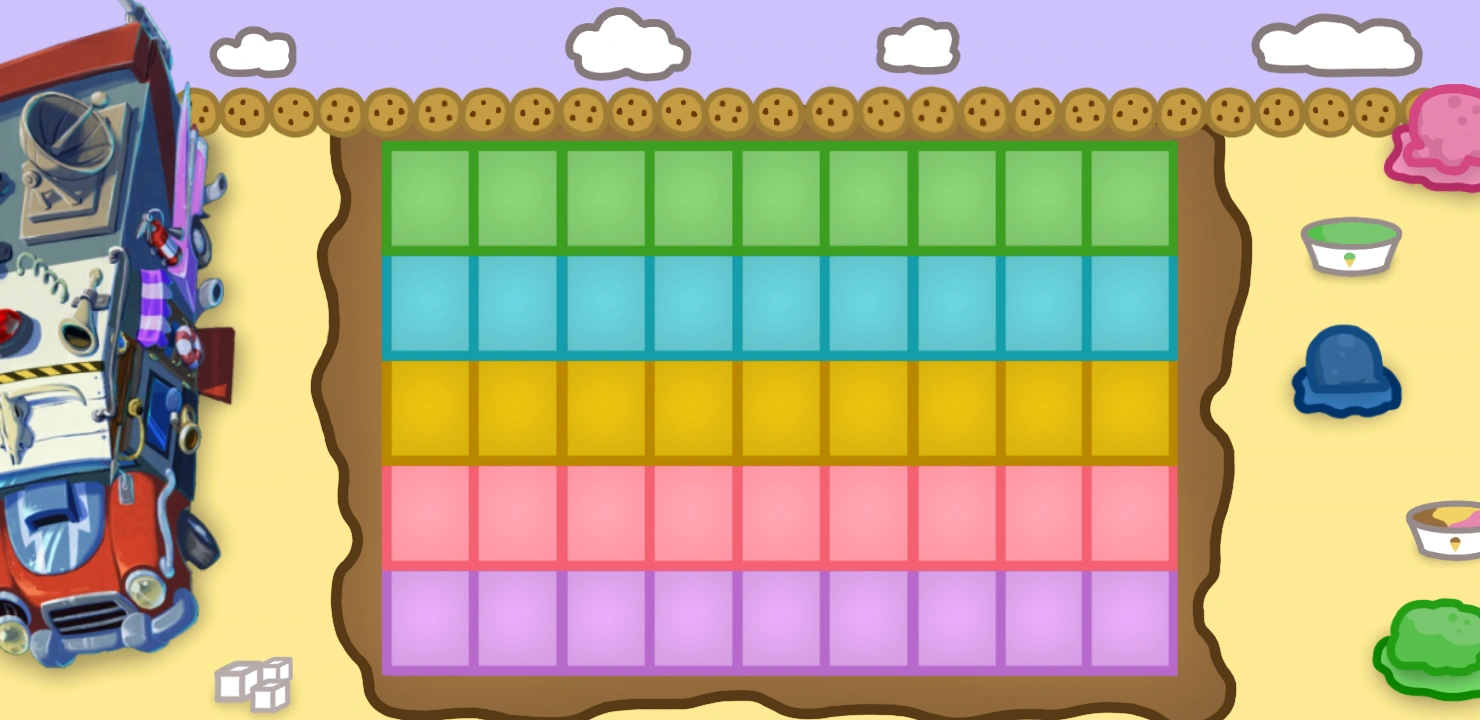
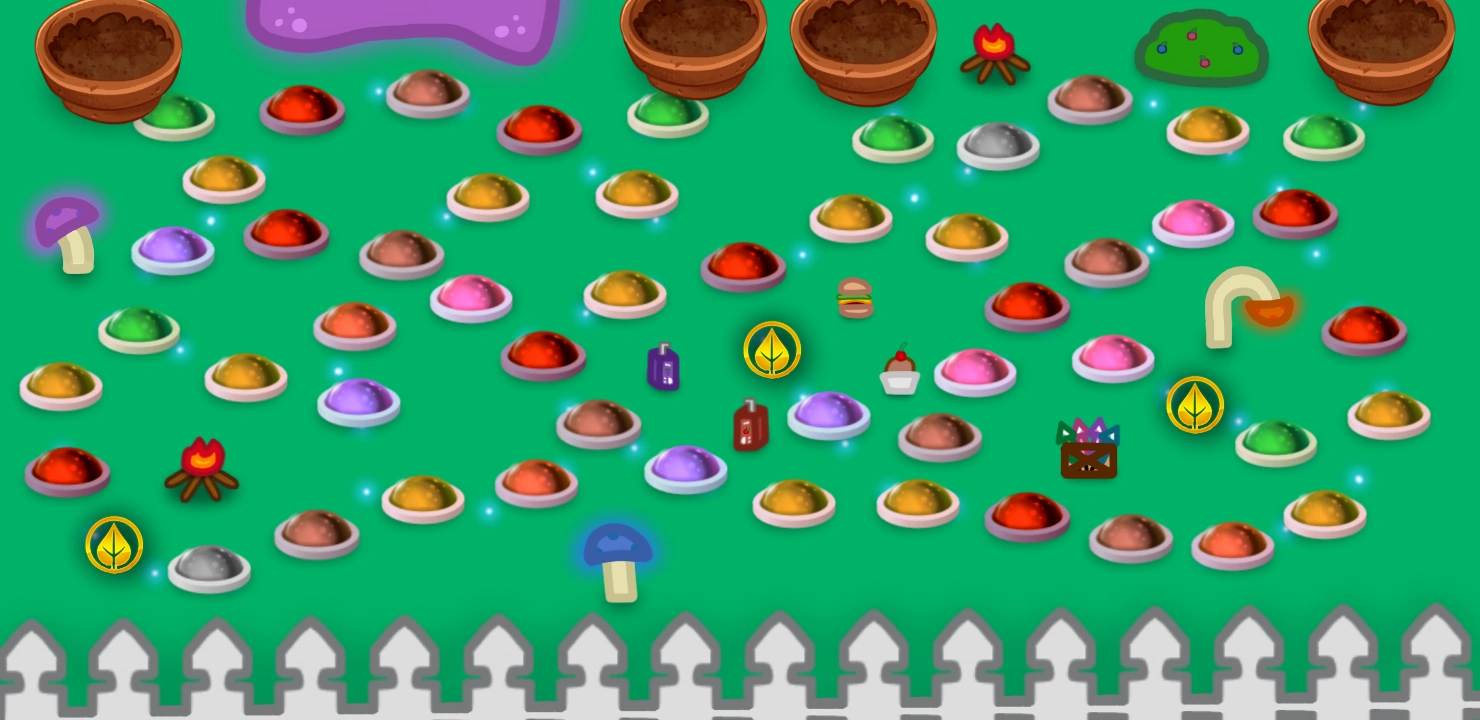


Minigames
The minigames are the main way of getting Sun in order to purchase plants in Quick Match and Story Mode. There are a total of 60 minigames, 15 returning from the first game.
A minigame is played after every turn, and depending on the placement players got in the minigame a set amount of Sun is given to them. Here are the prizes for each place:
| Free-for-All Minigames | 2v2 Minigames | 1v3 Minigames | |||
|---|---|---|---|---|---|
| Position | Prize | Position | Prize | Position | Prize |
100
|
Winner Team | 075
|
Winner(s) | 150
050 | |
075
| |||||
050
|
Loser Team | 025
|
Loser(s) | 000 (Solo & Team Players) | |
025
| |||||
Here is the list of the minigames:
- Whack-a-Zombie: Zombies come out of gravestones and you must destroy them with your hammer. However, some of them can use plants to cover themselves, making you lose if you destroy them. The player that destroyed more zombies wins.
- Camel Showdown: Similar to the one in Plants vs. Zombies 2, here camels will go to your house, and to defeat them you must make matches with the signs they have. The player with the best time wins.
- Deep Sea Mysteries: Each player must fish as much as they can for 45 seconds, gaining points based on what they fish, some things give out more points .
- Winter Power: Use Iceberg Lettuces to destroy zombies in your screen, the fastest player wins.
- Fire-Ice Battle: Use either Ice-Shroom or Jalapeno to stop Dr. Zomboss' snowballs/fireballs! If you use the wrong plant, you lose.
- Mower Champions: In 30 seconds, use your lawnmower to cut as much grass as you can. Once the time is over, the player that mowed the most wins.
- Card Draw: Draw a showcased plant, the most accurate player wins.
- Corn Maze: Find the exit of the maze you are trapped in. You will see the whole maze briefly when the minigame begins. The order in which you get out of it determines the minigame's position.
- Melon-y Line: Watermelons will be dropping from the sky and you have to catch them, but be careful as zombie heads will also drop down and if you catch them, you lose points, frozen watermelons are worth double points. The player with the most points wins.
- Sun Robbers: Sunflower will show a button sequence that you have to follow to get sun, there are 10 rounds, the player with the most sun wins.
- Sappy Ending: Each player has to cover 1 zombie's body with sap in 30 seconds, after the time has passed, the player that covered most of the zombie in sap wins.
- Tough Lob: Players must manipulate a catapult in order to take down approcching zombies, if a zombie gets too close, you lose. Gargantuars can sometimes appear, being slower but taking 2 hits instead of 1 to destroy.
- Spore Counting: Count the Puff-Shrooms on the screen while many other mushrooms distract you. The player with the most accurate number of Puff-Shrooms wins.
- Fast Catch: Catch plants that are falling from the sky with a Flower Pot. Each plant awards you with 1 point. The player with most points wins.
- Spare Spores: Spores will be thrown from the sides, and you must avoid them or else you lose. The minigame lasts for 40 seconds, and the longer it lasts, more spores appear.
- Smelly Vimpires: In a wide field, there are a bunch of Vimpires approaching, if they get near you, you lose. In order to defeat them, grab Garlics from the ground and throw them at the Vimpires. The last player standing wins.
- Beghouled: Match as many plants in groups of 3 as you can, each match grants 3 points, while making a mistake is a 1 point loss. The player with most points after 30 seconds wins.
- Octo Surpise: Use Hot Potatoes to melt the Octopi trapping your plants. When a player melts all octopi, the minigame ends.
- Jester Twister: Launch different projectiles for Jester to deflect them to other players, you gain points when you hit someone, but lose some if you get hit. After 45 seconds, the player with most points wins.
- Dino Attack: Ride one of 4 different dinosaurs and race to the finish line, avoiding obstacles. Each dinosaur has a different ability and stamina.
- Wisdom Treeway: Get Fertilizers, Watering Cans, and Bug Spray to grow your Wisdom Tree, if you don't attend it, it will shrink down. After 60 seconds, the player with the tallest Tree wins.
- Zombatar Destruction: A Zombie will be shown briefly, and each player must recreate it with the correct clothing and accesories. Each item that a player gets right is worth 1 point. The player with most points wins.
- Jam Slam: Players must make a certain action depending on the jam that is playing, if players get it wrong, they lose. Once all players but one have lost, the minigame ends.
- Seed Bloom: Plant as many seeds as you can in a huge field, you can remove the other player's seeds as well with your shovel. The player that planted the most seeds wins.
- Chocolate Lure: Use chocolate to lure Stinky the Snail towards your zone of the lawn. The first player to lure Stinky wins.
- Squashing Fields: Harvest Squashes and throw them at other players to knock them off the lawn, when a player is knocked off, it loses. The last player standing wins.
- Mega Shuffle: 4 cards will be shuffled into a deck of 20 cards, each player must pick a number between 1 and 4, and the chosen amount will be the number of cards that you move, once you find one card, you win.
- Sheep Attack: Avoid the transforming rays of Wizard Zombie that will turn you into a sheep! Once you are hit, you lose.
- Fungal Expansion: Grow a Fume-Shroom as much as you can using the microphone, after 20 seconds, the biggest Fume-Shroom wins!
- Lucky Blover: Blow away a zombie using Blover, the player that sends it the farthest wins.
- Gravestone Escapade: Use Grave Buster to remove the gravestones, while one player harvests them, the other uses them to remove the gravestones, the team that destroyed the most after 30 seconds wins.
- Zen Gardening: Team up with your partner to put plants in Flower Pots, one player puts seeds while the other waters them, the team with more plants wins.
- Wall-Nut Bowling: Work as a team to destroy as many zombies as you can using 1 Wall-Nut! One player will arrange the zombies so the other one can knock them all down. The team that destroyed the most zombies wins.
- It's Raining Seeds: Catch the seeds falling from the sky with a Flower Pot, pass the Flower Pot to your partner so they can catch seeds as well, the player that catches the most seeds after 60 seconds wins.
- Vine Climb: Climb the vines until you reach your partner, each player does half the climbing. The fastest team wins.
- Pea Pod Growth: Fill the Pea Pods as much as you can by following the correct button sequence as a team. The player that fits the most peas in the Pea Pod wins.
- Banana Launching: Shake the controller in order to power the Banana Launcher with your teammate, after 10 seconds, the banana will be launched, the player that launched it the farthest wins.
- Food Fight: Throw food at the other team in order to earn points, hitting another player grants 1 point. After 45 seconds, the team with more points wins.
- Shadow Menaces: Expand your shadow area using Moonflower against the other players. If you hit other players, you will produce more of your shadow area. After 30 seconds, the team with the most area wins.
- Sod Planters: Fill the lawn with many Sod pieces, override the other team's Sod to get more points. The player that planted the most Sod wins.
- Amateur Chefs: Make the correct order for the upcoming plants with your partner, each right order grants 1 point. After 45 seconds, the player with most points wins.
- Fungi Awaken: Use Coffee Beans to wake up all the mushrooms on-screen, one player will be in charge of the Coffee Beans while the other one puts to sleep the other team's awaked mushrooms, the team that woke up the most mushrooms wins.
- Cannons Away: Fire the Coconut Cannons to destroy the Seagull Zombies, add more power by holding them for longer. The team that took out the most zombies wins.
- Cherry Explosions: Match buttons correctly in order to make Cherry Bomb explode and destroy zombies, if the task isn't completed fast enough, the minigame is lost. The team that destroyed the most zombies wins.
- Big Trouble Little Zombie: Resize zombies to match the silhouette that appears behind them, players will take turn as a team to do this 5 times each, the team that finishes the task first wins.
- Lost Traps: The Solo player will set up different invisible traps in a temple, through which the Team players have to go through, if they step on a trap, they lose. There are 3 rounds.
- Crushing Bot: The Solo player has to crush the Team players using a robot, once all players have been crushed, the Solo player wins. However, if the time (30 seconds) runs out, the Team players win.
- Trampled Flowers: In this minigame, zombies will be deployed by the Team players from random positions, and they will approach towards a flowers, which the Solo player must protect from being trampled by flicking zombies away. If the zombies trample the flowers, the Team wins, but if after 10 rounds the flowers were not trampled, the Solo player wins.
- Pop Quiz: The Team players will watch different zombies breifly pass by through the screen, and then they will have to answer the question selected by the Solo player, if they pick wrong, they lose, but after 3 questions, the minigame ends.
- Solar Takeaway: The Team must steal the sun produced by the Sunflowers of the Solo Player, however, the Solo player can do several things to prevent this. If the Team players reach the sun, they win, otherwise, the Solo player wins.
- Zombiquarium: As a Team, grab the brains the Solo player puts before they reach the bottom of the tank, if they touch the bottom, the Team loses, but if after 30 seconds this has not happened, the Team players win.
- Mine Cart Control: The Team players must pick the correct mine carts to avoid the zombies placed in the tracks by the Solo player, which can put 3 (Out of 6 tracks) every round, there are 5 rounds. If all players run into a zombie before this, the Solo player wins, otherwise, the Team players win.
- Hypno Battle: The Team players will place zombies periodically, while the Solo player has to stop them using Hypno-shrooms. However, the zombies and hypno-shrooms have cooldowns, so they must be used wisely. If the zombies reach the Solo player's house, the Team players win, but if this hasn't happened after 40 seconds, the Solo player wins instead.
- Plant Food Frenzy: The Solo player must guess how many zombies on screen have a Plant Food inside of them, however, the Team players will distract them by using different items to block their view. After 20 seconds, the Solo player must put the exact number of zombies with Plant Food, if the number is right, the player wins, if not, the Team wins.
- Shamrock Blowup: Both Team and Solo players will have to blow up as many zombies as possible using Shamrockets. The Team players will have one cannon each to fire, while the Solo player will have three that will fire all at the same time. After 45 seconds, the team that blew the most zombies wins.
- Snap Wars: Team players must move around a lawn, avoiding the Solo player which controls a Snap Pea, and must eat the Team players. If after 45 seconds, 1 or more Team player hasn't been eaten, the Team wins, but if all players were eaten before the time runs out, the Solo player wins.
- Puzzle Peas: All players must solve a puzzle by rotating the pieces into the correct form. The Team players will have a puzzle with more pieces than the Solo player, but this last one will have a slower speed. The player that finishes the puzzle first wins.
- Potted Power: Grow a Potted Powerhouse by collecting leaves on the screen. The Team players can collect them all at once, but the Solo player has a bigger range to get them. More leaves will appear periodically. After 30 seconds, the team that grew the biggest Potted Powerhouse wins.
- Chomping Duel: The Solo player has to control Chompers to eat the Team players, which are standing in a small platform. The Team players can hide behind some blocks to prevent being eaten. After 30 seconds, if there are still players standing, the Team wins. Otherwise, the Solo player wins.
- Rocket Race: Race towards the finish line using rockets. The Team players must press buttons in a correct order to move more, same with the Solo player. The team that gets first to the finish line wins.
Spaces
Spaces are a mechanic used in Quick Match and Story Mode. In the game, when a player rolls the dice block, they move forward the number of spaces indicated, each space has its own effect and ability. Spaces got a visual revamp in this sequel, and new ones were added, while some were removed.
Green Spaces
 | |
Sunflower Spaces
 | |
Roll-off rules: The player wins the roll-off if it gets 4, 5 or 6 on the dice block. |
Ra Spaces
 | |
Roll-off rules: The player wins the roll-off if it gets 1, 2 or 3 on the dice block. |
Item Spaces
 | |
When a player lands on an Item Space, they get a random Item, Items have different purposes to help the player. |
Brain Buster Spaces
 | |
Exclusive to Quick Match Mode, Brain Buster Spaces spawn 5 random zombies in the lawn of the player that landed on them. |
Crazy Spaces
 | |
When activated, Crazy Spaces will spawn 5 zombies in all players' lawn (Except for the activator), also exclusive to Quick Match Mode. |
Fertilizer Spaces
 | |
Fertilizer Spaces make/give a random plant to the player in a chosen lane. The plant made/given costs 100 |
Doom Spaces
 | |
Doom Spaces will steal 3 plants from each player's lawn. |
Pizza Spaces
 | |
Pizza Spaces replace Item Spaces in Pizzeria Prison. When a player lands on them, they'll get an exclusive item to that Board. |
Items
Items are a brand new feature to Plants vs. Zombies: Build Your Lawn! 2. One is given when the player lands in an Item Space, players can hold up to three items per game. If they get one while they have three items, they must discard one. One item can be used per turn (Before rolling the dice block), and they can have effects in both the lawn and board.
There are ? items in the game, with more being added periodically through updates and DLC. Items also have different chances to be given, and some are only obtainable after certain turns.
Turn 1 - Turn 5 items
| Name | Image | Ability | Probability |
|---|---|---|---|

|
|||
Turn 6 - Turn 10 items
|
|
|||
Turn 11+ items
|
|
|||
Other items
- Items with a marigold background are exclusive to Pizzeria Nightmare. No other items appear on that world.
Shop
A brand new feature of the game is the Shop, in which the player can buy many things with the in-game currency of ![]() Zombucks
Zombucks ![]() .
.
Zombucks
The player can get ![]() Zombucks
Zombucks ![]() by playing matches, the better its placement and overall performance, the more
by playing matches, the better its placement and overall performance, the more ![]() Zombucks
Zombucks ![]() they get.
they get. ![]() Zombucks
Zombucks ![]() will only be given if the match finalizes.
will only be given if the match finalizes. ![]() Zombucks
Zombucks ![]() are also obtained by playing minigames, the extra modes, and Online matches.
are also obtained by playing minigames, the extra modes, and Online matches.
Here are the different methods to get ![]() Zombucks
Zombucks ![]() :
:
- Quick Match - 1500
 (1st place, 1100/700/300 if 2nd, 3rd or 4th)
 - Extra Modes - Depends on the Game Mode (Specified below)
- Online Match - 3000 (1st place, 2200/1400/600 if 2nd, 3rd or 4th)
Purchasable Objects
Premium Plants
Plant
|
Image
|
Damage
|
Defense
|
Range
|
Ability
|
Price
| |
|---|---|---|---|---|---|---|---|
Starfruit
|
|
200
|
50
|
Regular**
|
Straight
|
Attacks five random zombies.
|
20000
|
Torchwood
|
|
100
|
-
|
Regular**
|
-
|
Peas behind this do +20 Damage.
|
20000
|
Beeshooter
|
|
75
|
40
|
Regular**
|
Straight
|
Attacks 4 Zombies in its lane, doing -5 Damage for every Zombie.
|
20000
|
Pumpkin
|

|
100
|
-
|
Tough*
|
-
|
Can be planted on other plants to provide protection.
|
20000
|
Twin Sunflower
|
|
75
|
-
|
Regular**
|
-
|
Produce 25
|
20000
|
Sap-Fling
|
|
50
|
10
|
Regular**
|
Lobbed
|
Lobs sappy pinecones to slow down all zombies in a tile.
|
20000
|
Escape Root
|
|
100
|
-
|
Regular***
|
Lobbed
|
Start of Turn: Switch places with a Plant. Transform into a Potato Mine
|
20000
|
Jalapeno
|

|
75
|
60
|
-**
|
Lane
|
-
|
20000
|
Winter Melon
|
|
250
|
70 (Impact)
35 (Splash) |
Regular***
|
Lobbed
|
Does Splash Damage upon impact. When this hurts a Zombie, chill it.
|
20000
|
Blooming Heart
|
|
75
|
20
|
Regular**
|
Lobbed
|
When this hurts a Zombie, this gets +10
|
20000
|
Strawburst
|

|
175
|
30/60/90
|
Regular***
|
Lobbed
|
Touch to attack, every turn it skips an attack it gains +30
|
20000
|
Premium Characters
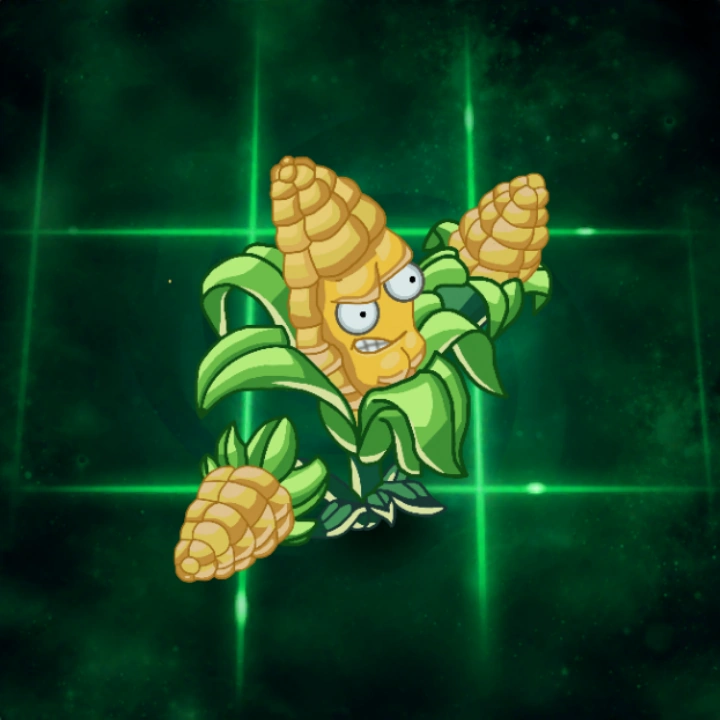 |
|
| Description: Victory has never had more butter. | |
| Price: 30000 |
|
| Superpower: Corn Barrage - Start of Turn: Do 15 damage to all zombies in any lane. | |
| Kernel Corn | Dice Block:   |
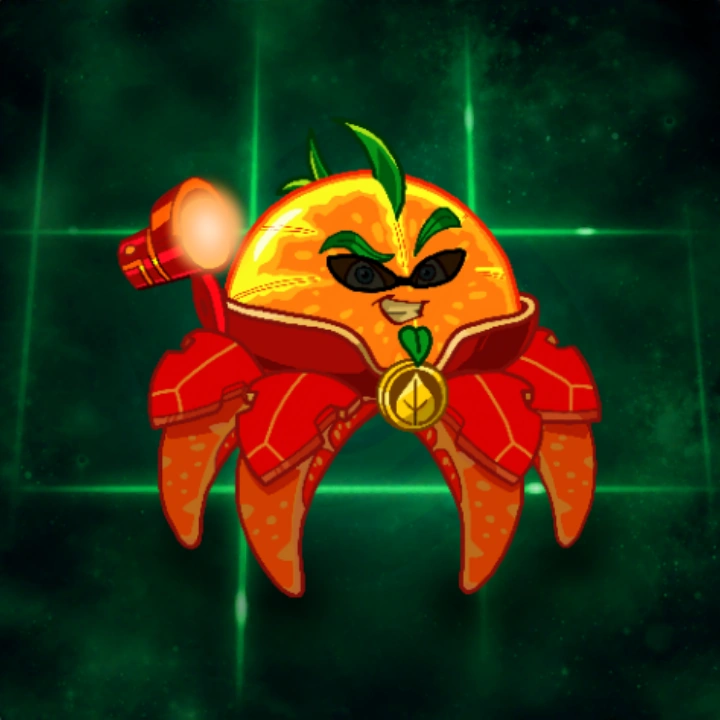 |
|
| Description: Never thought you'd live enough to see a stylish orange? Well, you were SO wrong! | |
| Price: 30000 |
|
| Superpower: Peel Shield - All Plants last 1 turn longer. | |
| Citron | Dice Block:   |
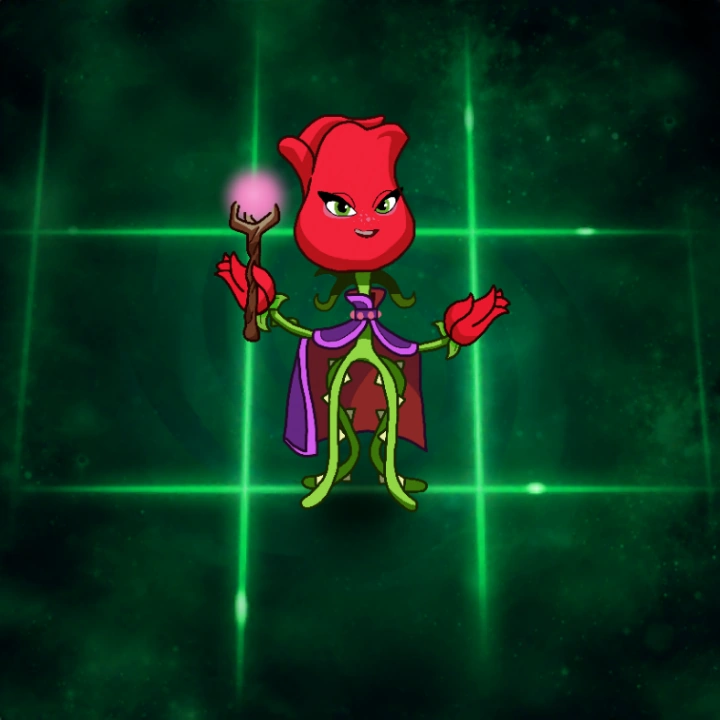 |
|
| Description: The magic never ends with such a whimsical sorcerer! | |
| Price: 30000 |
|
| Superpower: Goatify - Start of Turn: Transform a random Zombie into a Goat. | |
| Rose | Dice Block:   |
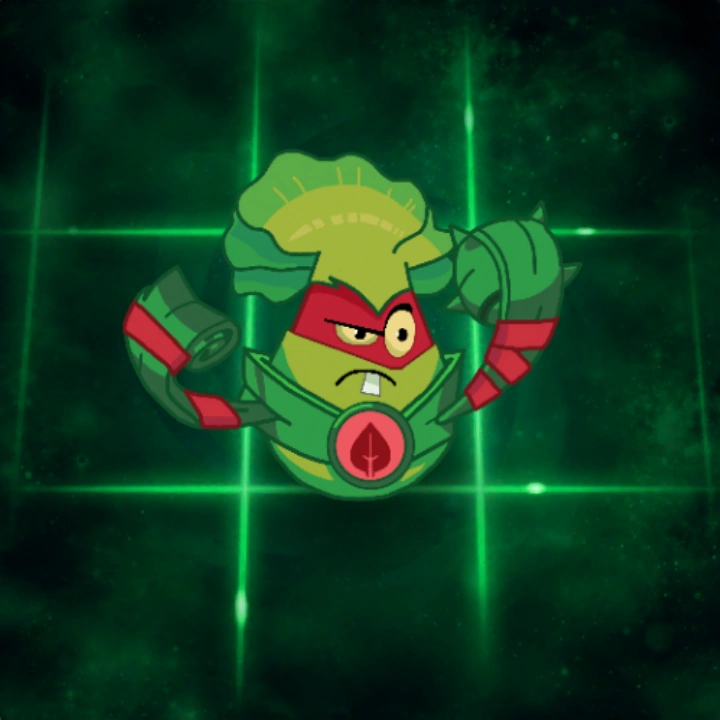 |
|
| Description: "Knuckle Sandwiches for all my enemies" | |
| Price: 30000 |
|
| Superpower: Holo-Punch - All Plants have Burn for the last 5 turns. | |
| Grass Knuckles | Dice Block:   |
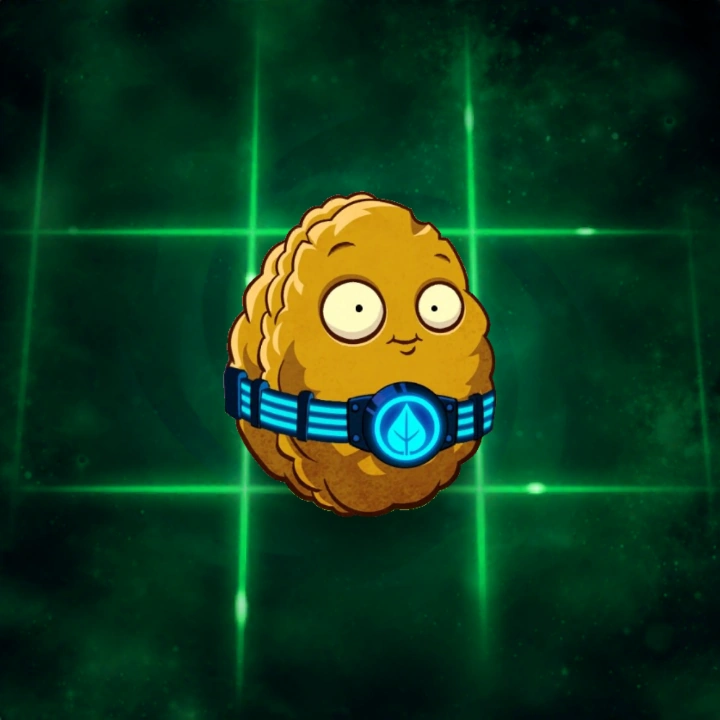 |
|
| Description: The leader of nut puns will nut tolerate zombie attacks! | |
| Price: 40000 |
|
| Superpower: Uncrackable - When a Plant is destroyed, you gain +5 |
|
| Wall-Knight | Dice Block:   |
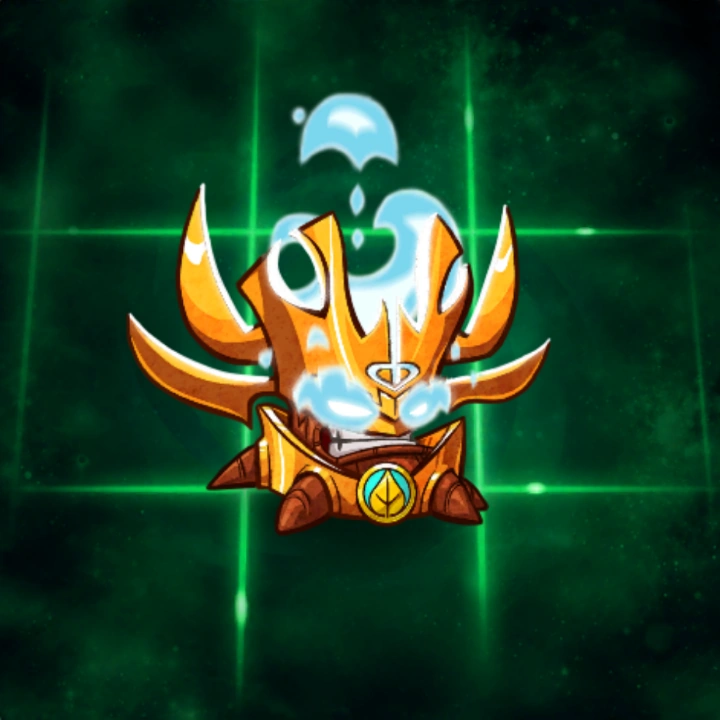 |
|
| Description: Believe it or not, calling him "Stumpy" counts as breaking the law. | |
| Price: 40000 |
|
| Superpower: Blazing Bark - All Plants do +10 |
|
| Captain Combustible | Dice Block:   |
Costumes
Costumes are special cosmetics in Plants vs. Zombies: Build Your Lawn! 2. Every plant has 2 of these. To unlock them, you have to get all their Puzzle Pieces, you can get Puzzle Pieces from Costume Packs. Each Costume Pack costs 500 ![]() . Each Costume Pack normally gives 6 Puzzle Pieces, but it can give up to 12 in some rare occasions.
. Each Costume Pack normally gives 6 Puzzle Pieces, but it can give up to 12 in some rare occasions.
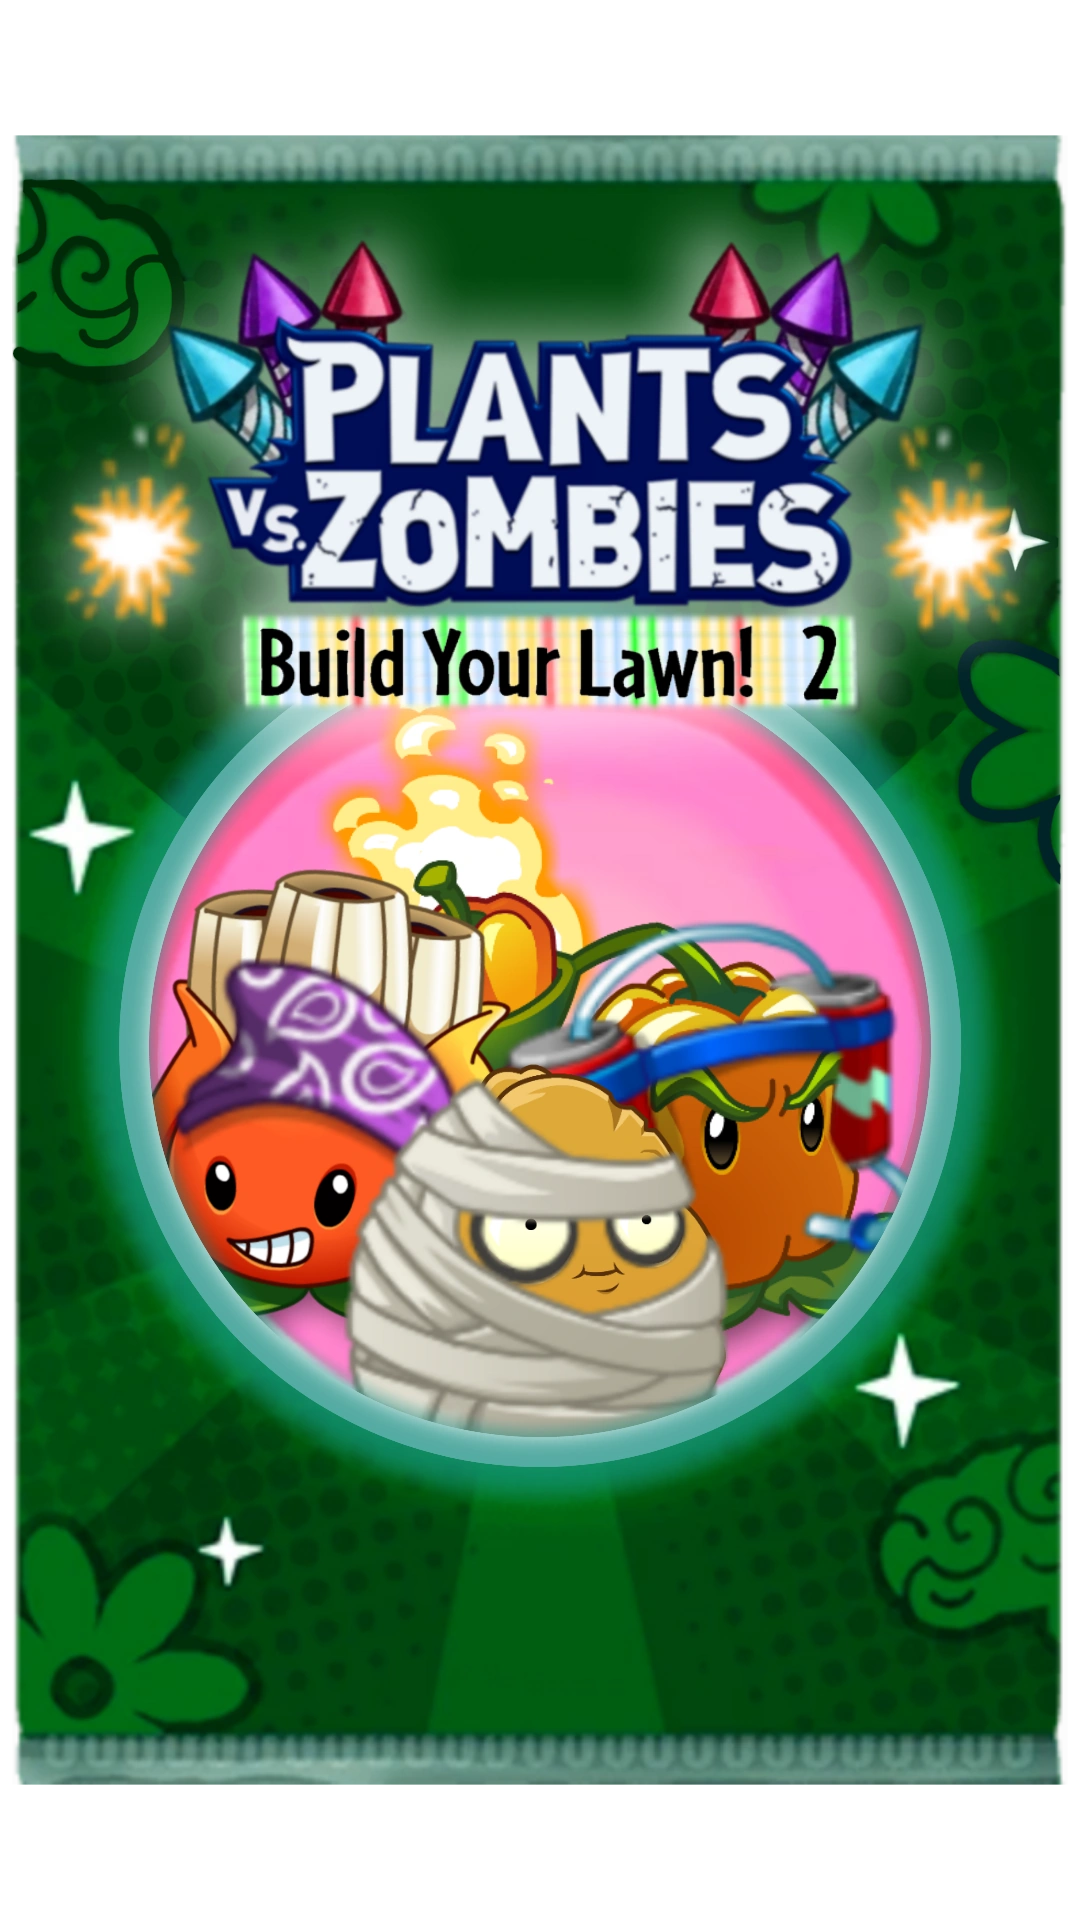
Common Costumes take 12 Puzzle Pieces to be finished. Special Costumes take 8 Puzzle Pieces. Magical Costumes take 6 Puzzle Pieces. And Legendary Costumes take 4 Puzzle Pieces.
Below you can see a list of all costumes for each plant:
| Plant | Costume 1 | Costume 2 |
|---|---|---|
 Peashooter |
 Franken-Pea |
 Symphony Peashooter |
 Sunflower |
 Giftflower |
 Fashion Flower |
 Wall-nut |
 Party Nut |
 Mummy Nut |
 Potato Mine |
 Heroic Spud |
 Hothead |
 Chomper |
 Chomper Cape |
 Chompcake |
 Puff-Shroom |
 Cowboy-Shroom |
 Puffy Bull |
 Sun-Shroom |
 Masked Fungus |
 Sun Lord |
 Fume-Shroom |
 Old-Shroom |
 Samurel |
 Pult-Shroom |
 Classy Pult |
 Shroomstache |
 Hypno-Shroom |
 Hippie-Shroom |
 Hypno Genie |
 Lily Pad |
 Flower Pad |
 Bow Lily |
 Bowling Bulb |
 Hat Bulbs |
 Party Bowlers |
 Threepeater |
 Savage Peas |
 Birthdayz Peas |
 Guacodile |
 Nachodile |
 Foodie Guacodile |
 Red Stinger |
 Red Archer |
 Adventure Stinger |
 A.K.E.E. |
 Bandana Fruit |
 Army A.K.E.E. |
 Stallia |
 Sleepy Stallia |
 Roaring Flower |
 Aloe |
 L.E.A.F. Supporter |
 Peaceful Aloe |
 Lava Guava |
 Ninja Guava |
 Flourishing Lava |
 Pepper-Pult |
 Summer Pepper |
 Blooming-Pult |
 Snow Pea |
 Snowy Party |
 Winter Pea |
 Cold-Shroom |
 Balloon-Shroom |
 Ice Cream-Shroom |
 Equinox Berries |
 Mustache Berries |
 Equinox Workers |
 Squash |
 Ninja Squash |
 Happy Squash |
 Doom-Shroom |
 Classy Doom-Shroom |
 Ducky-Shroom |
 Plantern |
 Wizard Plantern |
 Plantraffic |
 Melon-Pult |
 Cook Melon-Pult |
 Antenna-Pult |
 Intensive Carrot |
 Carrot Specs |
 Intensive Doctor |
 Repeater |
 Viking Pea |
 Vampea |
 Pea Pod |
 Hats in a Pod |
 Leader Pod |
 Olive Pit |
 Neon Olive |
 Lucky Pit |
 Split Pea |
 Demon-Angel Peas |
 Split Show |
 Grapeshot |
 Parasol Grapes |
 Balloon Shot |
 Witch Hazel |
 Sleepy Hazel |
 Ornament Witch |
 Perfume-Shroom |
Arrow-Shroom |
 Perfumed Cap |
 Caramel Apple |
 Easter Apple |
 Marigold Crown |
 Berry Bush |
 Eighties Bush |
 Berry Futuristic |
 Life Lily |
 Witch Lily |
 Lily Boogaloo |
 Pollen Bouquet |
 Pollen Bowquet |
 Icy Bouquet |
 Flaming Pepper |
 Fan Pepper |
 Santa Pepper |
 Garlic |
 Cap Garlic |
 Garlic Glove |
 Little Olives |
 Flag Olives |
 Olive Cake |
 Tomato Juice |
 Tomato Lantern |
 Jetpack Juice |
 Pineapple Sauce |
 Pineapple Shadow |
 Piña Tropical |
 Impactus |
 Sport Cactus |
 Blooming Cactus |
 Peacock |
 Top Hat Pea |
 Cooked Peacock |
 Nenuflare |
 Mustache Nenuflare |
 Sausage Flare |
 Winterberries |
 Princess Berries |
 Bow Berries |
 Sacuanscorche |
 Scorching Thorns |
 Blooming Hat |
 Sweet Pea |
 Gentle Pea |
 Sweet Hat |
 Syrup Berries |
 Berry Matching Hats |
 Bluesberries |
 Carrot Cake |
 Flower Carrot |
 Rainbow Cake |
 Corny Candy |
 Witch Candy |
 Mustache Corn |
 Cotton Candy |
 Wizard Candy |
 Cotton Mime |
 Spore-Shroom |
 Paper-Shroom |
 Spore Boat |
 Boing-Shroom |
 Bouncy Mage |
 Candle-Shroom |
 Water-Melon |
 Juicy Melon |
 Cowboy Melon |
 Popcorn Blaster |
 Rainbow Popcorn |
 Cap Blaster |
Extra Game Modes
Aside from the main Party/Turn-based modes, Plants vs. Zombies: Build Your Lawn! 2 features extra content and modes that can be played at any moment, here they are.
Minigame Garden
In this mode, the player can play any minigame they want with no restriction whatsoever. They can play as many as they want and can leave at any moment. Winning/Losing a minigame has no punishment nor a reward. However, for each minigame played, the player earns 50![]() .
.
2-4 Players can play this game mode at once.
Adventure Almanac
Read information about Plants, Zombies, Items, and Characters here. This mode grants no rewards, it's just for knowledge purposes.
This mode is for 1 player only.
Zen Glory
Grow plants in the Zen Garden by winning minigames. There are 16 plants to grow, each plant must be watered three times before it grows into a random plant from the collection. Plants will give the player that grew them a different amount of points based on what plant was grown. However, four of the plants in the garden reduce points instead of giving them. A minigame is played when the game first begins, and once it's finished, players get to water a number of plants based on their placement. The placements in the minigame also represent the order in which they water the plants. Once all players have watered their plants, a new minigame is played, until all 16 plants have been watered. After that, the player that got the most points wins.
The minigames played are Free-for-All only. Any tie given in a minigame is solved in a roll-off. First placers get to water plants twice. Second and third places water plants once. While fourth placers don't get to water plants. It's important to know that once a player has watered a plant, said plant cannot be watered until the next turn.
Here are the plants that can grow from the sprouts, the points they give, and how rare they are.
Zen Glory can be played with 2-4 players, both locally and with CPUs.
Ending this game mode in first place grants the player 1500![]() , ending it in second place grants 1100
, ending it in second place grants 1100 ![]() , ending in third place grants 700
, ending in third place grants 700![]() , and fourth place grants 300
, and fourth place grants 300![]() .
.
Endless Mode
Like a regular match, but endless. This mode is only against CPUs, and it will go on forever unless all players lose.
This mode can be played with 2-4 players, but all of them must be CPUs (Aside from Player 1) because of how the mode plays.
Every 5 waves, the player is awarded with 500![]() .
.
Puzzle Brewers
Puzzle Brewers is an Extra Game Mode that was added in the 1.3 update. It is a match-3 game, meaning that the purpose is to make matches of 3 of the same object or more either vertically or horizontally (Or both). Each match grants you some points and at the end, you will get Zombucks based on that.
Each combination of 3 objects gives you 30 points, with extra 10 points for each more object in the same match. If you make an “L” shaped match, you get 75 points. Square-shaped matches give 60 points. Once the game is finished, the number of points you earned is divided by 10, and that is the number of Zombucks you get.
You can play by yourself, or with 1-3 other players locally or online. In Online mode, the player that makes the most points after every player has used their moves or the time has run out wins. The prize is 250 extra Zombucks plus the ones earned from the scores.
If the player finishes the match before the timer runs out or all moves have been used, then they will gain no Zombucks.
The Mode can be played in 2 ways:
Moving Frenzy
Make as many matches as you can with limited moves! You can win extra moves by making wacky combos and combinations. Earn as many points as you can and get lots of Zombucks!
You can choose from 3 different move amounts:
- 100 moves
- 70 moves
- 40 moves
Time Battle
Take advantage of the limitless moves you can make to earn lots of points! But take the timer into account, and make as much effort as you can to earn Zombucks before the time runs out.
You can choose 3 different timers:
- 3:00 minutes
- 2:30 minutes
- 1:45 minutes
Botany Casino
This returning mode from the original game was added in the 1.8 Update. Players will go through a set of free-for-all minigames (They can pick from 5, 8, or 10), and they will gain Sun based on their placement. Before playing each minigame, players will bet some of the Sun (The quantity they desire). After the minigame, the winner will earn most of the Sun, second and third earn a lesser amount, with fourth earning no Sun. After 10 minigames, the player with most Sun wins. All players start with 100 Sun.
The Sun quantities you can bet:
- 25 Sun
- 50 Sun
- 75 Sun
- 100 Sun
- Half your Sun
- All your Sun
Note that you will earn less Sun if you bet less than the rest of the players, and vice-versa if you bet more.
How much Sun you get from the bid:
- First Place - 60% (10% more or less based on the amount you bet).
- Second Place - 25% (10% more or less based on the amount you bet).
- Third Place - 15% (10% more or less based on the amount you bet).
- Fourth Place - 0%
If the Sun gained ends up being a decimal, it will be rounded down to the nearest whole number. If a player runs out of Sun, it loses, and the game continues with the other players.
Online Houses Mode
Introduced in the 1.7 update, the Online Houses Mode is a new way to play online matches and to team up with other players around the world to become the best, strongest house for exclusive prices only available in this mode.
The first time you enter this mode, you get to choose between a House, there are 5 different Houses, each with an exclusive Dice Block that can only be used in this mode, and an exclusive badge. Badges are minor perks that can help you out in an Online House match to defeat a rival from a different house.
Anyone can join any House, you can meet players from all around the world here and expectate their matches against other Houses and send small goodies to help them out. Every individual player can send you a gift per match, while a big House-exclusive gift can be given only once by only one player per match.
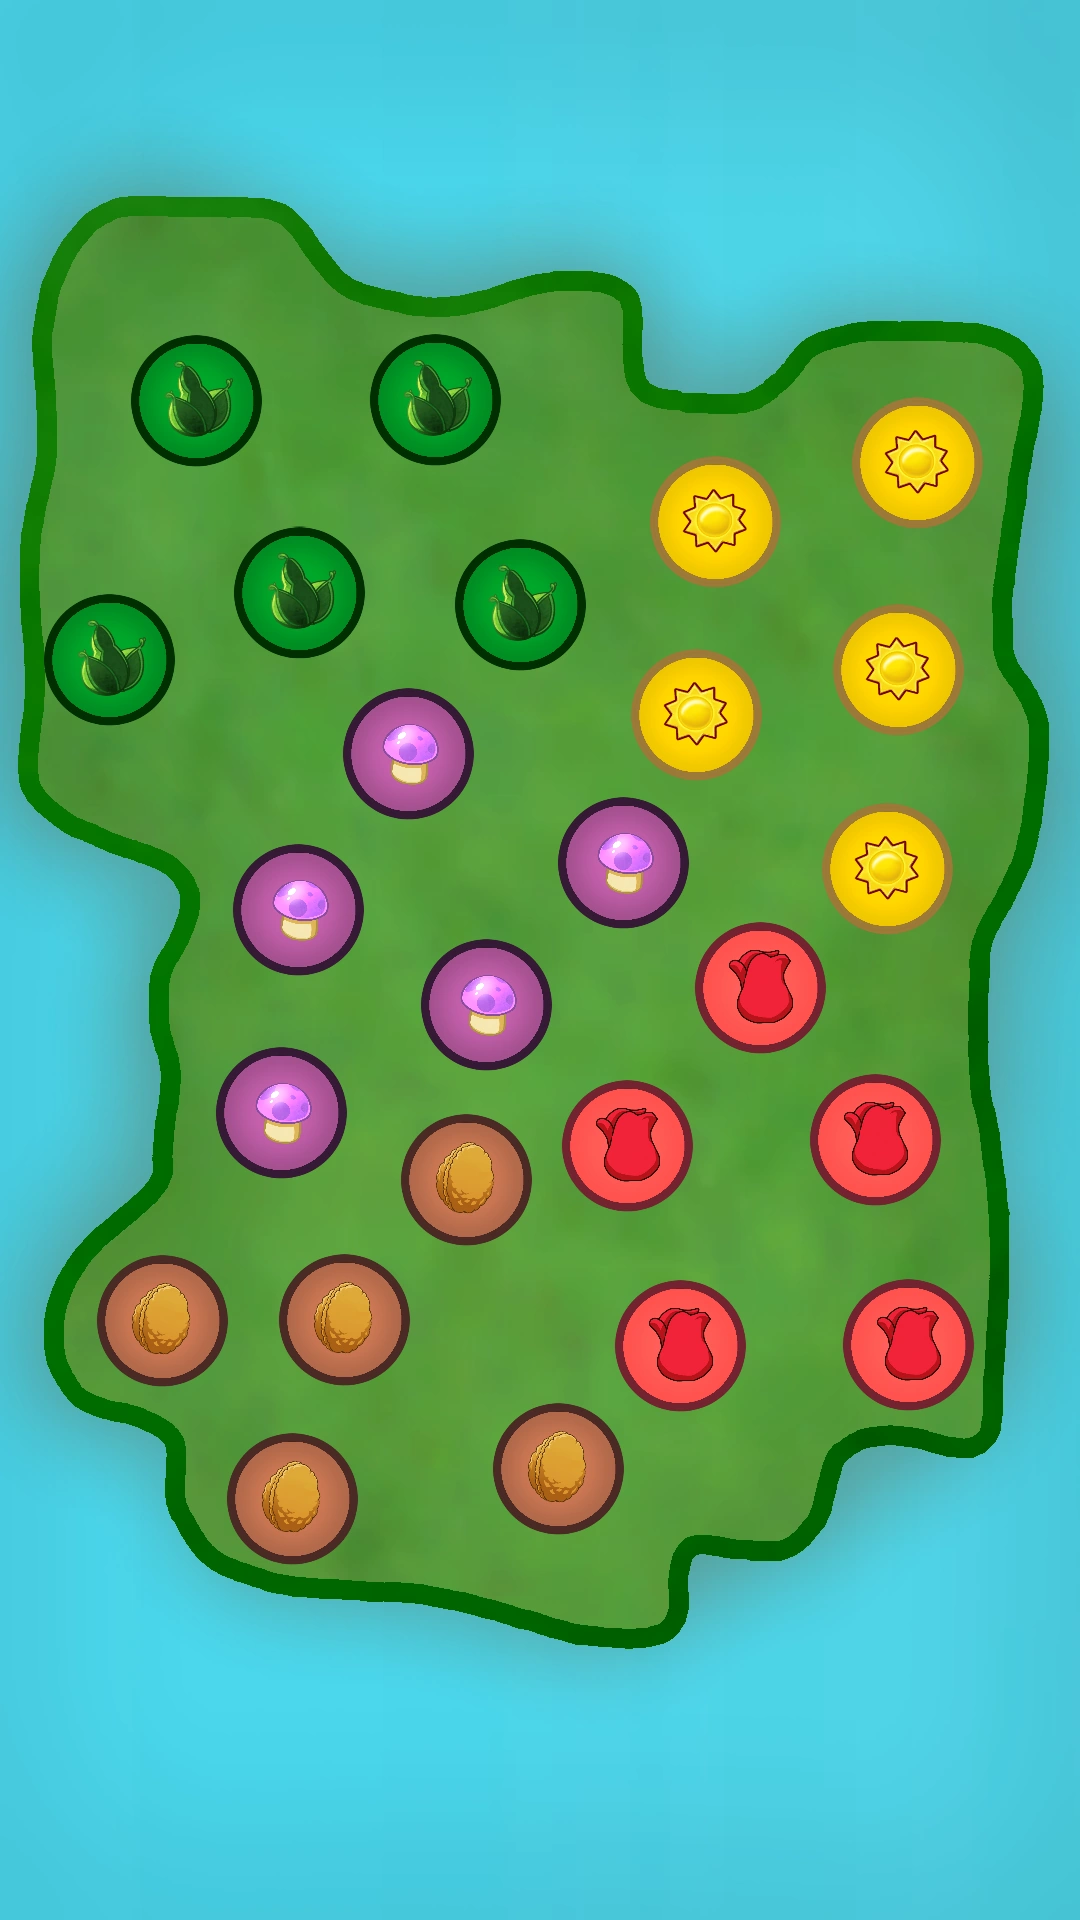
Every match takes place in Party Island, a place in which each House has settled and now lives to prove that they are the best one of them all. Each House has an equally divided territory in Party Island, and your job is to invade the other Houses’ territories by defeating a player from the opposing House in a Party match. The Houses’ territory is represented through Orbs, so after winning the match that Orb will switch colors into the one of your house, representing that the territory is now yours.
However, if a player attacks your House instead, all players from the house will receive a notification about it, and they can enter the match at any moment. In the meantime, a Master difficulty CPU will be playing (Same thing happens when you attack another House and no one joins). If you win the match, then the territory remains yours, and you get 250 Zombucks, but if you lose, the territory is lost and you earn no Zombucks.
The winning House is determined every 15 days as the one with the biggest territory of them all. The prices are an exclusive Seasonal Badge, a Premium plant costume, and 1000 Zombucks for each player that played at least one match. The Premium plant costume may return in a future season, but the Seasonal Badges are a one-time-reward. If you didn’t play any matches for the winning House, then you don’t earn any rewards. Multiple Houses can obtain prizes if they had the same territory, leaving the Season winner as a tie.
The player can switch Houses between Seasons, but not while one is currently going.
The matches can be played with any character the player wants, they last for 10 turns and are only played in the Wooden Forest board and lawn.
Houses
There are a total of 5 different Houses to pick from:
 |
||||
 |
||||
 |
||||
 |
||||
 |
Badges
Aside from the House Badges, there are other ones that can be obtained through Achievements accomplished in either Regular or Online matches. These can be seen in the Achievements page. You can take up to 3 Badges into Online Houses games.
Premium Plant Costumes
 Beeshooter |
 Queen Beeshooter |
|
 Torchwood |
 Torchwood Swimmer |
|
 Starfruit |
 Fairy Star |
|
 Twin Sunflower |
 Gardening Twins |
|
 Winter Melon |
 Winter Fan |
|
 Blooming Heart |
 Blooming Band |
|
 Sap-Fling |
 Christmas Sap |
|
 Jalapeno |
 Jalaranger |
|
 Escape Root |
 Escape Builder |
|
 Strawburst |
 Strawpunk |
Mystery Eggs
If a player purchased the game prior to April 18th, they would get a mysterious screen with three Mystery Eggs when they first entered into the game. Then, they would have the option to "Keep" or "Toss" the Mystery Eggs. As of now, nothing has been done with these items, but it is confirmed that with a future update they will get a utility.
After months of work, the Mystery Eggs teased the Online Houses update that was released on January of 2022. The players that had kept them would get an exclusive badge for it.
Game Versions
Plants vs. Zombies: Build Your Lawn! 2 can be bought in two separate versions. The Basic Version costs $29.99 and it includes the game only. The Deluxe Version costs $59.99, but it includes all the game's DLCs in it as free updates so they don't have to be bought separately.
Sales and reception
| Plants vs. Zombies: Build Your Lawn! 2 received positive reviews and was critically acclaimed for fixing issues from its predecessor, such as the new improved art style and polished gameplay. As of April 2023, it has sold over 17.1 million copies, making it the 9th best-selling game on the Nintendo Switch, and surpassing the sales of Plants vs. Zombies: Build Your Lawn!, at 7.7 million copies. The game is currently Fun Animation Production's best-selling game across all platforms. |
| ||||||||||||||
Each DLC has also sold very well and most have received abundantly positive reviews by the public. Below you can see each DLC's sales in detail regarding their release date.
Update history
Main article: Plants vs. Zombies: Build Your Lawn! 2/Update history
Scrapped concepts
Main article: Plants vs. Zombies: Build Your Lawn! 2/Scrapped concepts
Gallery
")
")
")
")
")
")
")
")
Screenshots
")
")
")
Credits
- To Flag zombie for Pizza-Tron 3000!
- To Gei for Impactus!
- To Dt1000 for Peacock!
- To Kray for Winterberries!
- To Devi for Nenuflare!
- To Punji for Marmalade Witch!
- To Rugby Zombie for Zombot Swing Smasher!
Trivia
- The minigame "Fire-Ice Battle" was originally named "Bipolar Pirojectiles" in Plants vs. Zombies: Build Your Lawn!.
- Tangle Kelp, Imitater, Coffee Bean, and Mystery Fruit are the only 4 normal plants without costumes.
- Tangle Kelp lacks them due to how obscure it is in-game and how little the costumes would be seen.
- Imitater has no costumes because it only appears briefly as it quickly transforms into other plants.
- Coffee Bean has no costumes because he is an instant use plant that does not stay long enough on screen.
- Mystery Fruit has no costumes as even though it is not an instant-use plant, it just stays stale with no meaningful ability for a turn.
- Premium Plants had no costumes until the 1.7 Update.
- They were added as a reward to the Online Houses Mode, rather than as an item you could buy at the Shop.
- The Shop was originally going to be in Plants vs. Zombies: Build Your Lawn!, but it was scrapped because there were not enough ideas for it.
- Despite not being present in-game, Electric Boogaloo is referenced in one of Life Lily's costumes.
- Candy Wonderland is the DLC with most original Plants and Zombies.
- Flaming Pepper and Winter Melon are currently the most expensive plants of the game, with a Sun cost of 250.


Fall Food Fight (2020) |
Build Your Lawn! 2 (2021) |
(2022) |